Color Finale 2 Pro packs advanced color tools way beyond built-in color grading capabilities to make your videos stand out. In the 2.13 update, native Final Cut Pro masks can now be used with the plugin. However, there are some nuances to their use, and this tutorial will guide you step-by-step.
Prerequisites
To use the native mask feature, you’ll need two clips: one that serves as the mask source, and another onto which the Color Finale 2 Pro effect is applied.
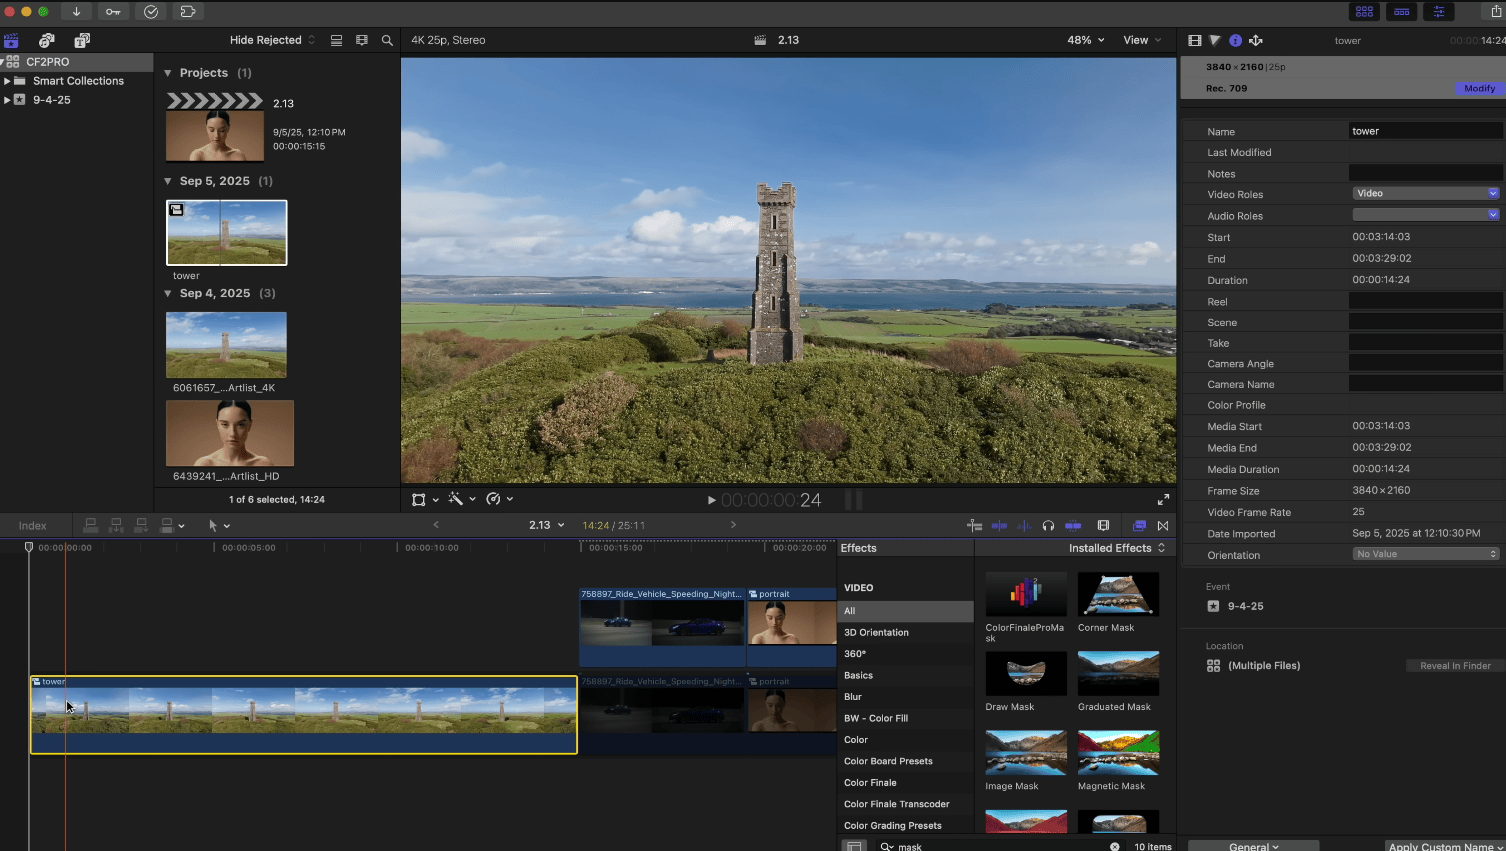
Important: For this to work correctly, all project files in Final Cut Pro—including the mask source footage—must share the same frame rate. Check the FPS of any clip in the Inspector > Info tab.
But you naturally might have multiple framerates on the timeline already, so the solution is to create compound clips inside the Media Browser of your existing project.
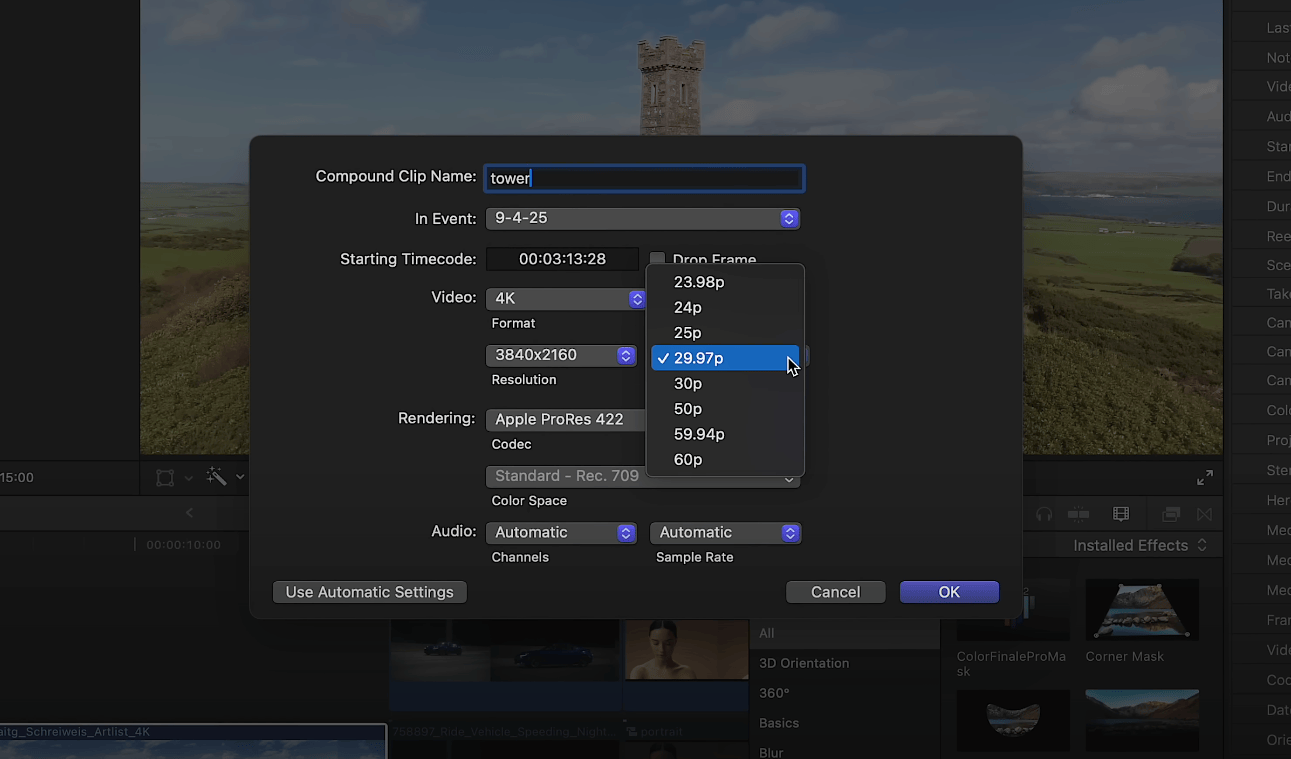
Right-click the file, and select New Compound Clip. Choose the project’s framerate. Then drag this new compound clip to the timeline.
Integrating Final Cut Pro masks with Color Finale 2 Pro
To properly integrate any type of native FCP mask, you’ll need two clips on the timeline:
- Clip 1 – the mask source.
- Clip 2 – the working clip you’ll be grading.
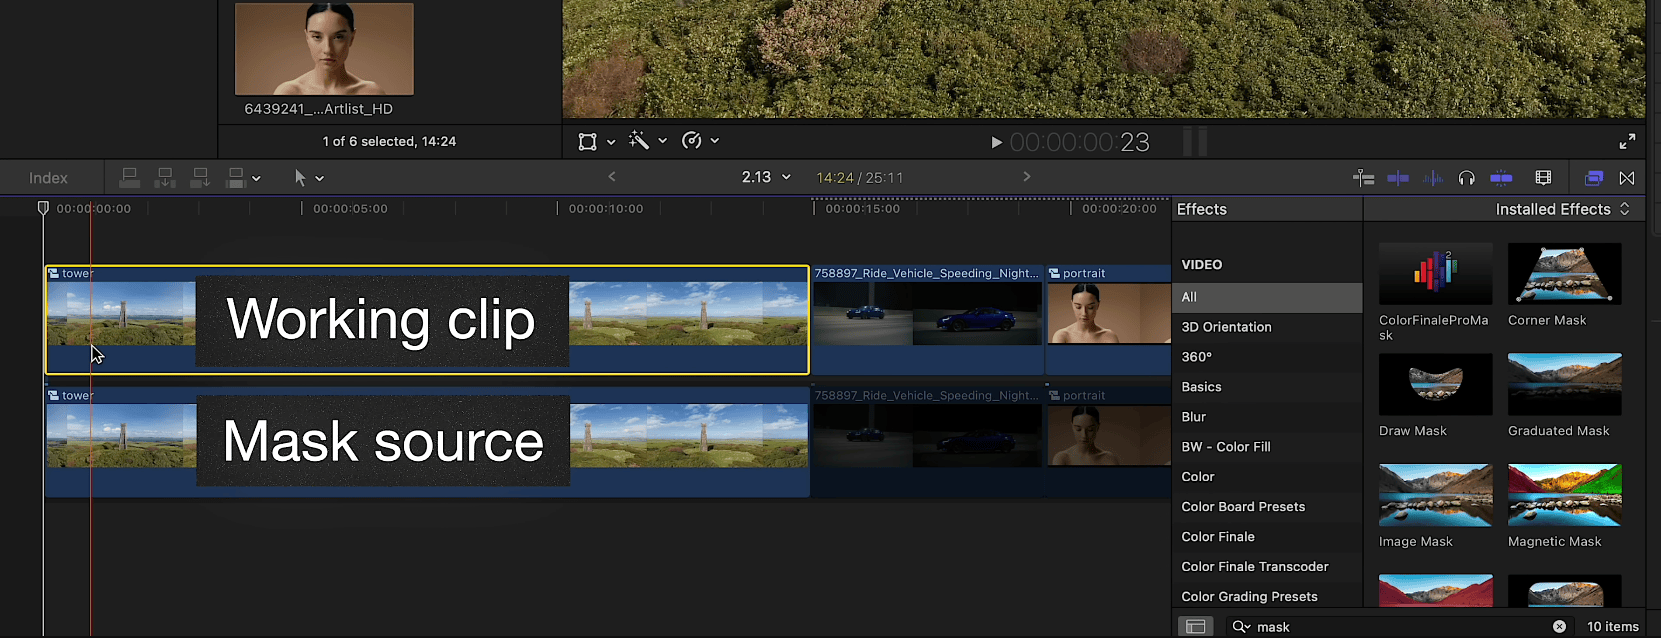
The order of clips doesn’t matter, but for convenience we can place the working clip above the source. For now, disable the clip you want to grade (at the top) so it doesn’t get in the way. On the bottom clip (the source) apply an FCP mask, for example the Magnetic Mask from the Effects browser — but you can use any of the built-in masks. Highlight the object and analyze the clip.
Now, re-enable the working clip. Apply a Color Finale Pro Mask from the Effects browser. Then, in the plugin’s inspector panel, scroll to the bottom to the new Drop Zone section. Select the mask source (so in our case, the clip underneath), and click Apply Clip. If the mask preview appears in the Drop Zone, you know it’s set up correctly.
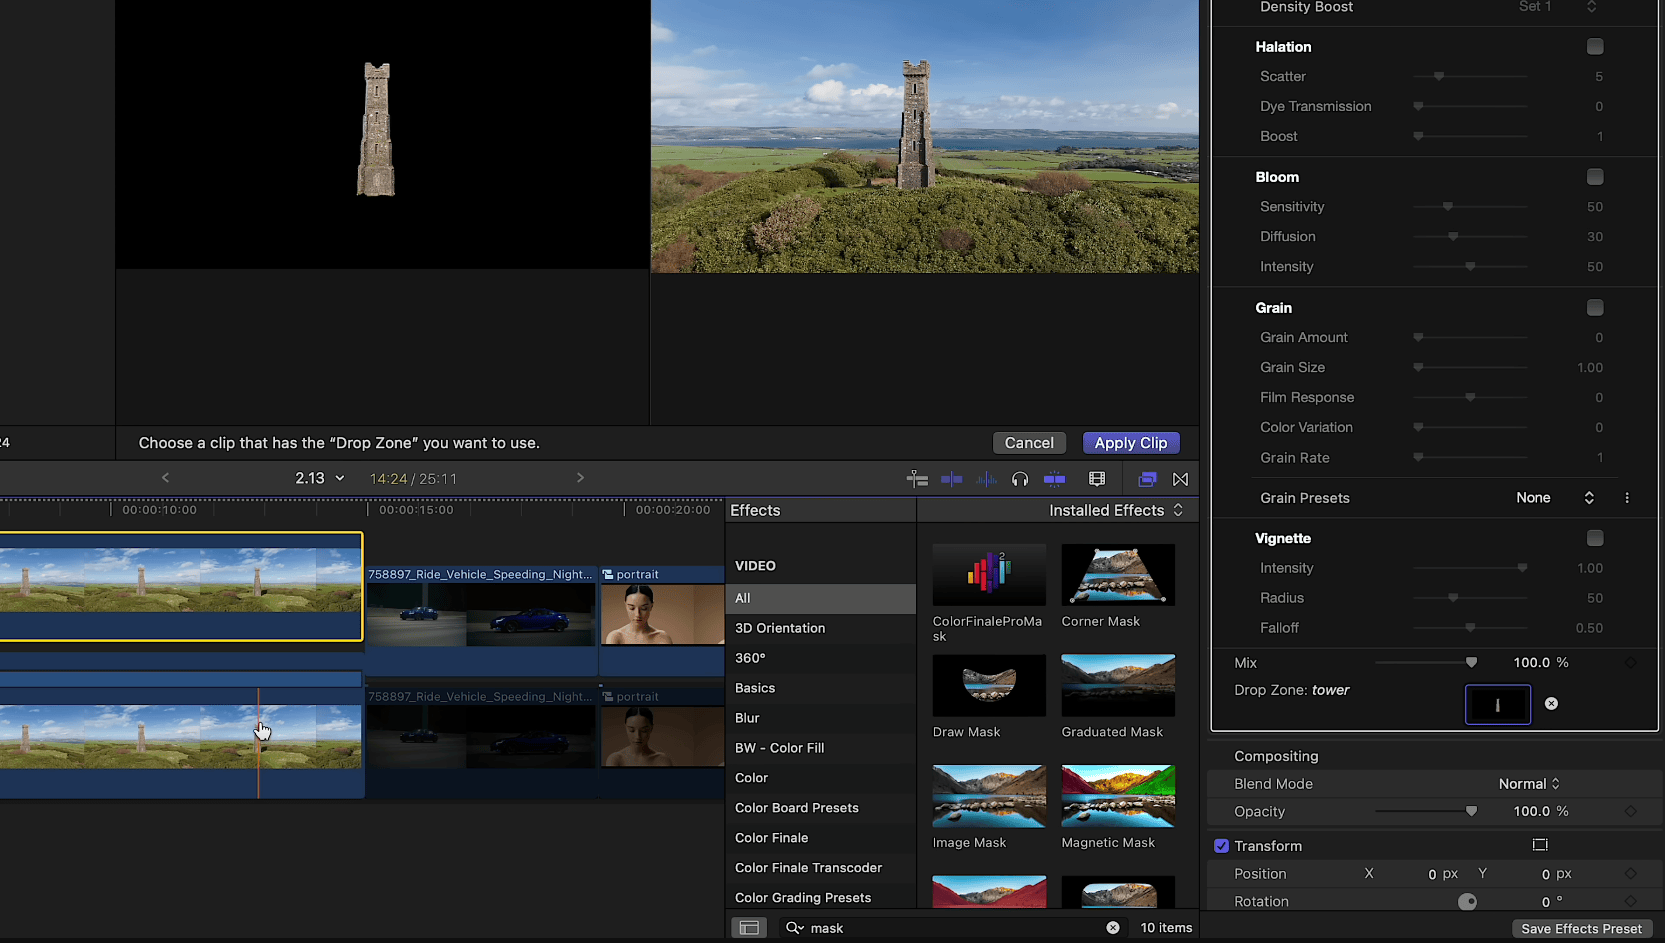
Don’t forget to highlight the plugin in the inspector when working with masks. Doing this makes sure that the custom Color Finale graphical elements are visible over the viewer.
Next, open the Layers panel, create a new group (to contain potentially multiple layers), and add a Color Wheels layer inside as an example. Increase the brightness or change color to see clearly that the mask works. For the group, click Add Mask and select the last icon in the mask menu: FCP Mask. The adjustments only affect the masked object.
The FCP Mask options
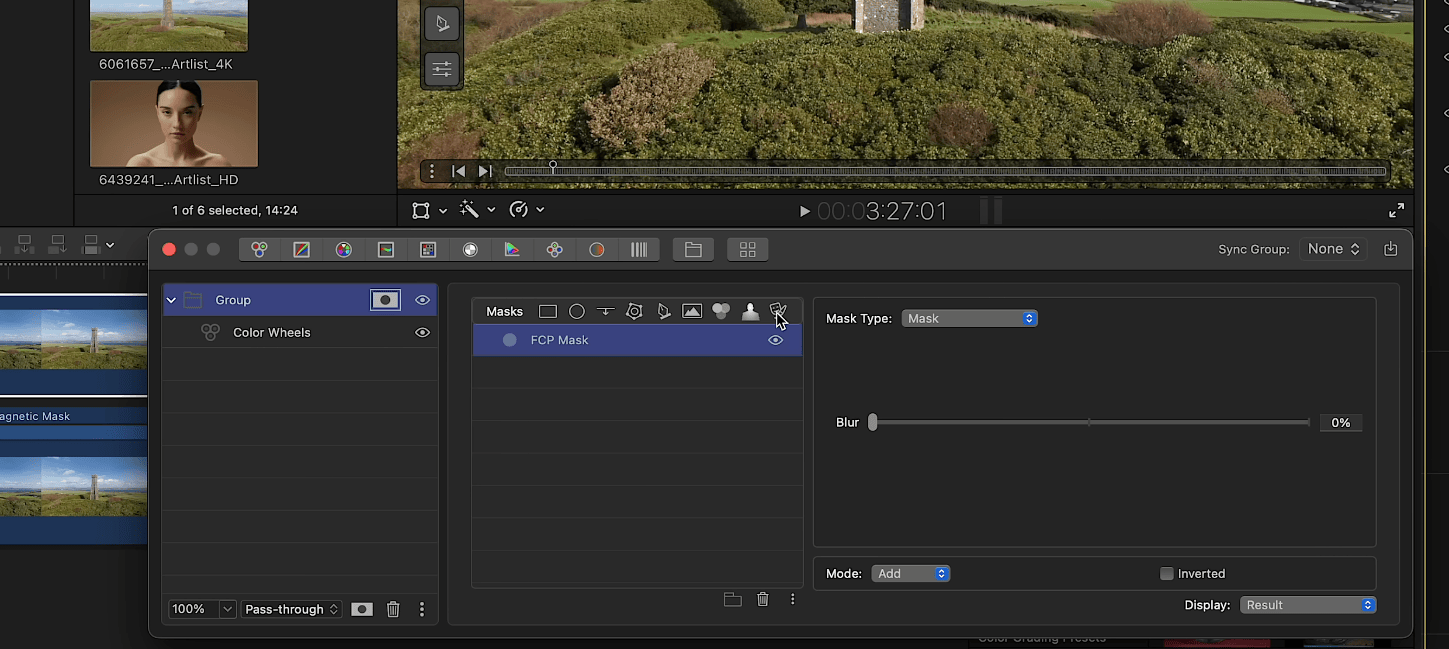
Just like with the AI Person Mask in Color Finale 2 Pro, you can select different mask types:
- Mask (the default option) with blur control.
- Contour mode with width and blur, plus contour placement options (Inside, Center, Outside).
- Mask + Contour, combining both sets of controls.
You’re not limited to using FCP masks alone as you can also combine them with Color Finale 2 Pro’s own masks. For example, you can add an Edge Mask in the mask settings and set it to Subtract Mode to remove part of an area that was masked with a FCP mask. The same principle works with masks like any trackable shape or B-Spline Mask.

And that’s the workflow for using native Final Cut Pro masks inside Color Finale 2 Pro. Try it out for yourself with a free 7-day trial of the plugin.