Contents
Introduction
Video editors often use relighting, flares, and light leak effects during post-production to fix or enhance the look of their shots. Such optical effects can simulated by creating and tracking shape masks. In this video, we’ll show how to do this with Color Finale 2 Pro, a color grading plugin for Final Cut Pro.
Example 1
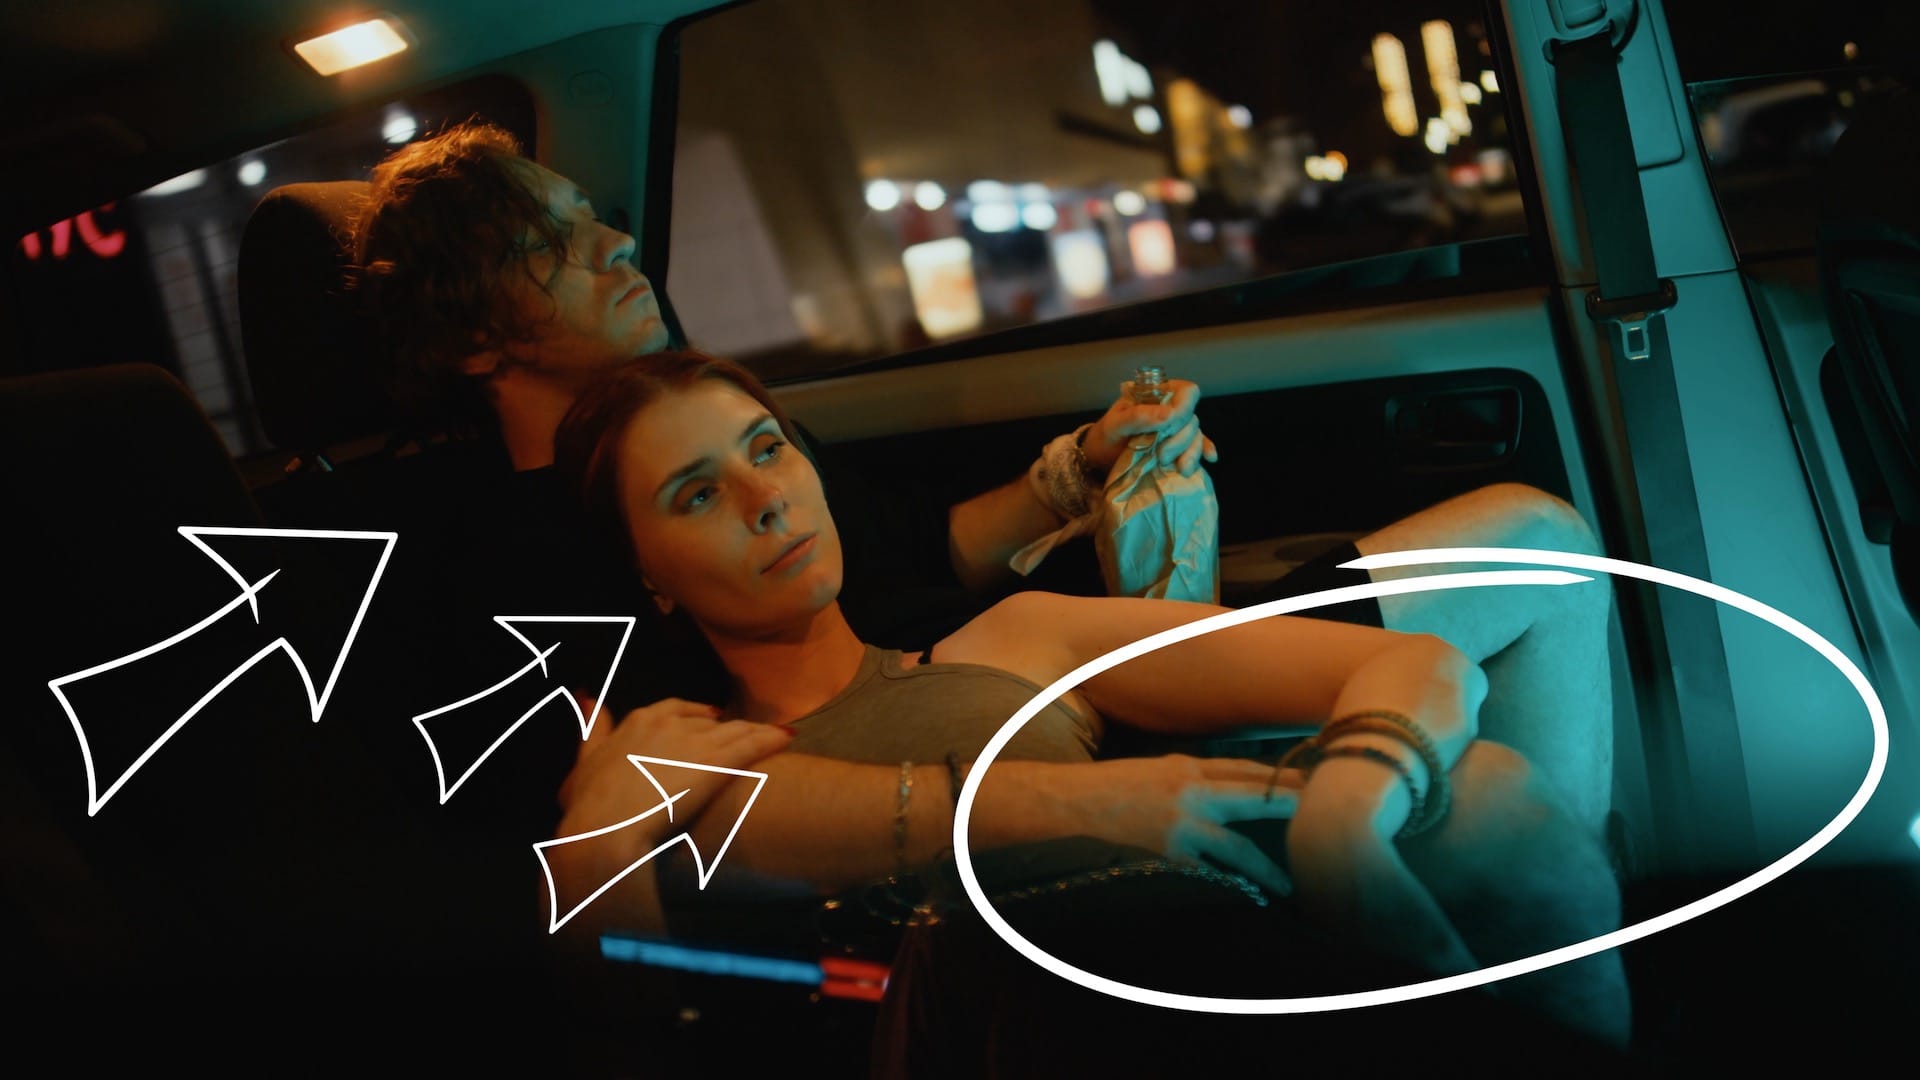
Take a look at this shot. To demonstrate the plugin's capabilities and as an idea to try for yourself, we're going to add a light leak.
There is already a natural glow coming from the right side, and some orange light coming from the left. Let's really emphasise this look by adding another glowing light effect.
By the way, check out the previous post and video about masks and tracking where we do the reverse — removing unwanted light leaks with masks.
Let’s dive in.
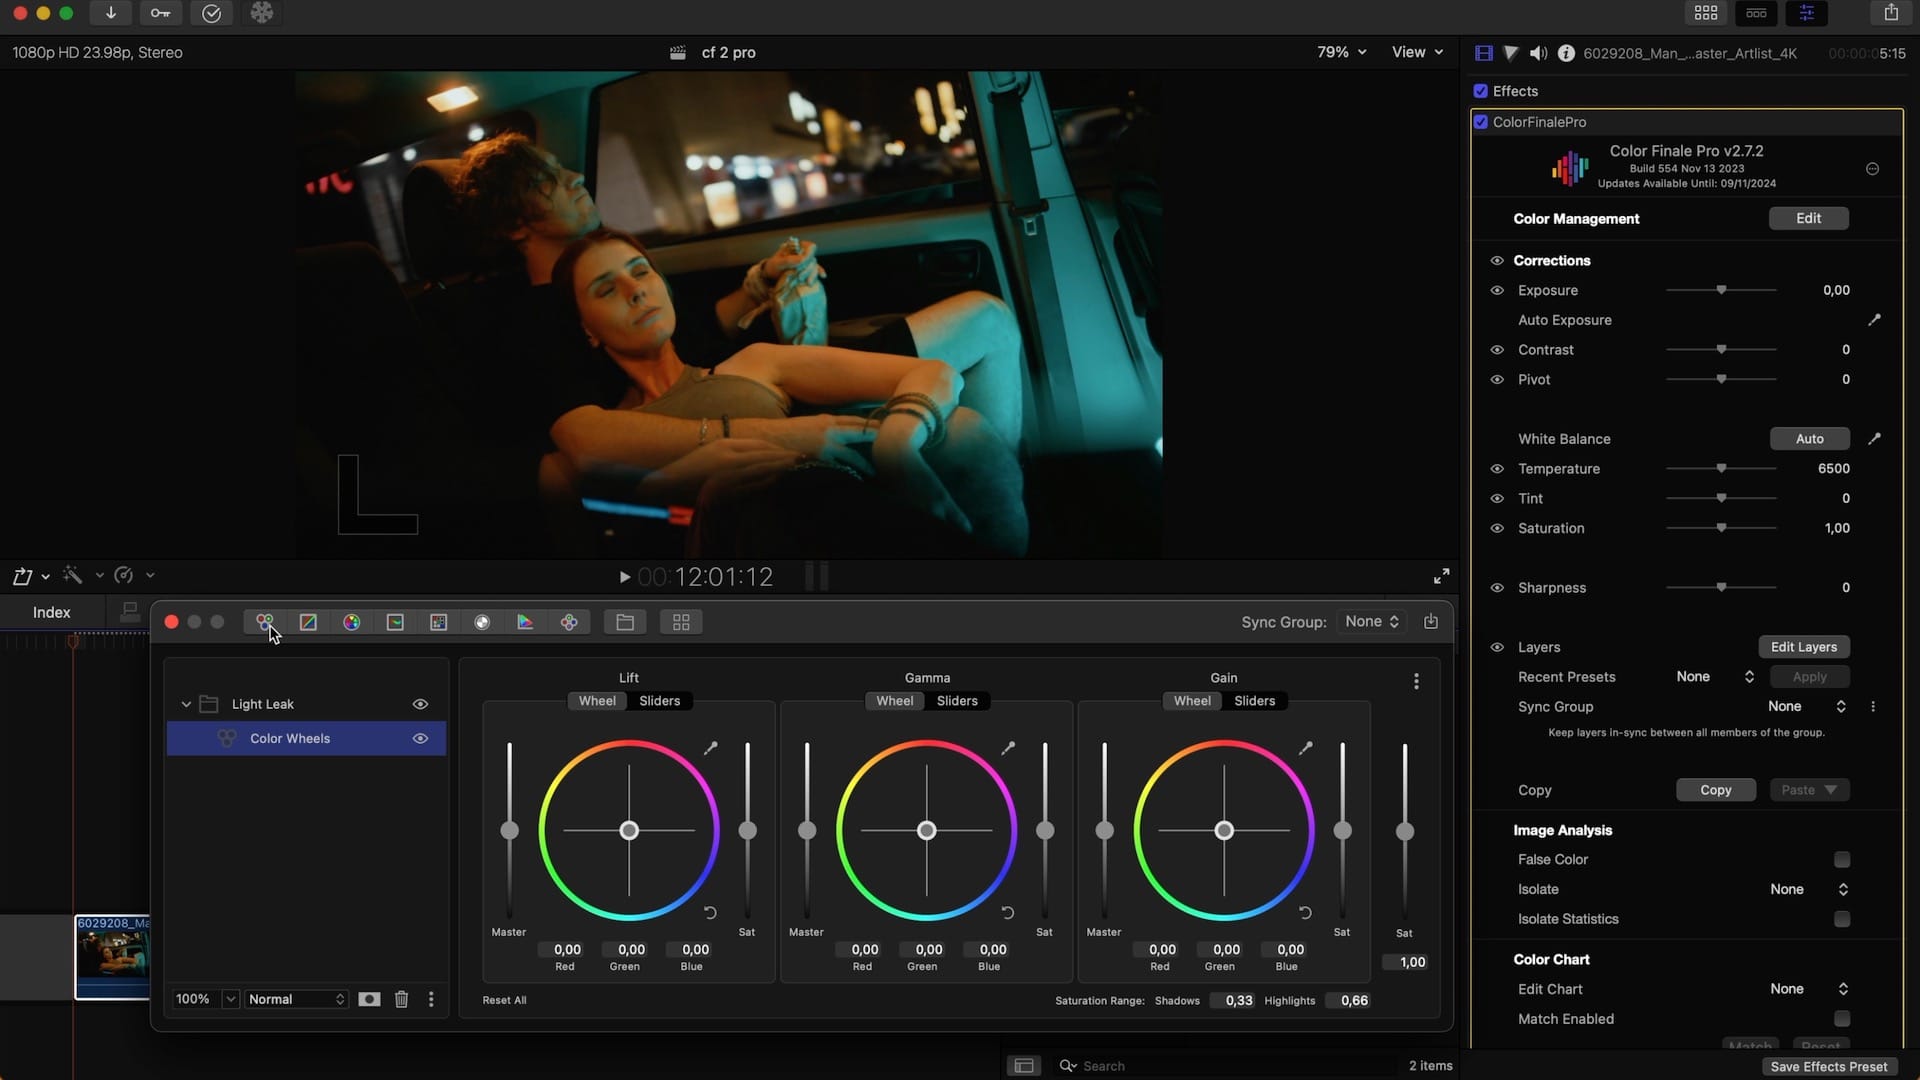
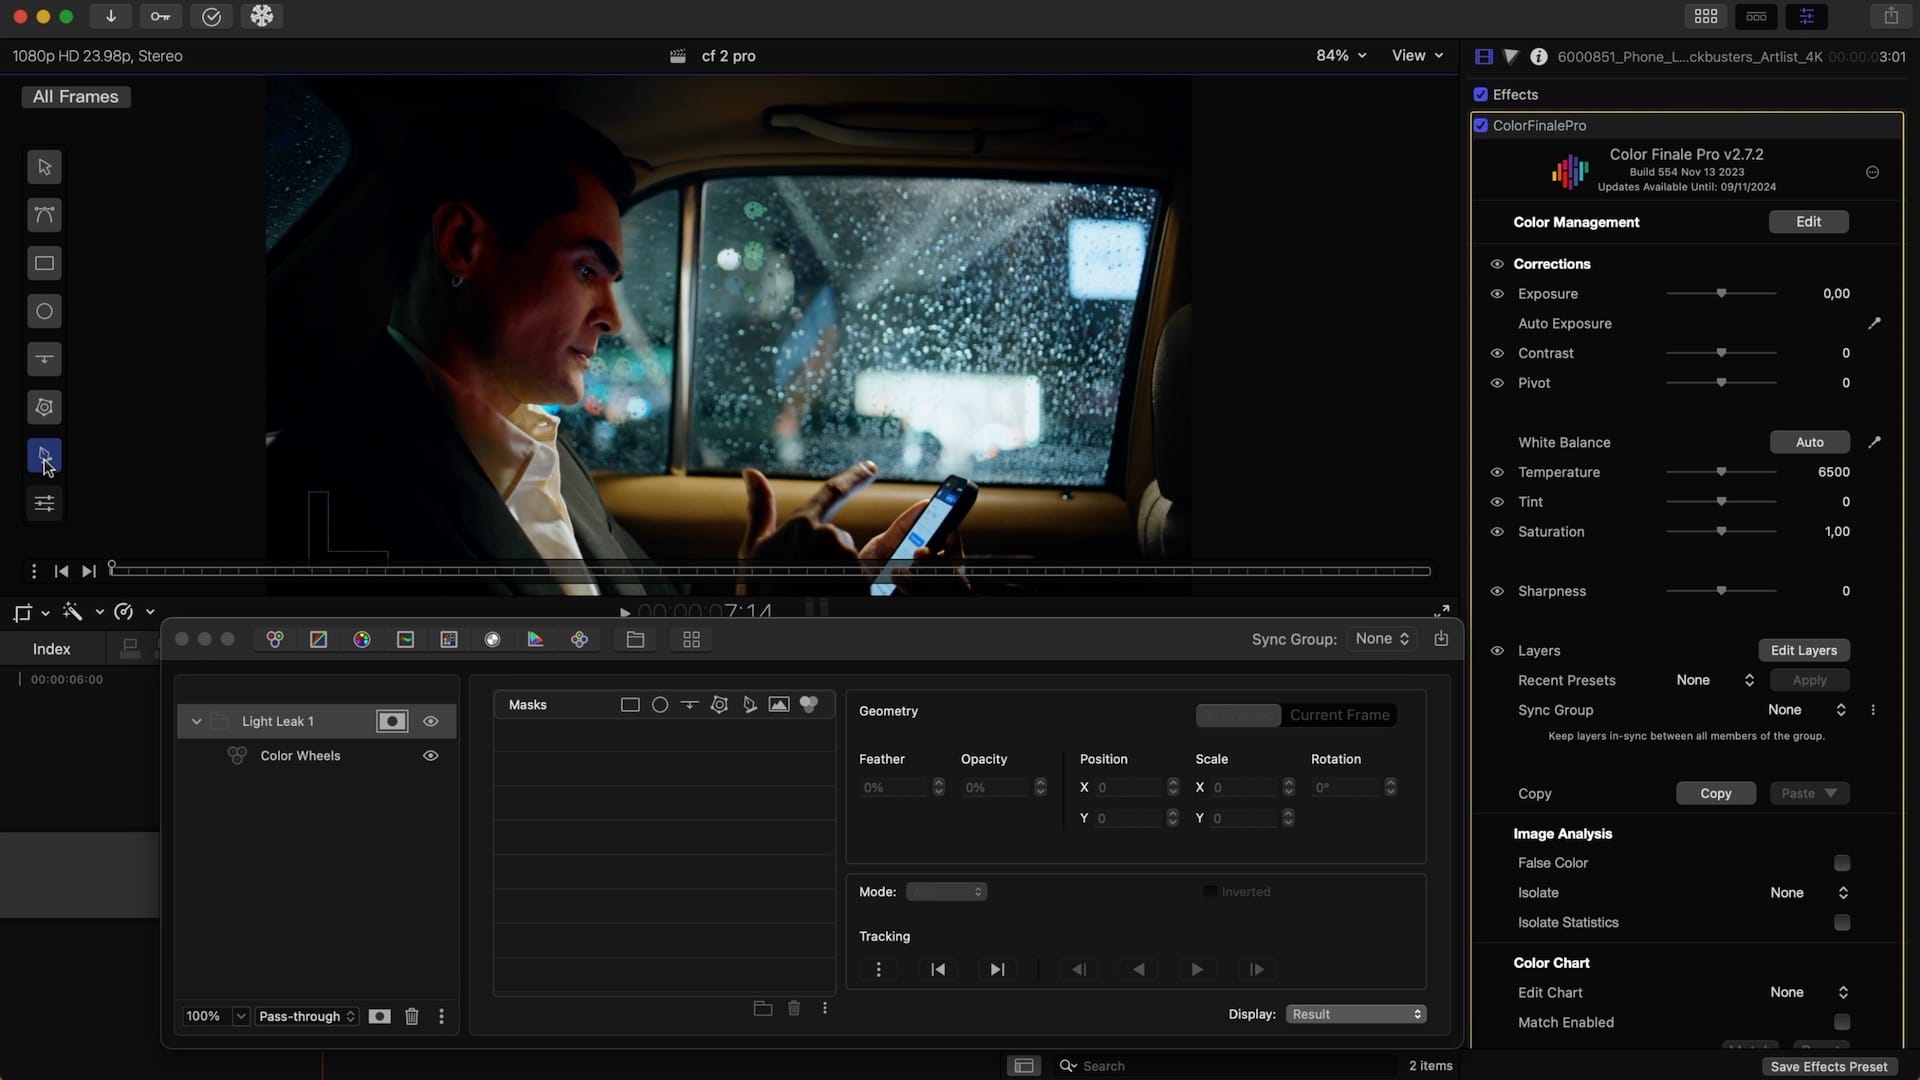
Open the layers panel from the inspector and create a layer group. Name it 'light leak.' Add a color wheels layer inside. In this example, we'll need just one layer to complete the work, but keeping things organised and labelled from the beginning is a good idea for when you may want to add additional layers down the line.
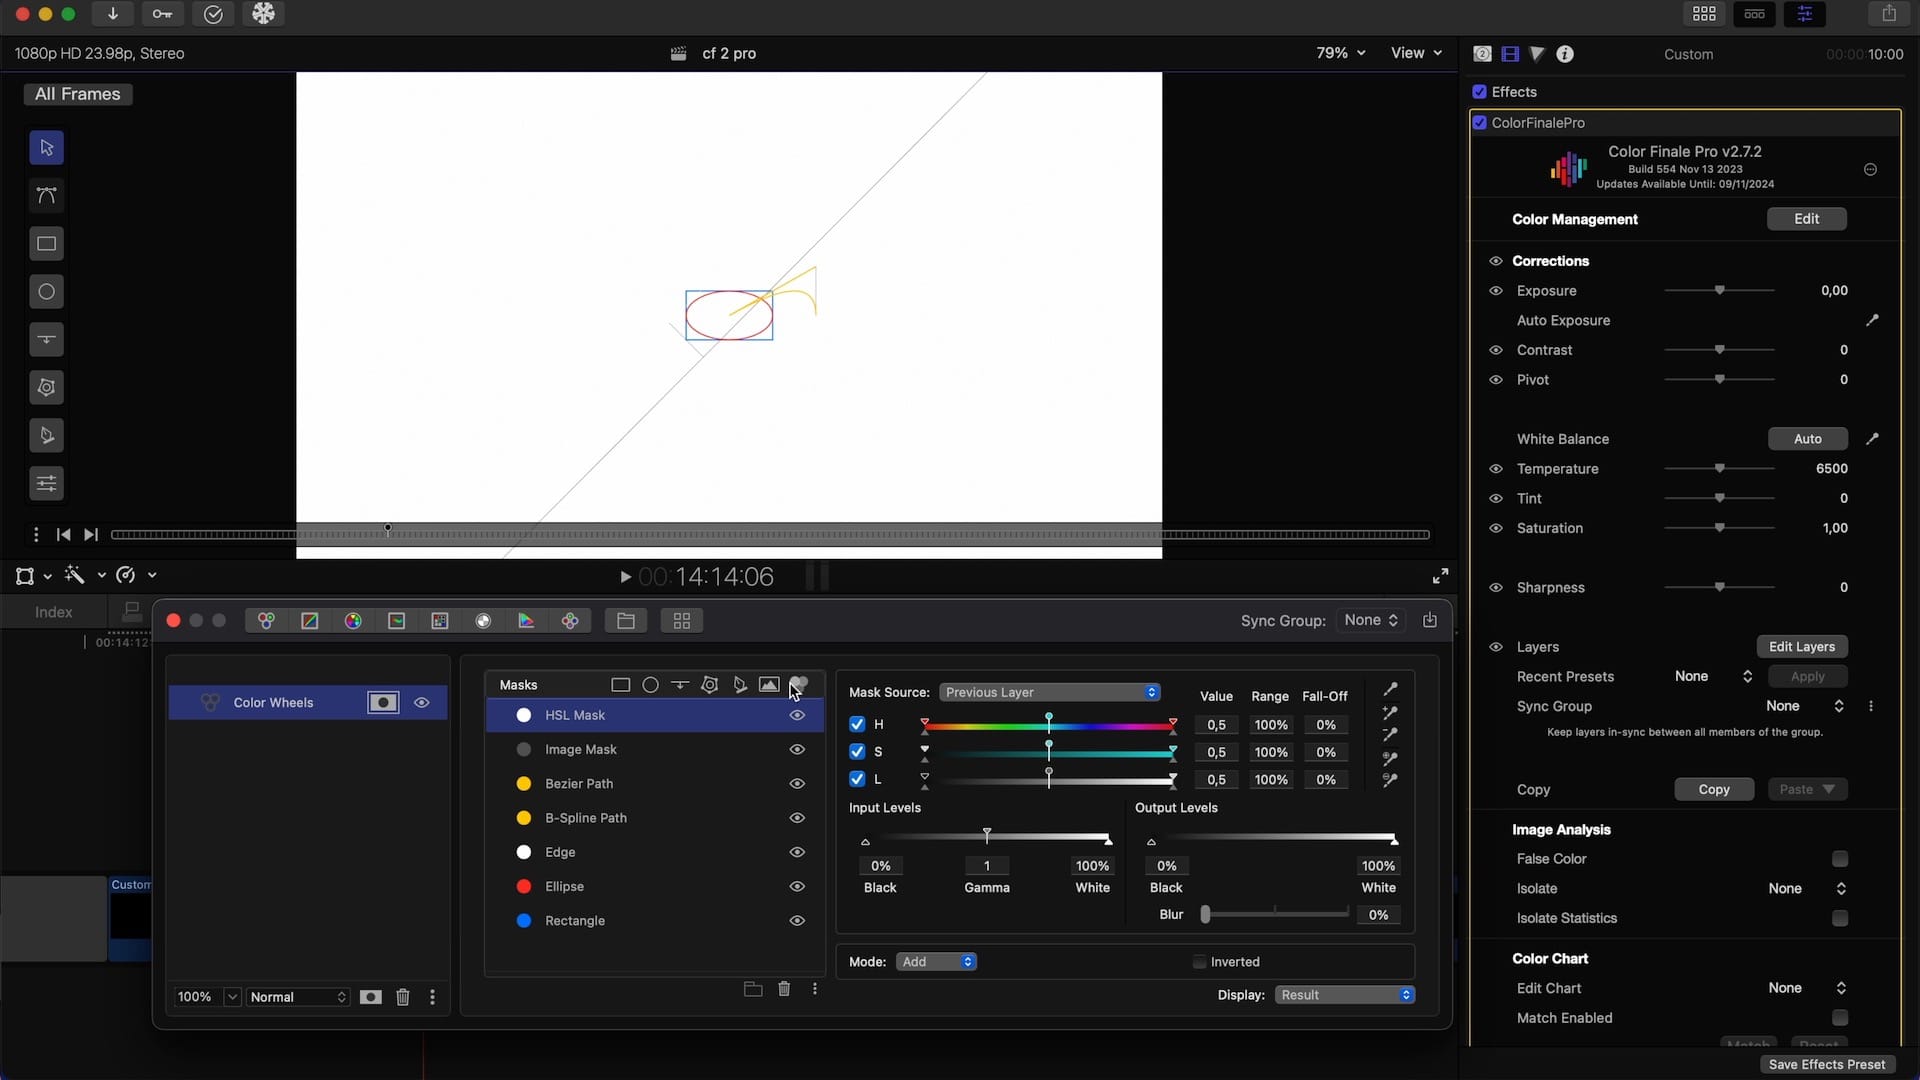
Before we add a shape mask to the image, let's have a look at the options. When clicking once on an icon, the mask is automatically placed in the viewer if it's a shape mask, and applied over the entire image if it's an image or an HSL mask. For now, let’s choose a rectangle shape mask.
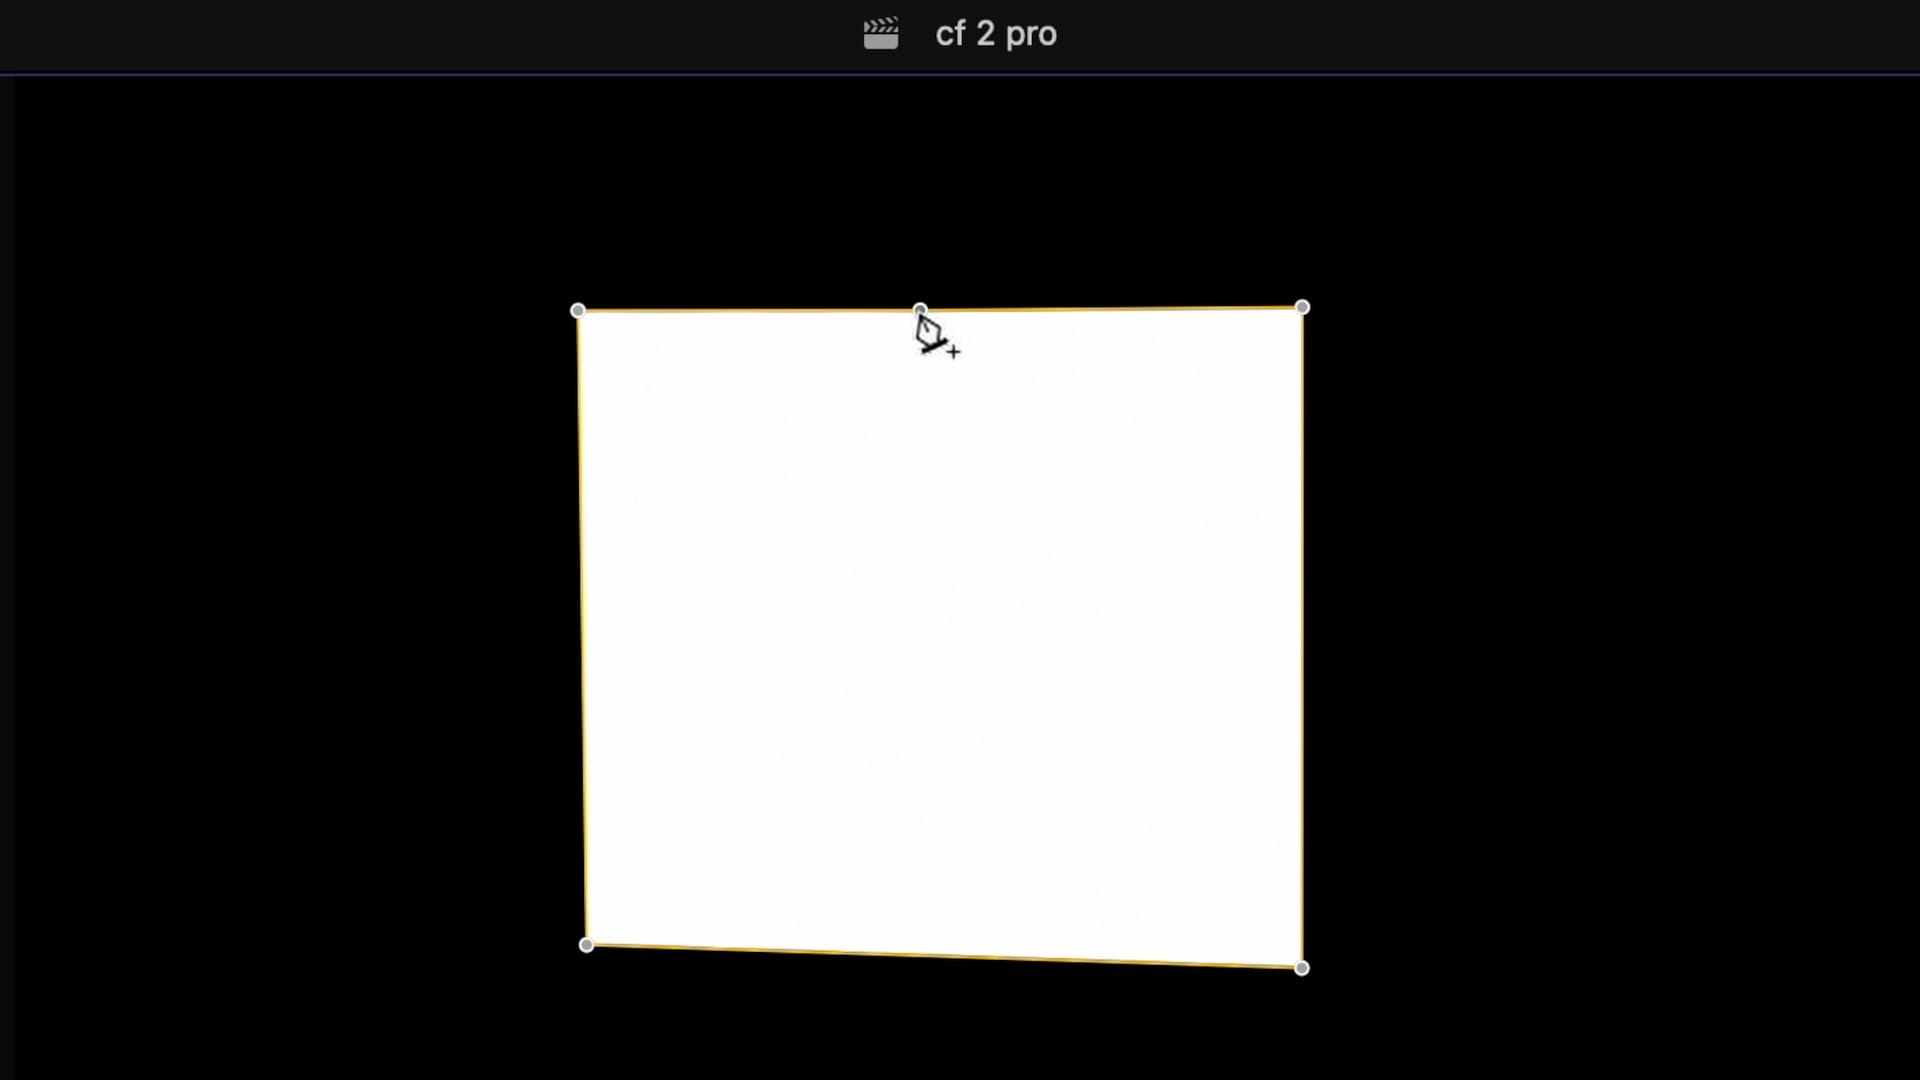
Using the on-screen controls, you can scale, rotate, change the overall shape and of course drag the mask around. Note: to see these controls, keep the inspector selected so that there's a yellow border around it.
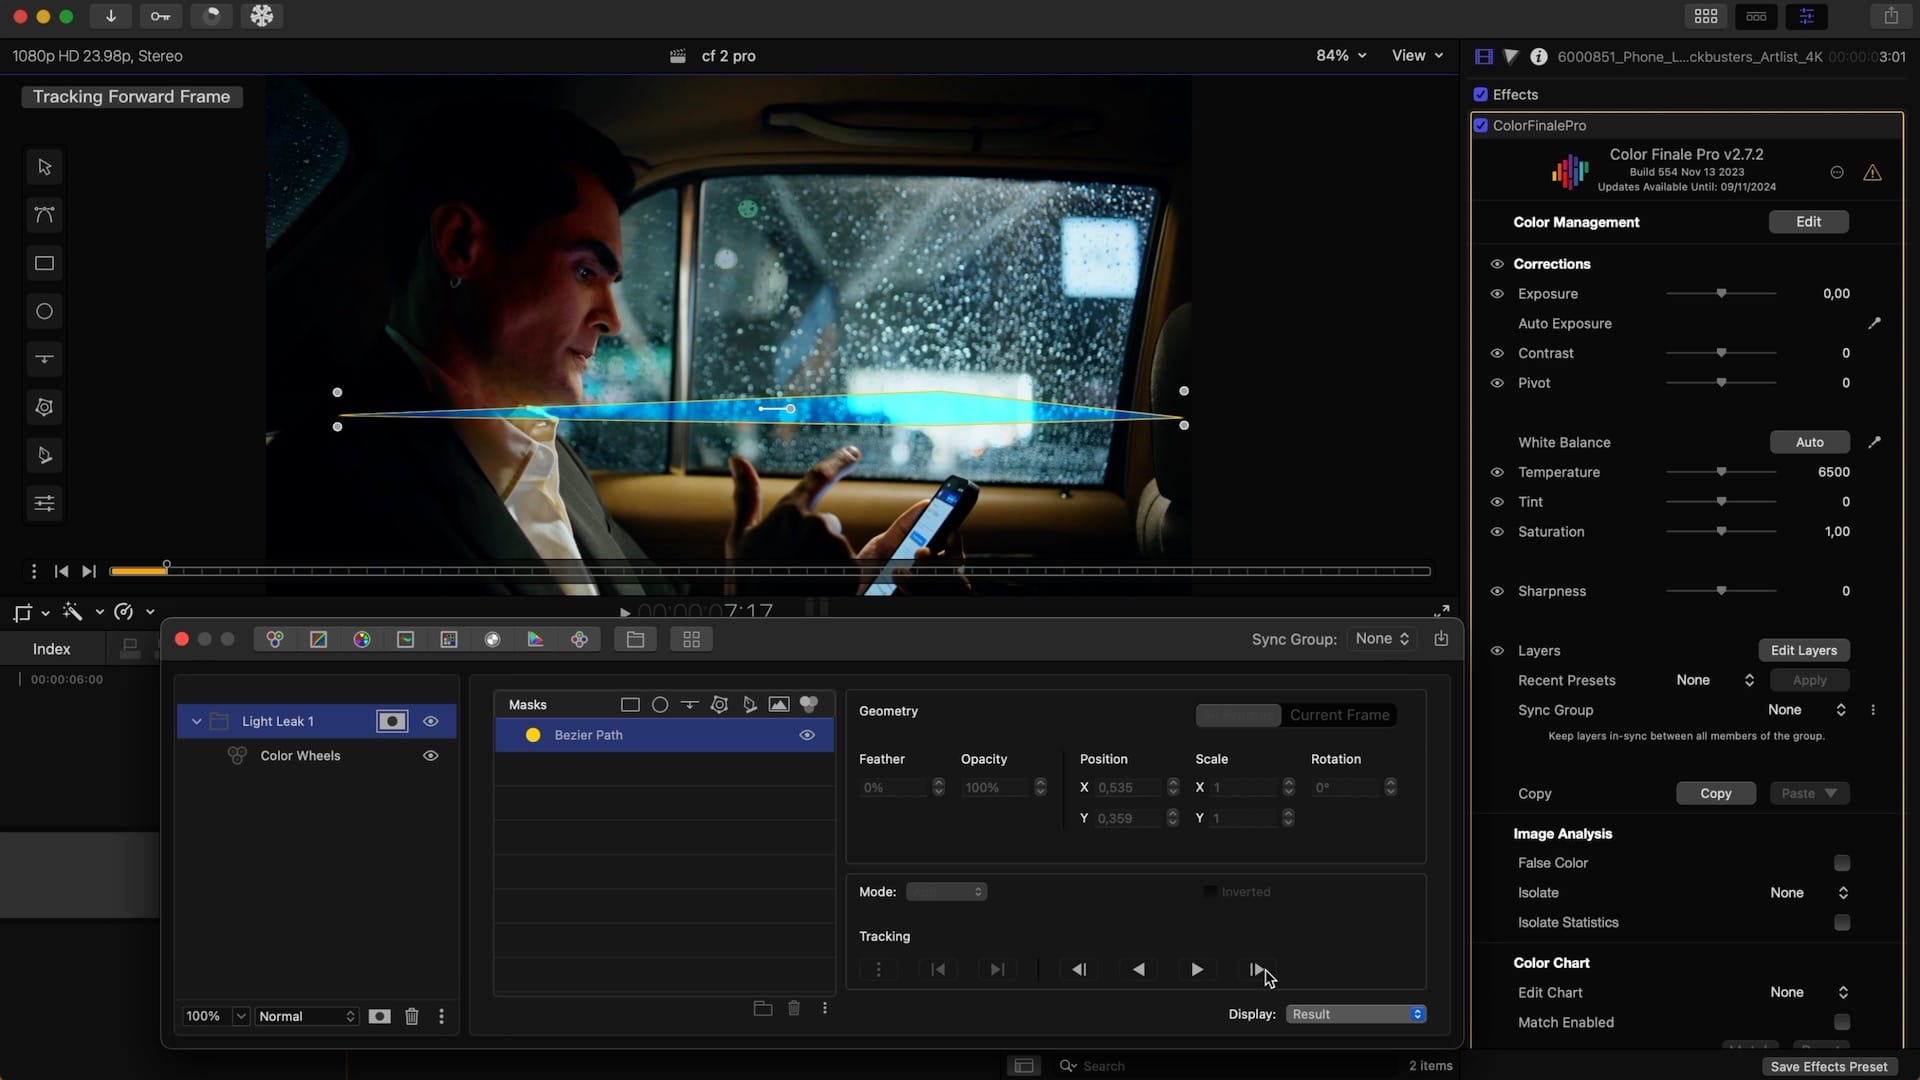
Right after placing a B-spline or Bezier mask, you can start editing their paths. To do so, click on the edit mask icon on the left of the viewer. Or add points by holding down the shift key — this will display a '+' symbol alongside the cursor — and then left clicking to add. To remove a point, hold down option command.
If you want to convert a point into a B-spline, hold down option and left click. In general, you can go back and edit the shape of your mask at any time.
Ok, let's return to our example.
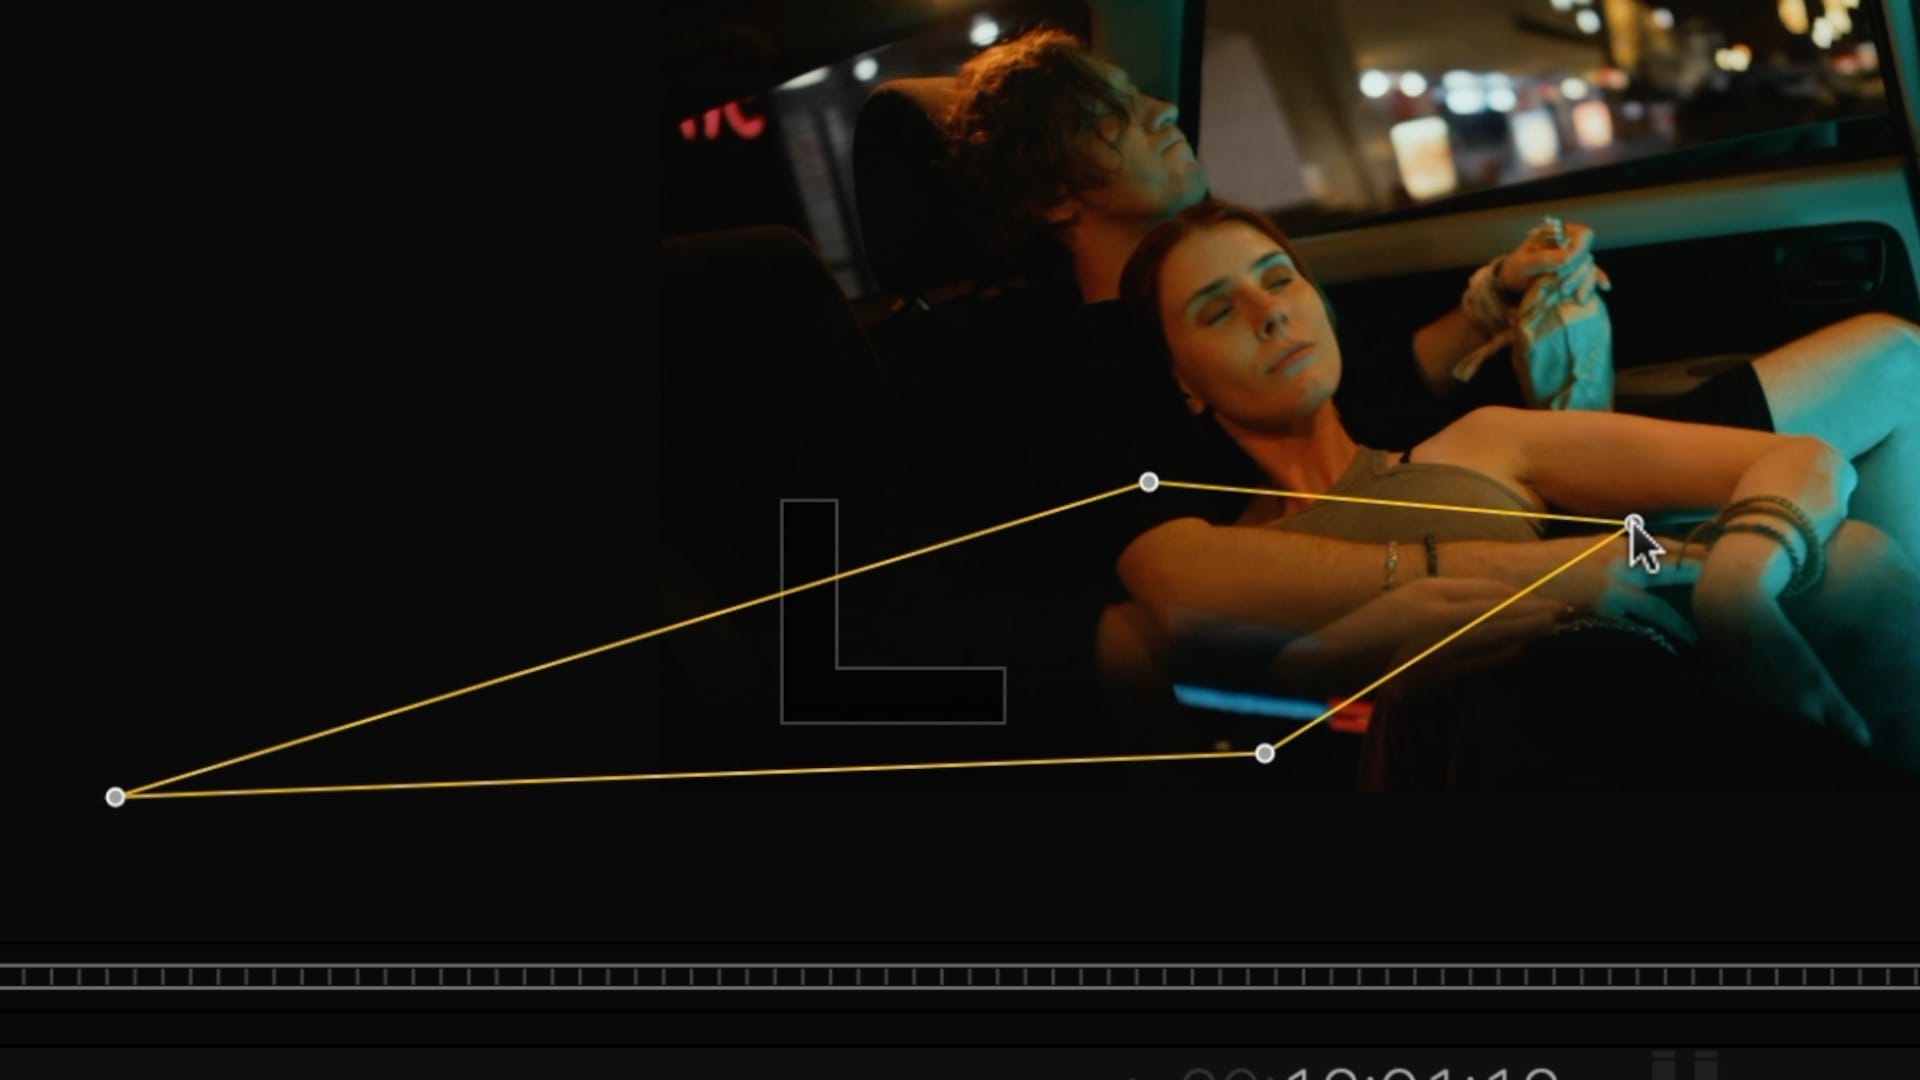
The left corner here is kind of the ideal zone to place a light leak. In our case we can draw a Bezier mask which we will then track.
Try all Color Finale 2 Pro features like masks and tracking and many more with a free 7-day trial.
Place points to define the mask, this is where our effect will be. Now let's move the gain, gamma, and lift wheel towards orange. We want to match the color in our mask with the natural light coming in from the left. So it looks like increasing the gain master slider and decreasing overall saturation gets us there.
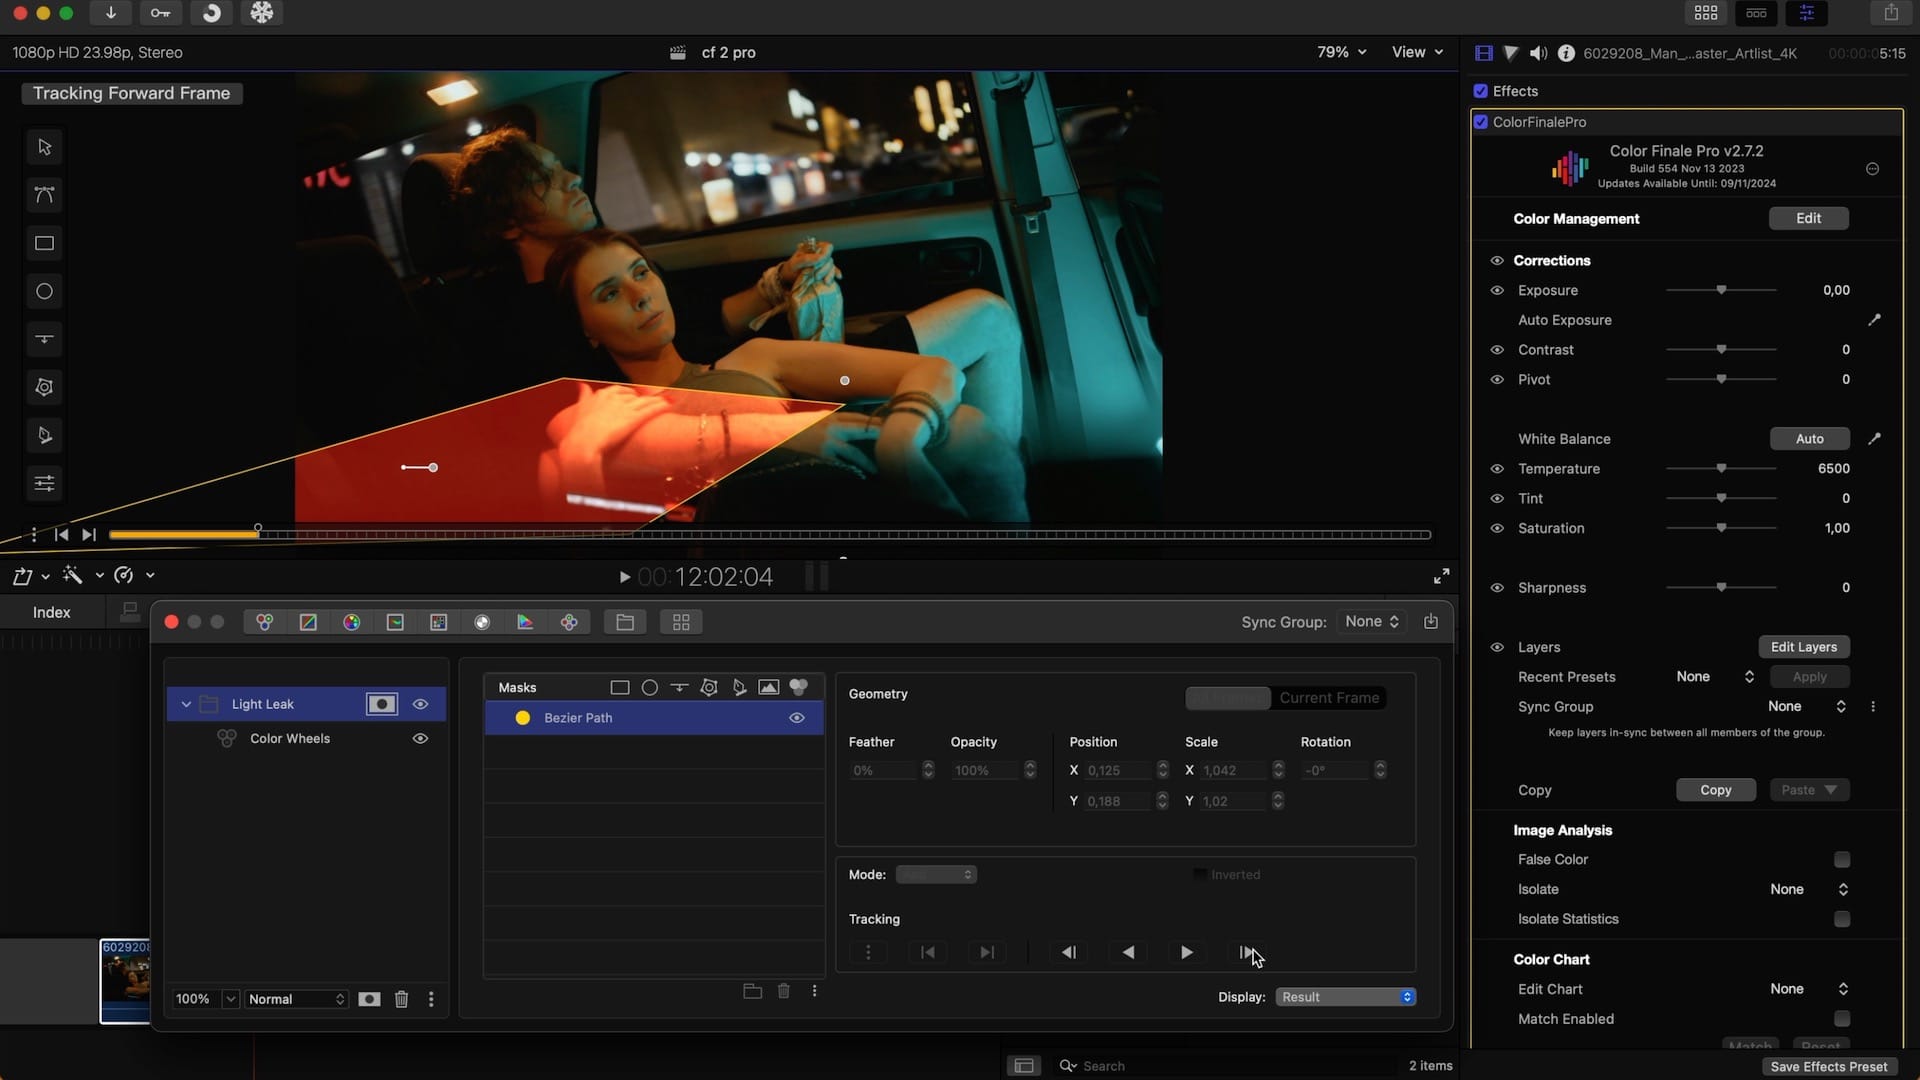
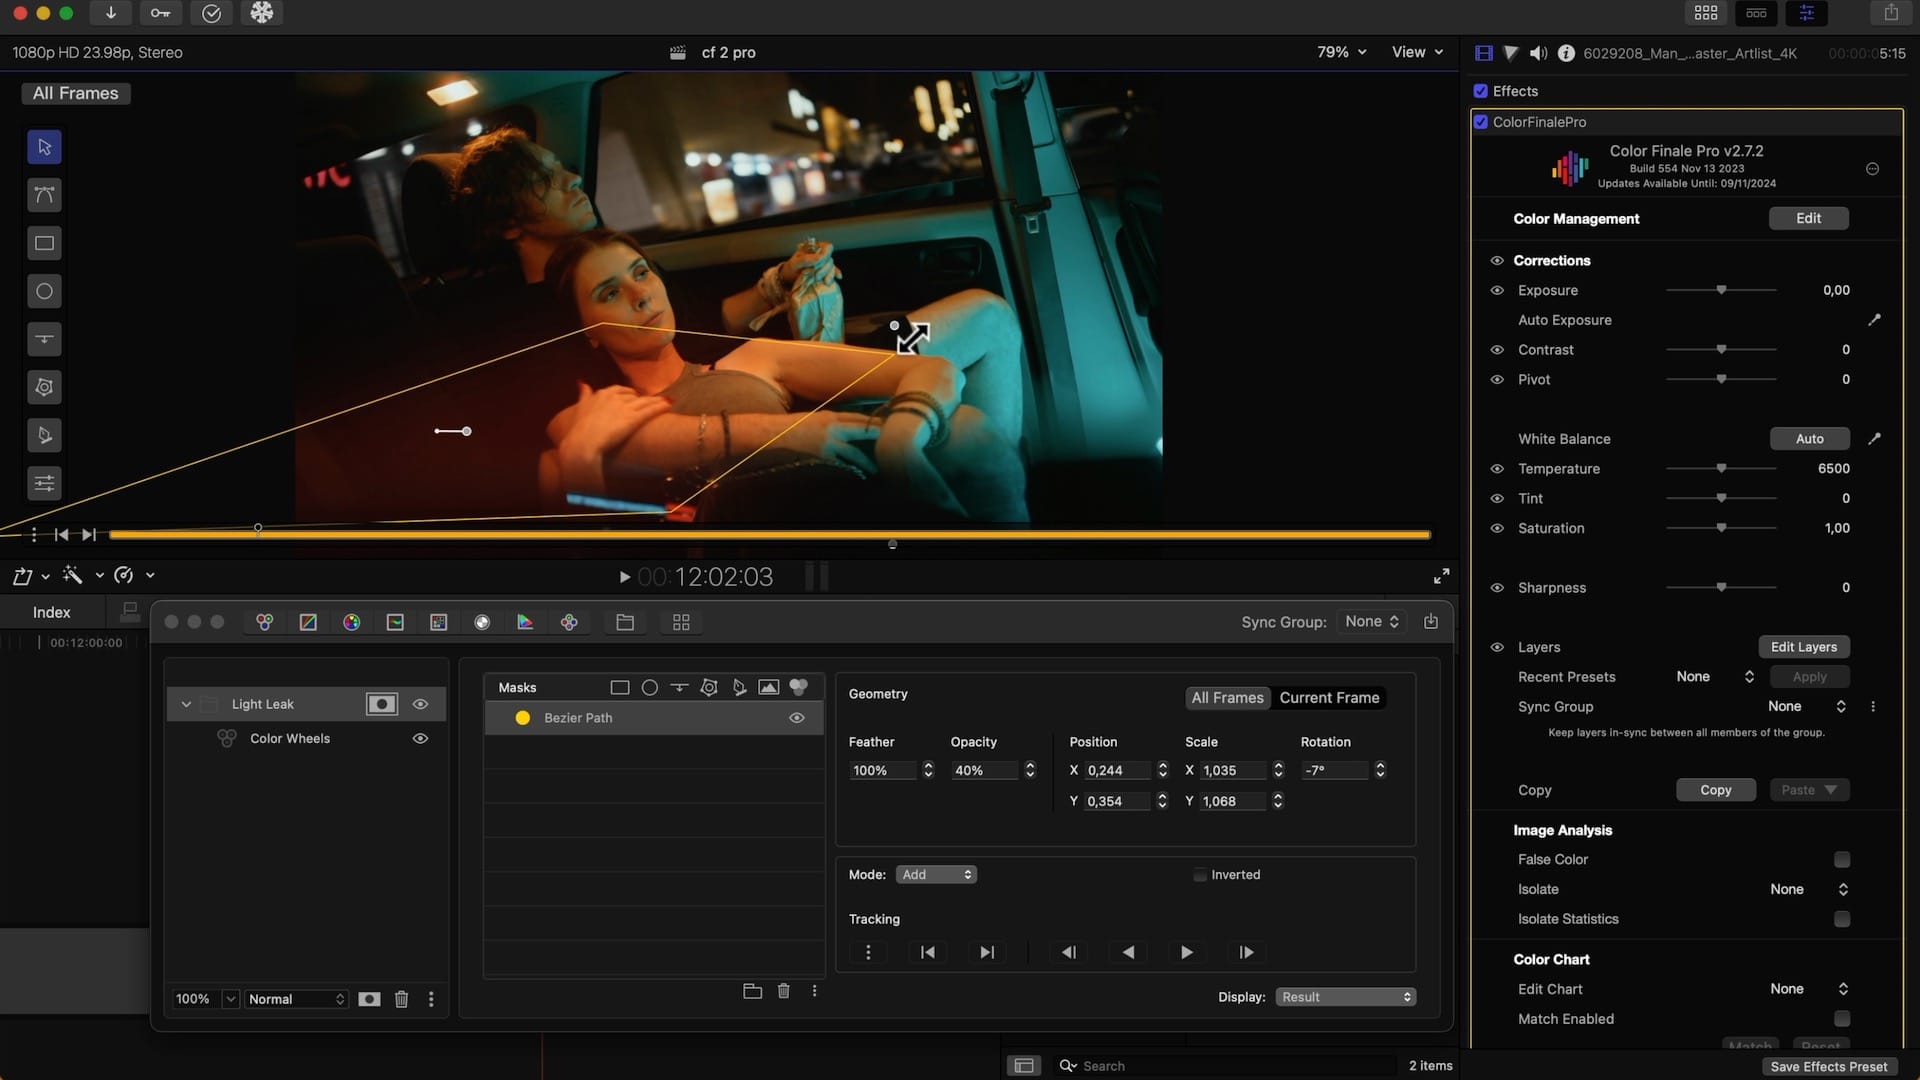
Now, let's track this. The tracker is inside the mask menu. Just track it forward with one button press. The points of the mask move along with the image, but at the moment, it's still a rough shape. So let's change the mask feather to 100% and its opacity to 40%. Let's check the result.
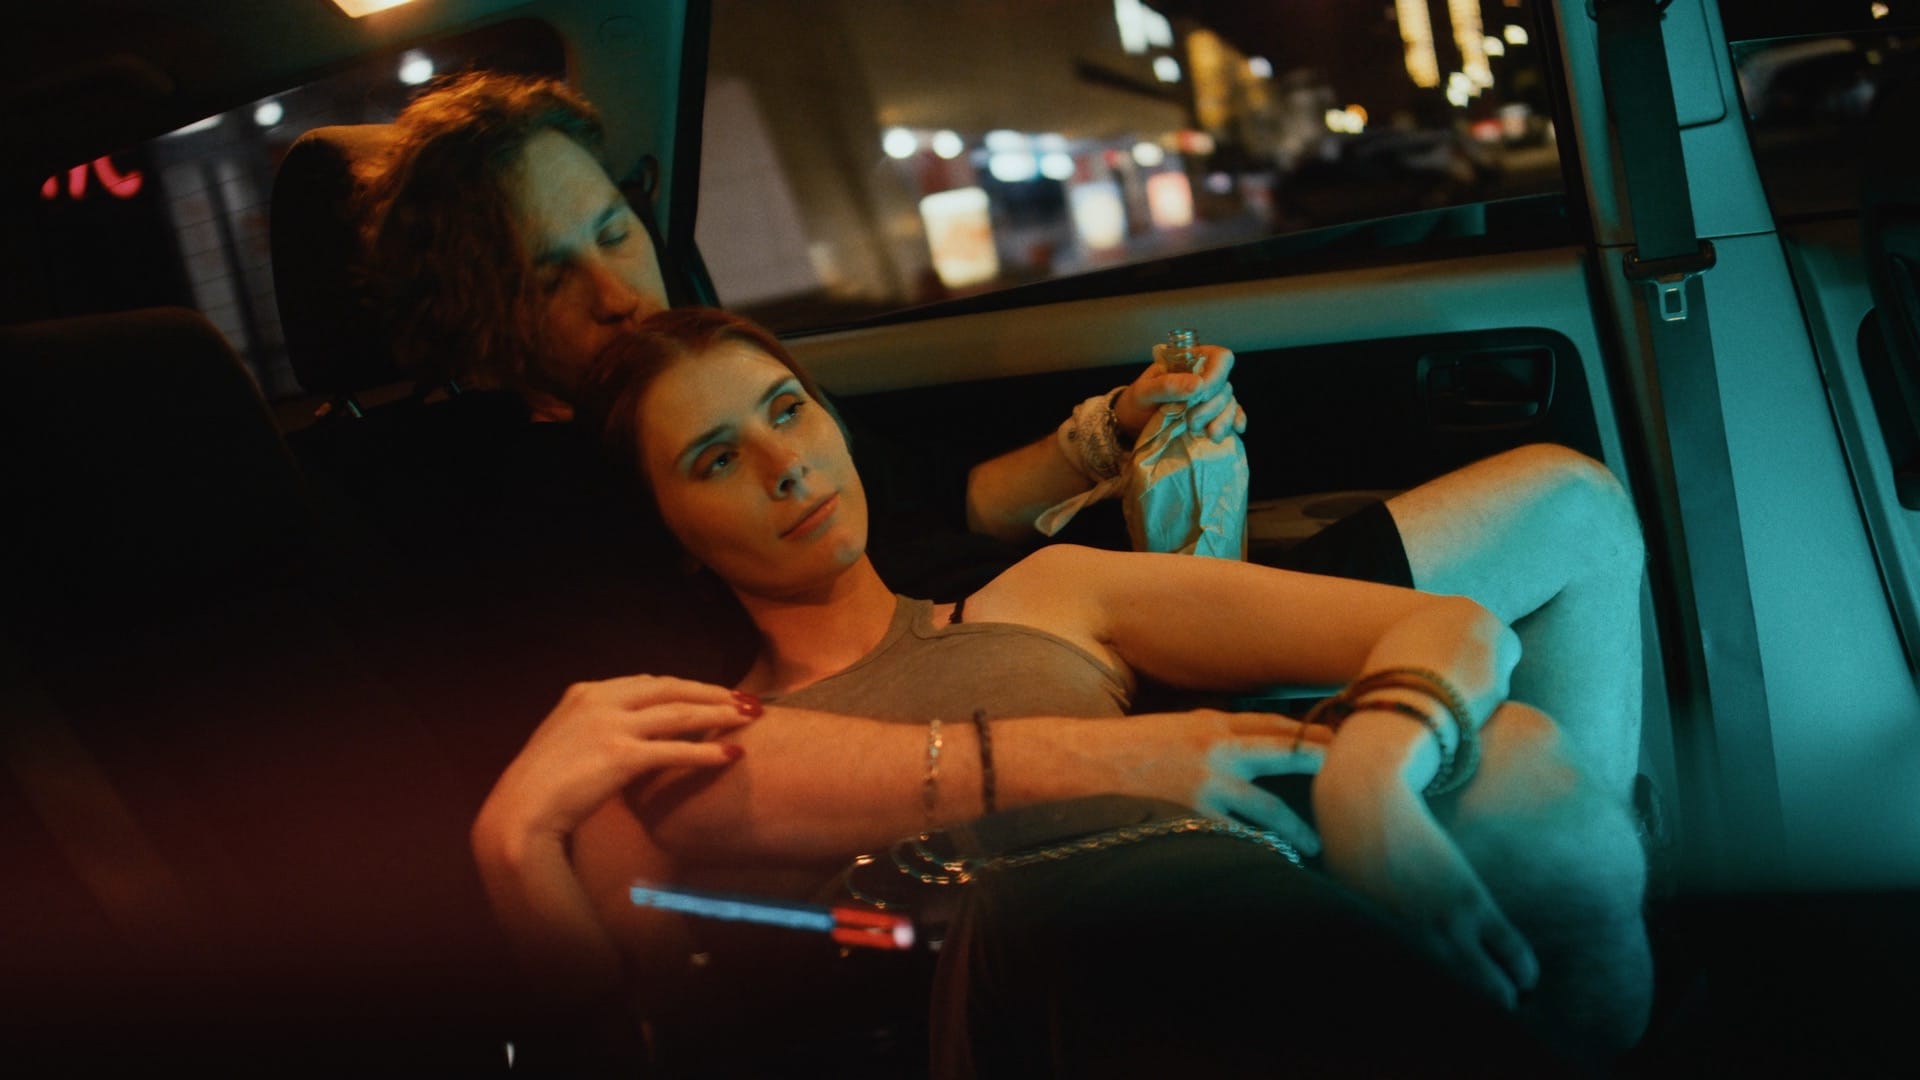
We achieved a pretty good look. Let's just make our light leak a bit larger. Simply increase the mask size using the on-screen controls.No re-tracking needed.
Now you can also drag the mask anywhere you want. The mask will follow the original trajectory regardless of its new location.
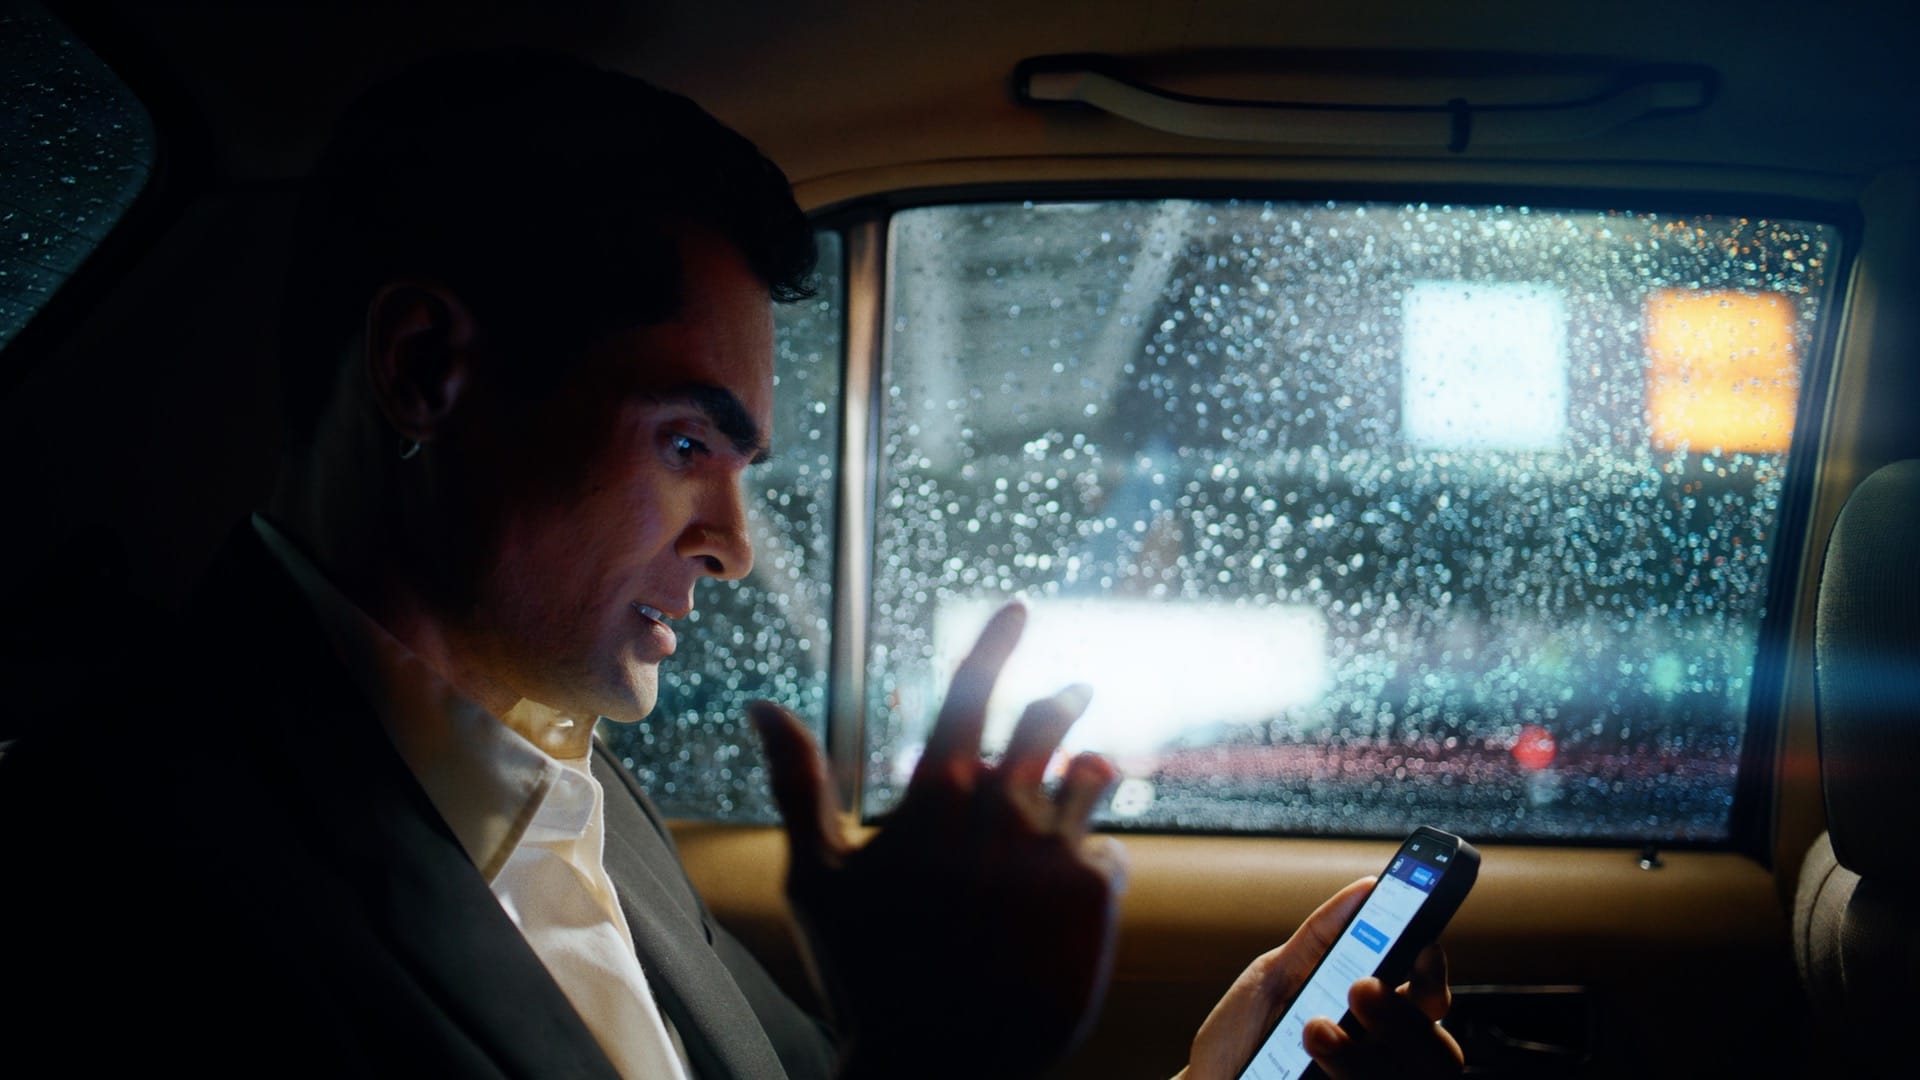
Here's the final result.

Example 2
In this second example, let’s use another shape mask. We're going to make it thinner and wider. Repeat as in the previous example.
So far, so good; we got the desired result. The mask follows the movements of the car really well. Well, what if we want to add more of this kind of light leak but with different shape masks?
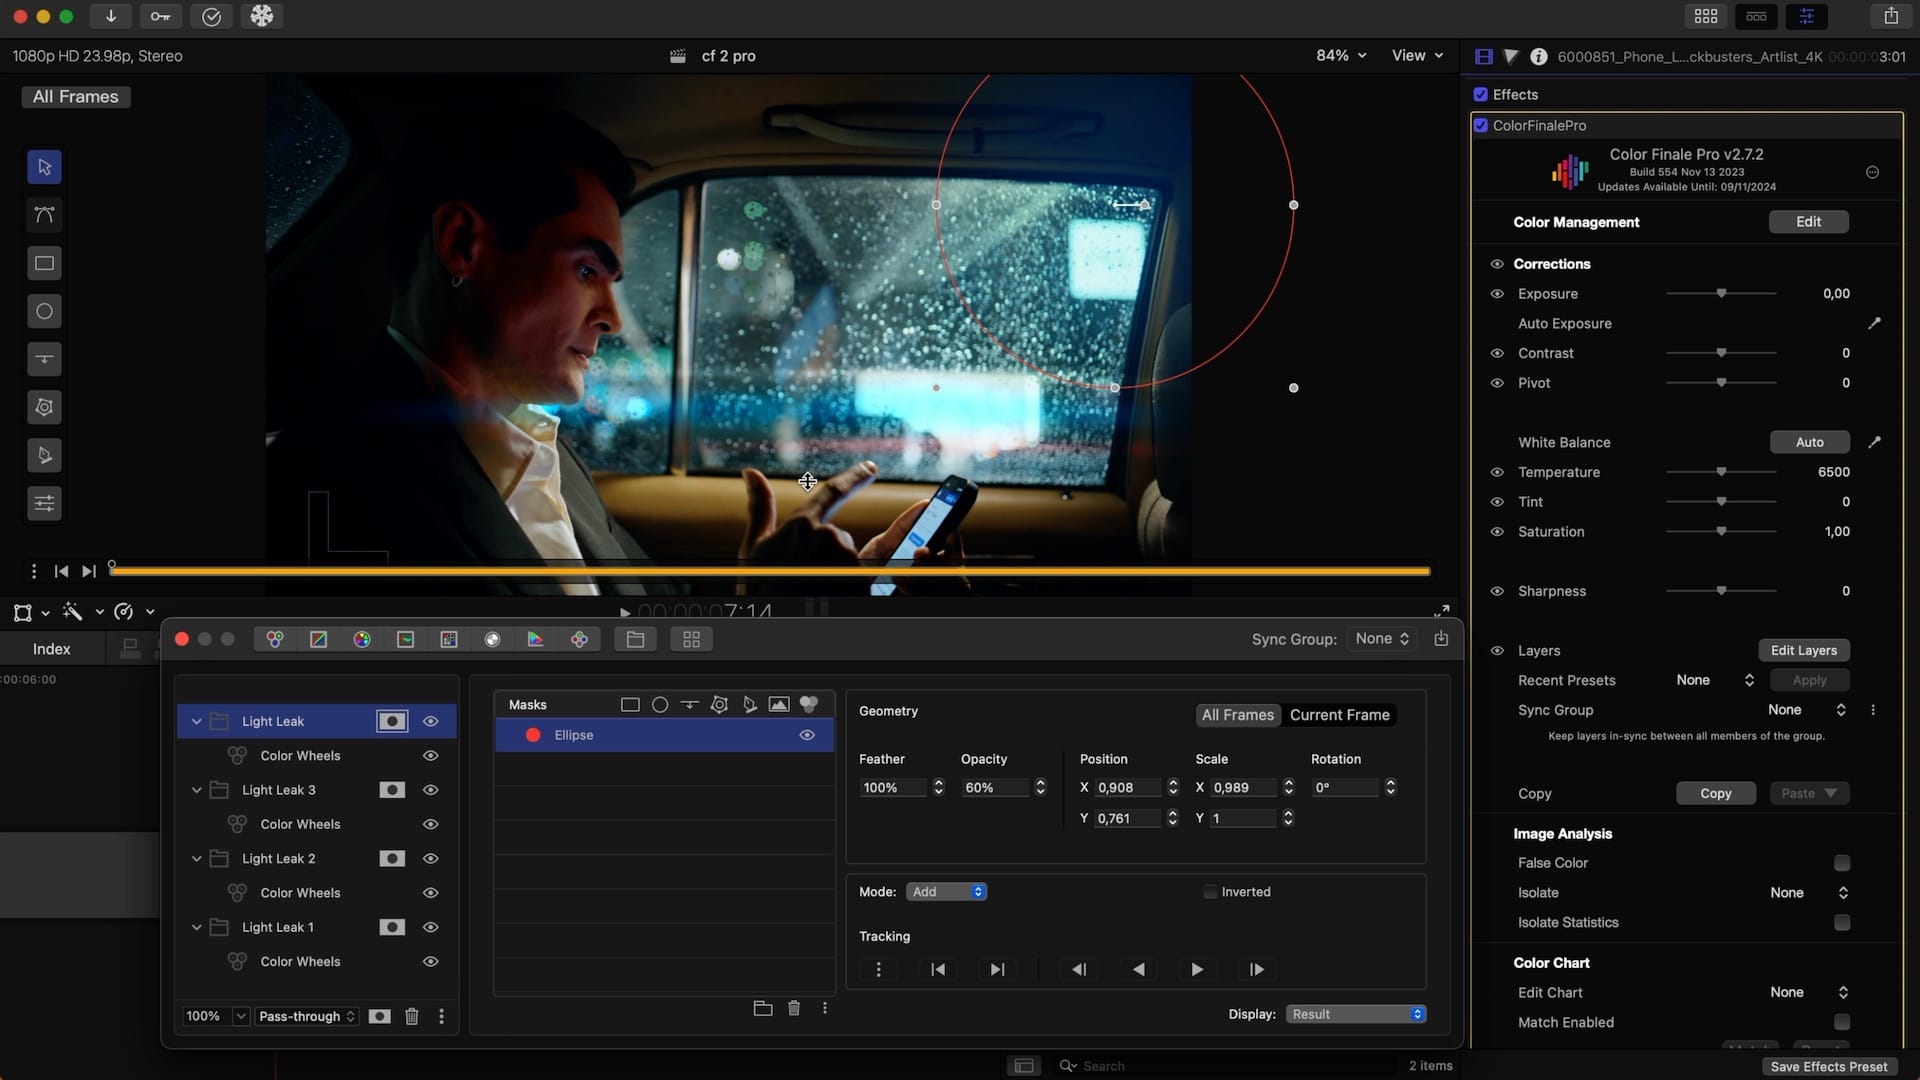
We can just copy and paste as many layers as we want. Simply change the mask shape, size, and color. The pasted layers keep their tracking information. If necessary, we can create a completely different shape and track it. Let’s see the final result.
Conclusion
That's it for this little tutorial. Using masks and tracking it becomes easier to create simple optical effects like light leaks and glows. Thanks for reading!