Contents
- Introduction
- Creating a mask
- Types of Masks
- Start Tracking
- Example 1 (Removing colour casts)
- Example 2 (Relighting a scene)
- Example 3 (Brightening eyes)
- Example 4 (False Colour + Edge Mask)
- Review
- Additional Info
Introduction
Image masking is a very powerful technique for photo and video post-production that can be the secret sauce to making the end result not just great, but visually stunning.
There are many uses for masks. Creating local adjustments with them can be used to direct attention to an important part of an image, like by increasing contrast ratios in specific areas, as well as to control the visual impact of elements that are more superfluous — all in service of developing a cohesive and powerful narrative for the viewer.
Applying a mask to a photo once is reasonably straightforward, and you can get away with creating masks for some static video shots, but once you have a clip where the camera and the subjects are moving within the scene, at this point you are likely to want some automated help!
This is where automated tracking tools come in, and Color Finale 2 Pro comes with a super handy area tracker.
Adding a Mask
Here’s how to add a mask in Color Finale 2 Pro.
First, say you have a Color Wheels layer in the layers panel. To add a mask, right-click on the layer, and select Add Mask.
If you then immediately modify any parameters within Color Wheels, the entire frame is affected: the mask is undefined and needs to be drawn. So the next step is to select what kind of mask to add to the frame, and this depends on the shape of the object and the purpose of your edit.
Types of Masks
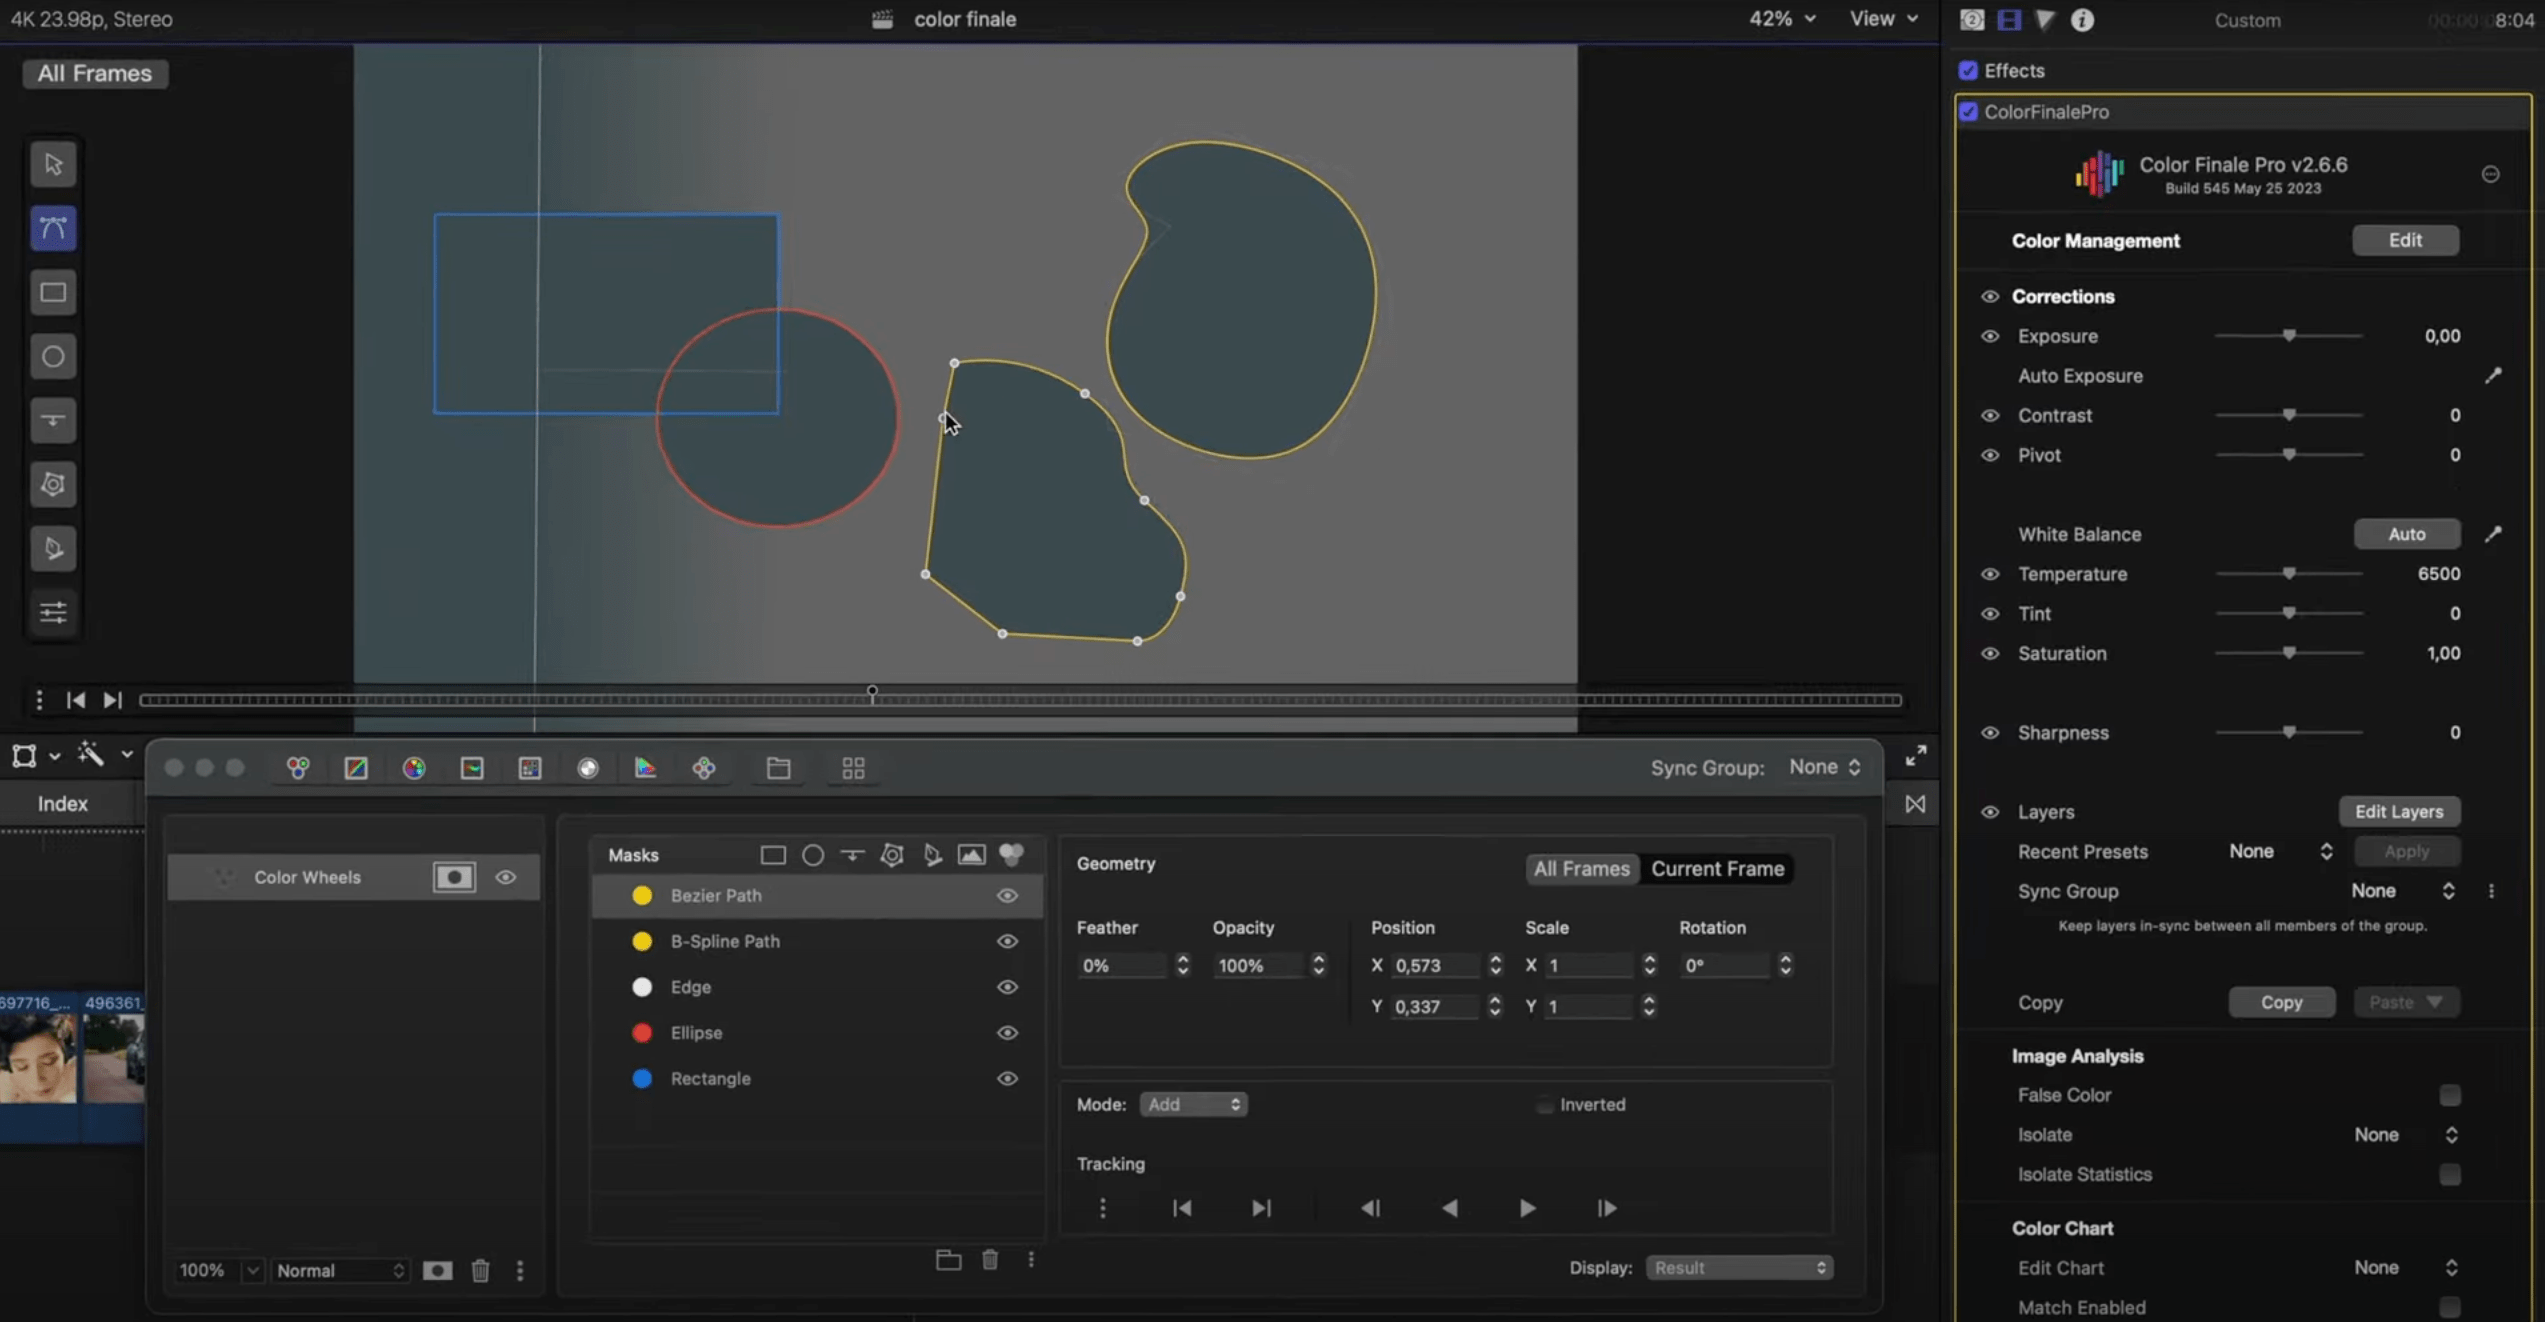
Mask options can be toggled by clicking on the mask icon to the right of the layer name. Inside the mask menu, there are several shape mask options:
- Rectangle
- Ellipse
- Edge (useful for gradients)
- B-Spline Path
- Bezier
You can combine multiple masks in one layer.
As well as these shape masks, there is also an image mask, and an HSL mask.
An image mask lets you select areas based on the overall brightness of the underlying pixels. Initially, brighter pixels will be fully masked and darker pixels transparent. Such a mask could be inverted, or a more narrow brightness range defined to get an interesting outcome.
This technique of working with specific brightness ranges is often used by professional colourists when balancing skin tones.
Similarly, the HSL mask also lets you select by chroma (colour) values. This lets you apply corrections to pixels of certain hues or saturation levels.
When applying a shape mask, you will naturally want to move and transform it. Use the on-screen controls in the viewer to do this. To see the these controls, make sure you have the Color Finale 2 Pro inspector selected such that it's surrounded by a yellow border.
Start Tracking
Go to the beginning of your sequence (you can use the on-screen scrubber to do that). Draw a mask over the area you want to track. Press the Track Forwards button. Briefly wait until the tracker completes the process.
What follows are some examples of applying and tracking masks.
Example 1
In this example, we have yellow and blue light leaking from the left and right edges of the frame respectively. Say we want to remove them, here's how it can be done.
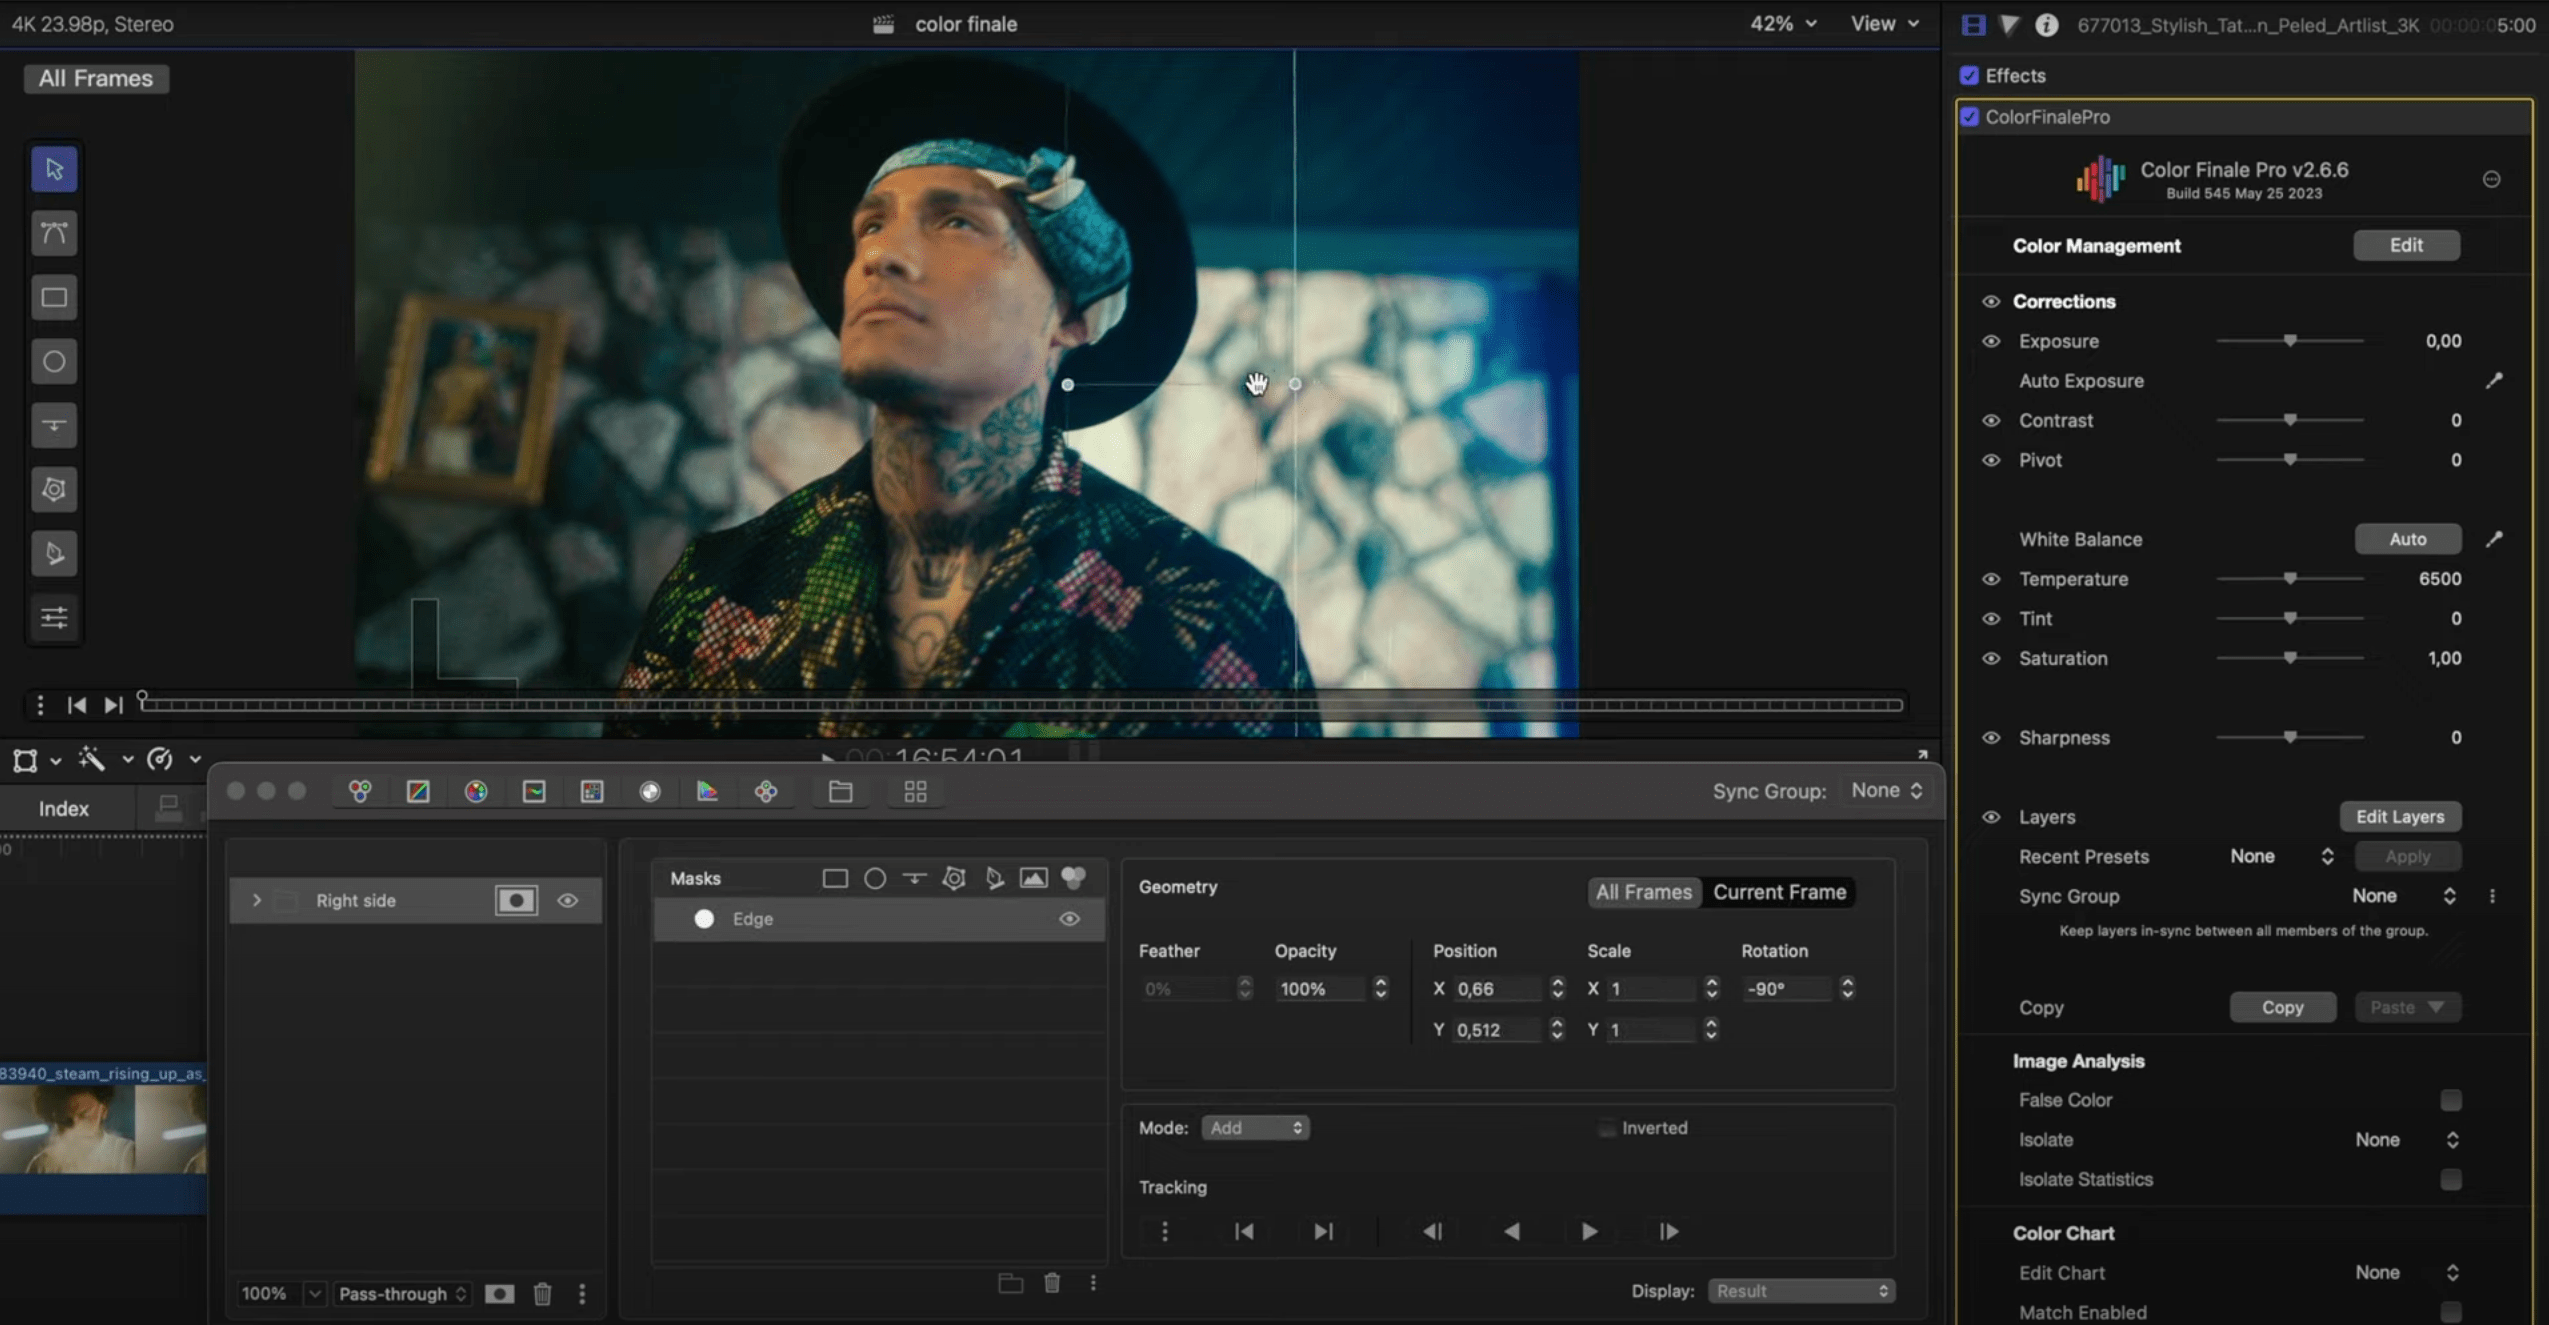
For multi-stage operations like we will be doing in this example, it's useful to create a layer group first, and call it something descriptive e.g. 'right side'. We'll be adding multiple masks so it's useful to label our work.
Add an edge mask over the right side of the frame. This will let us cover and remove the blue. Add a color wheels layer to the group, decrease the master gain and overall saturation.
Create an HSL Curves layer and use it to reduce saturation and luma. Use the color picker to select the blue.
Now let's do the same thing to the left hand side of the image.
Create another group and call 'left side'. Use the same tools. Because this clip is quite static, we don't need to track our edge masks.
Now, in this shot, to really make the subject's face pop, let's add a vignette. Create a third group called 'Center'.
Add an ellipse mask to track the talent's face. Smooth the edges and click track forward. Done.
Now we can use a color wheels layer to draw more attention to the face. Click 'invert parent mask' to apply changes to areas outside of the mask. Now create one more color wheels layer and lower the highlights.
Example 2
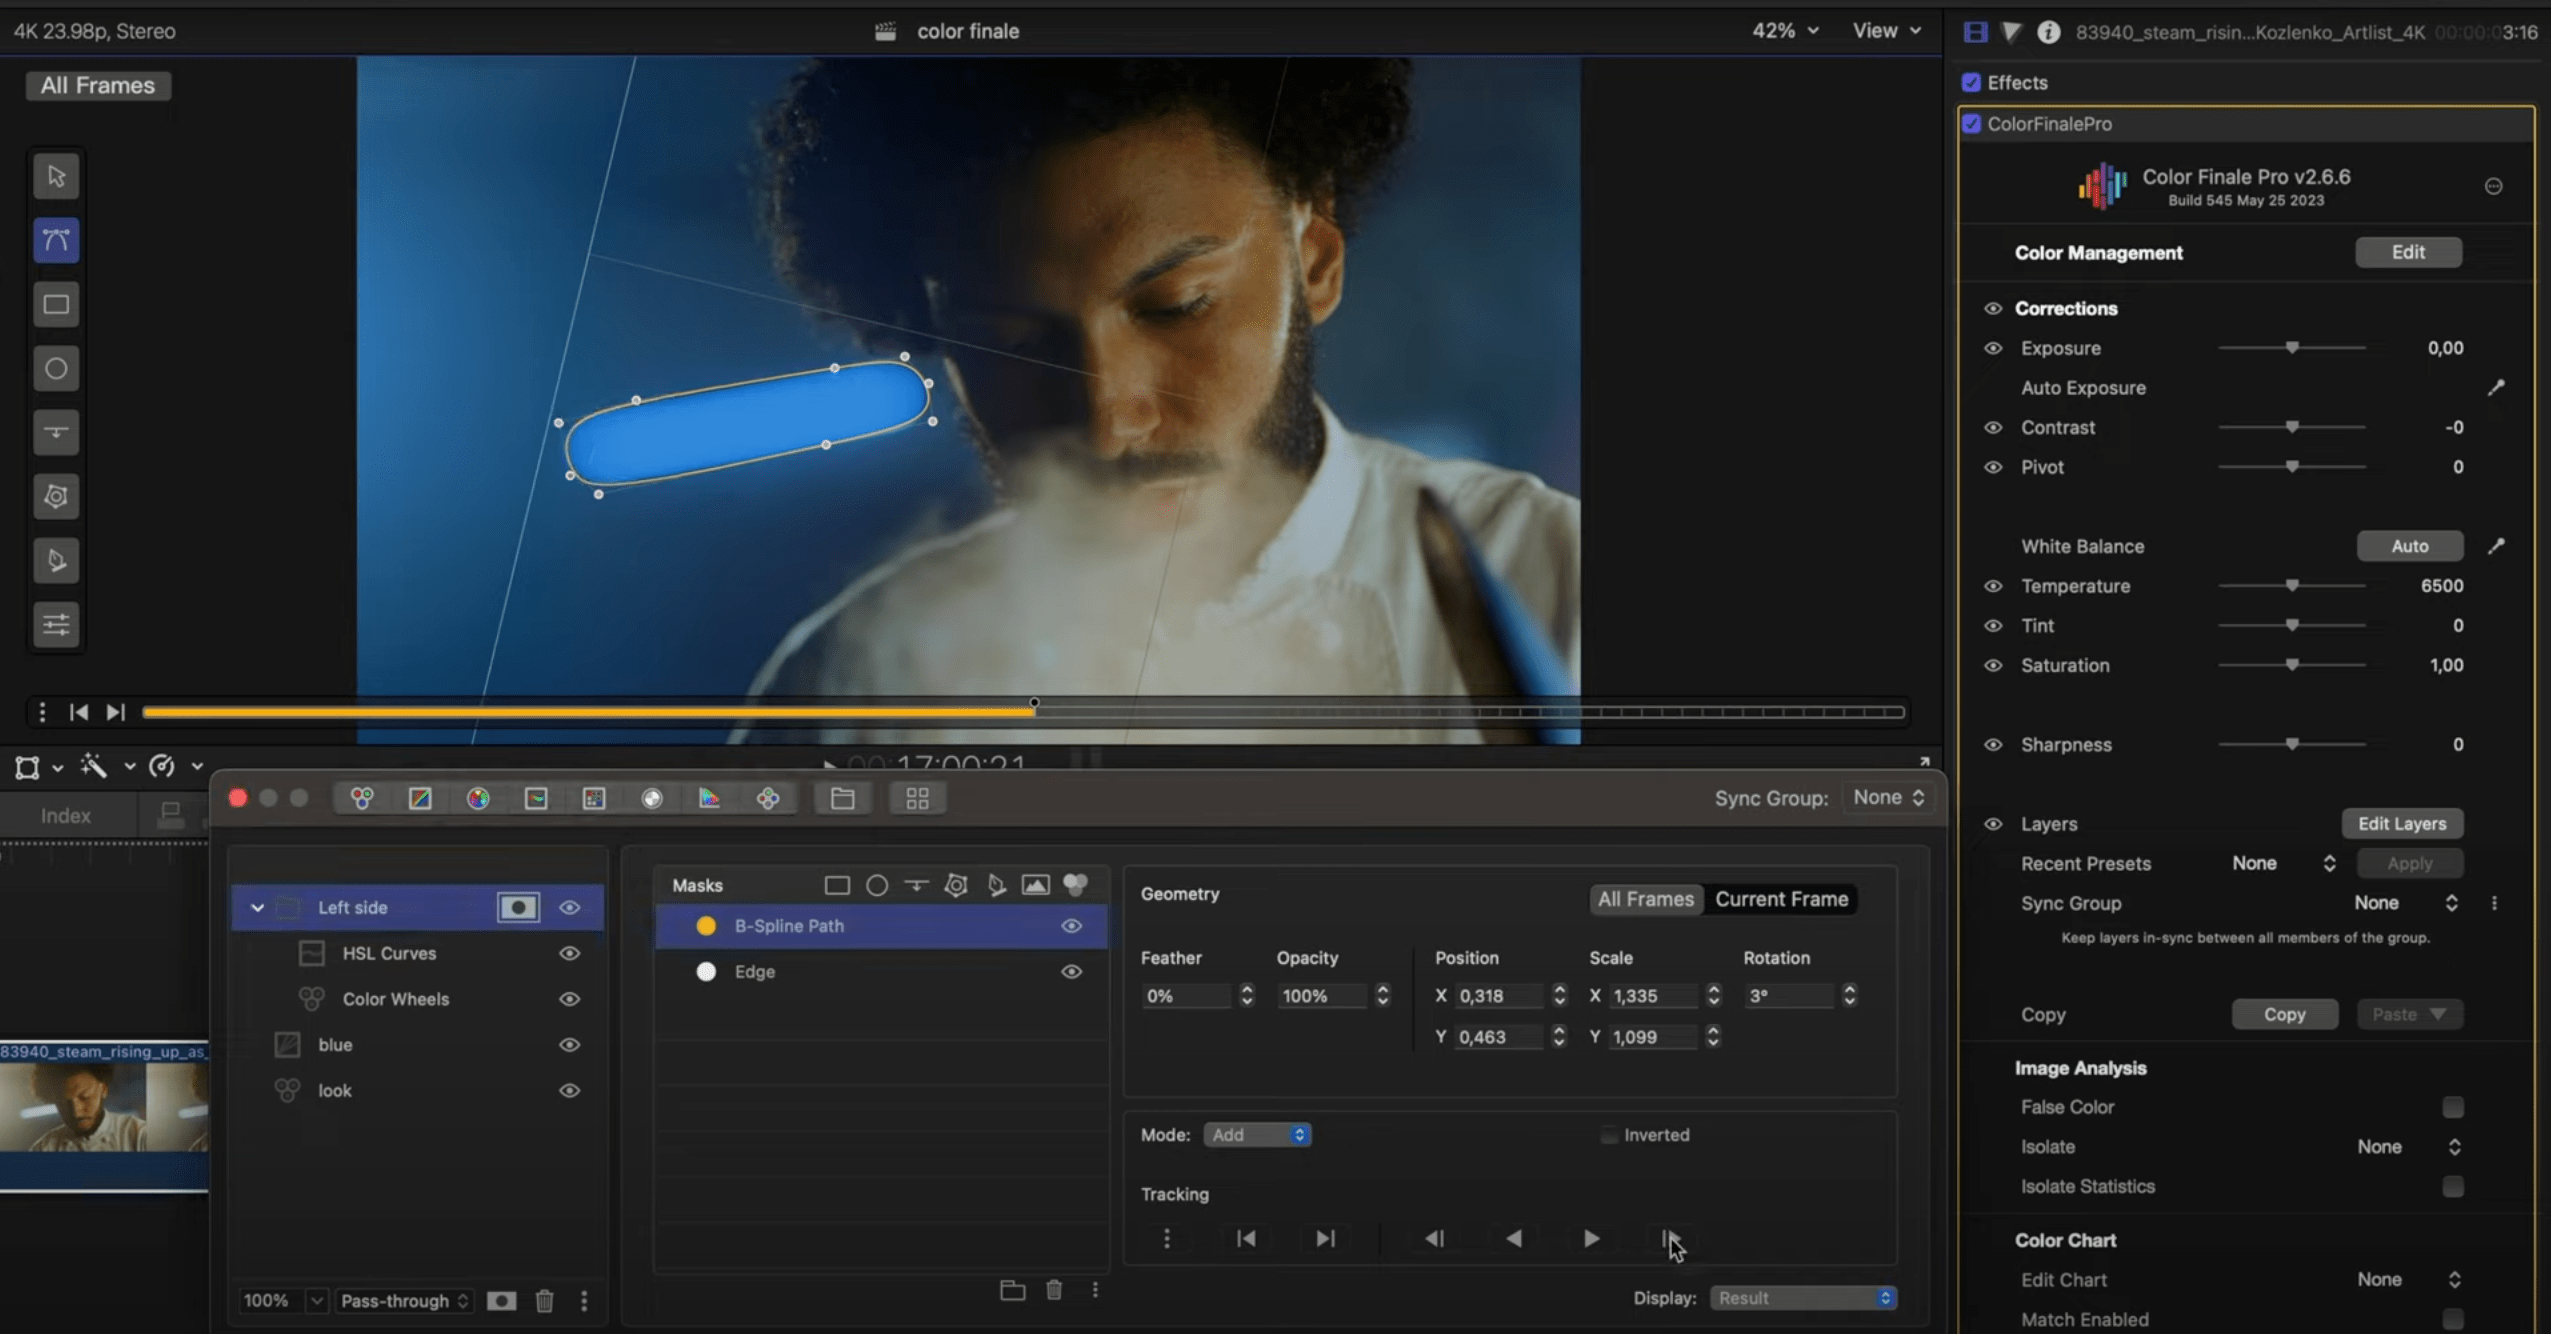
Here's another interesting case where we need to fix a light leak on the left side of the frame. We have already created a look. Create a new group and name it 'left side'.
Add an edge mask on the left side. Track it forward. Now we can use Color Wheels and an HSL Curves layer to colour the white flaring. Done. Everything seems good, but maybe it's a good idea to also accentuate the blue of the tube light in the background.
Create a B-spline mask around the tube. Track it forward. Feather the edges of the mask and choose the subtract mode to reveal the tube light. Done.
You can apply masks over layers that have been grouped together. Just add the mask to the group. Here we have created 3 layer groups that work together to relight a scene. The subject really pops now.
In this example, the white light has been coloured blue using HSL Curves and Color Wheels. One edge mask to capture the light flare from the left, and a B-Spline mask for the tube light in the background. Masks can be feathered for a soft edge.
Example 3
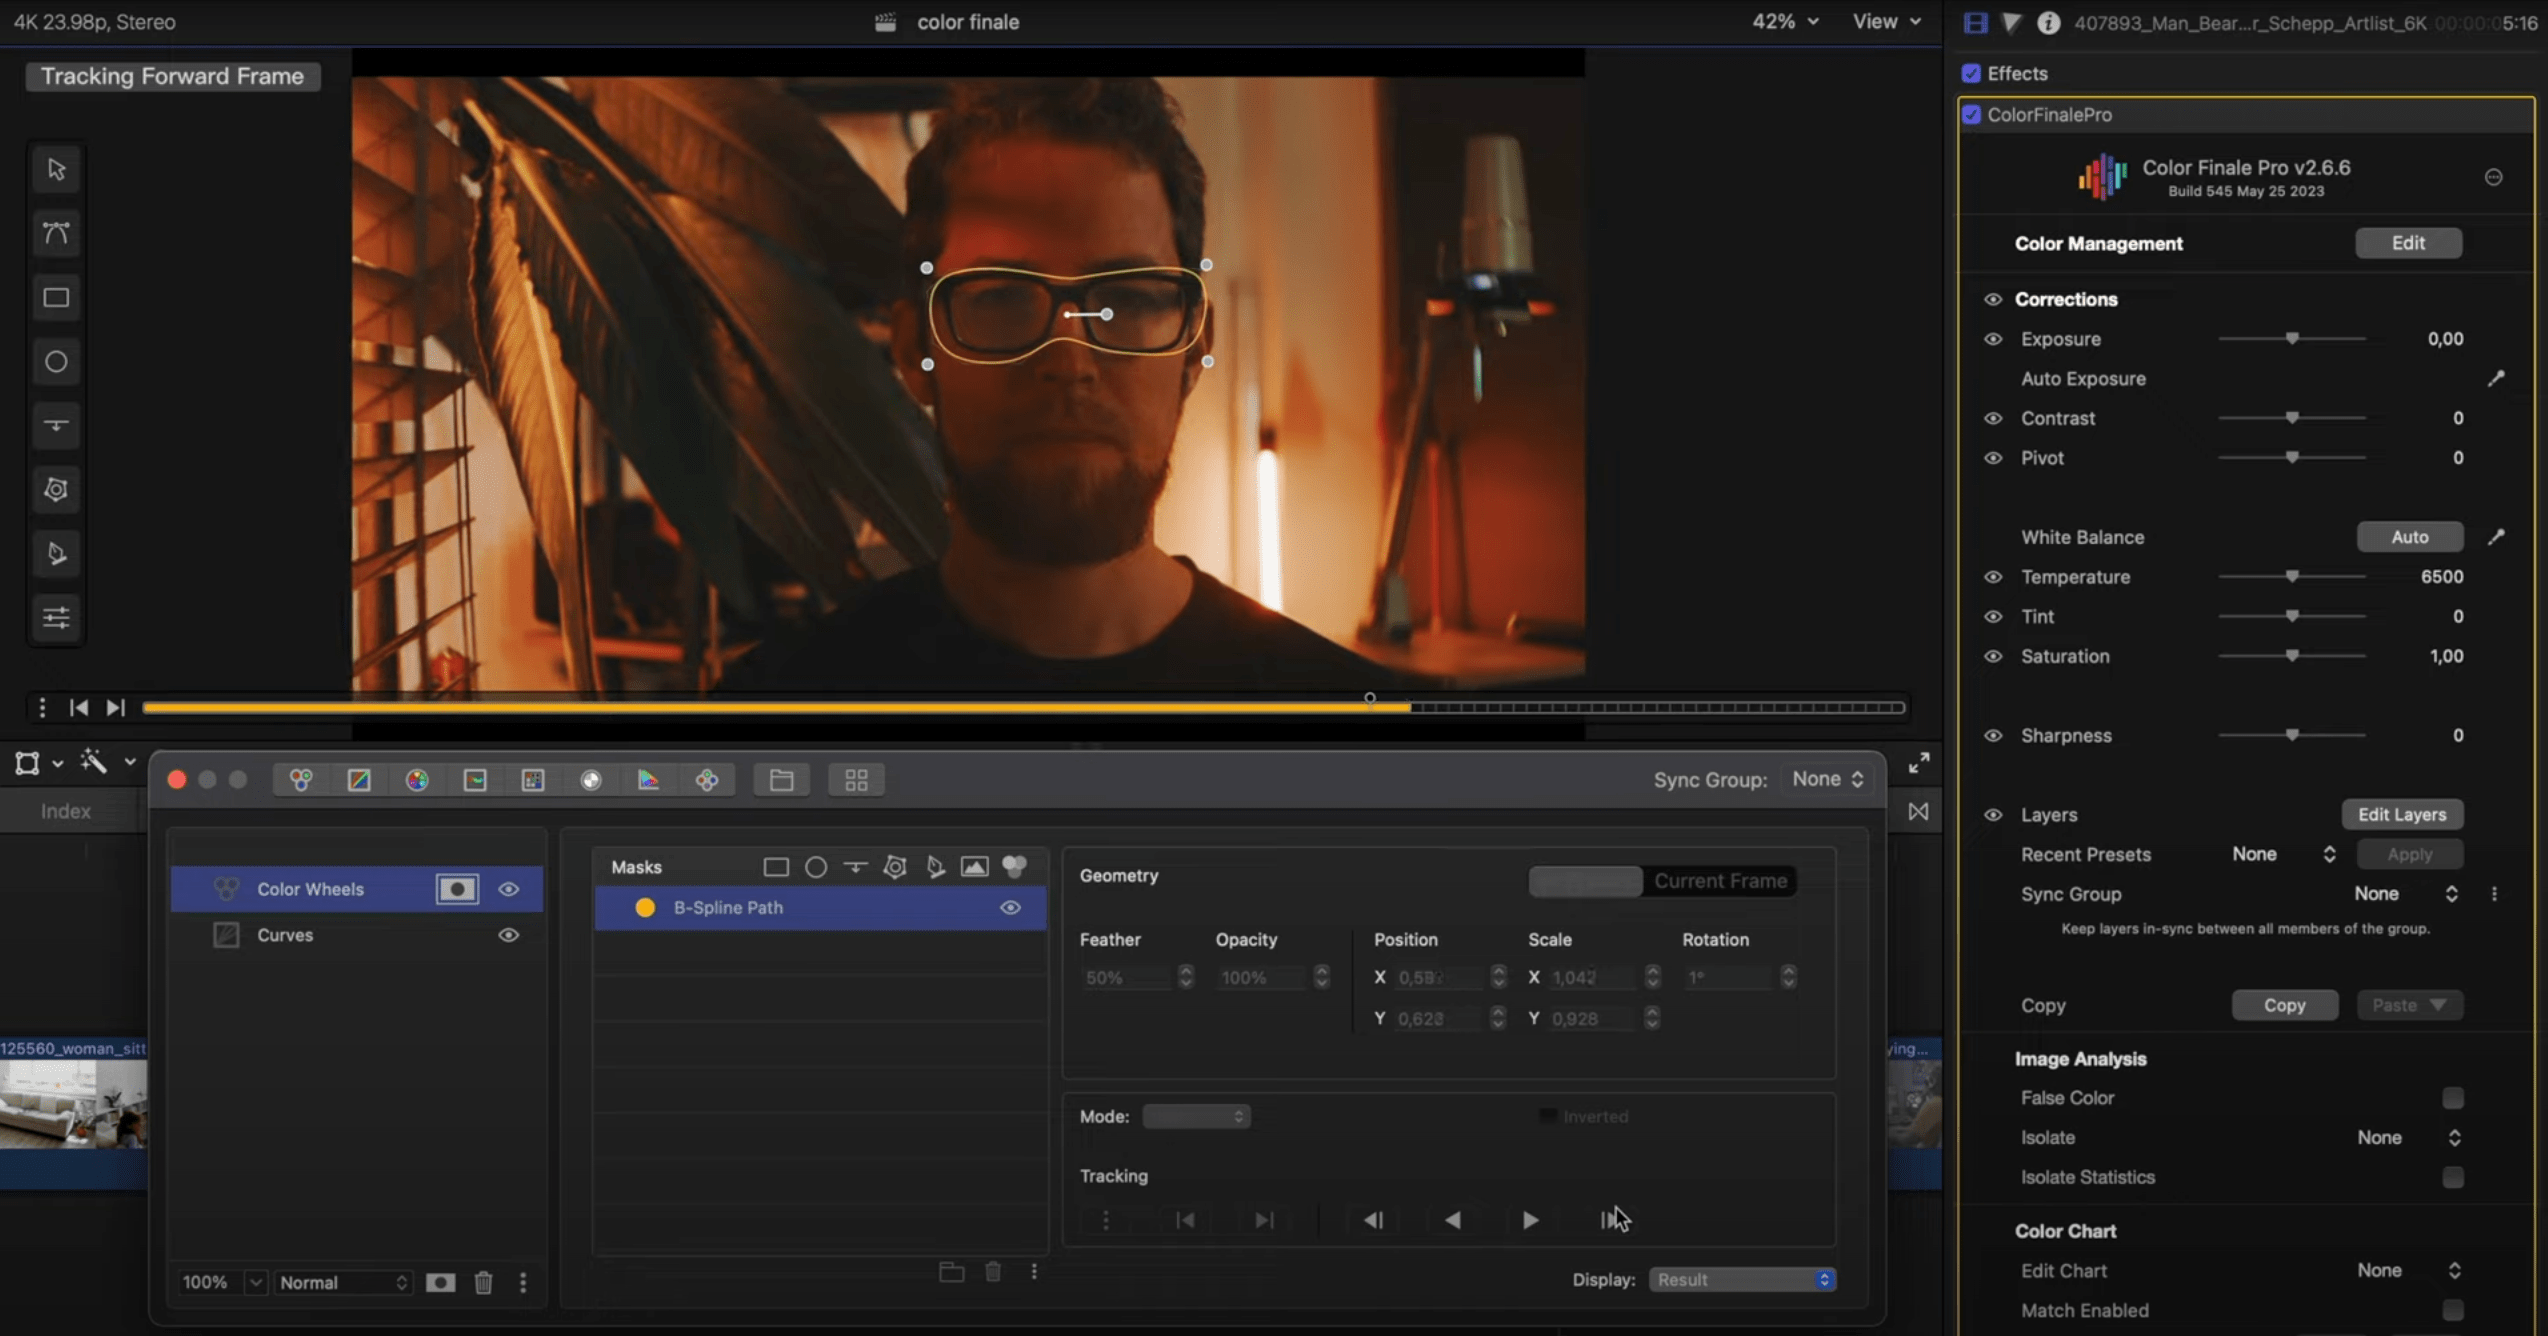
Here we drew and tracked a B-Spline Path to mask the eyes and glasses to bring out a bit more detail in the area.
Example 4
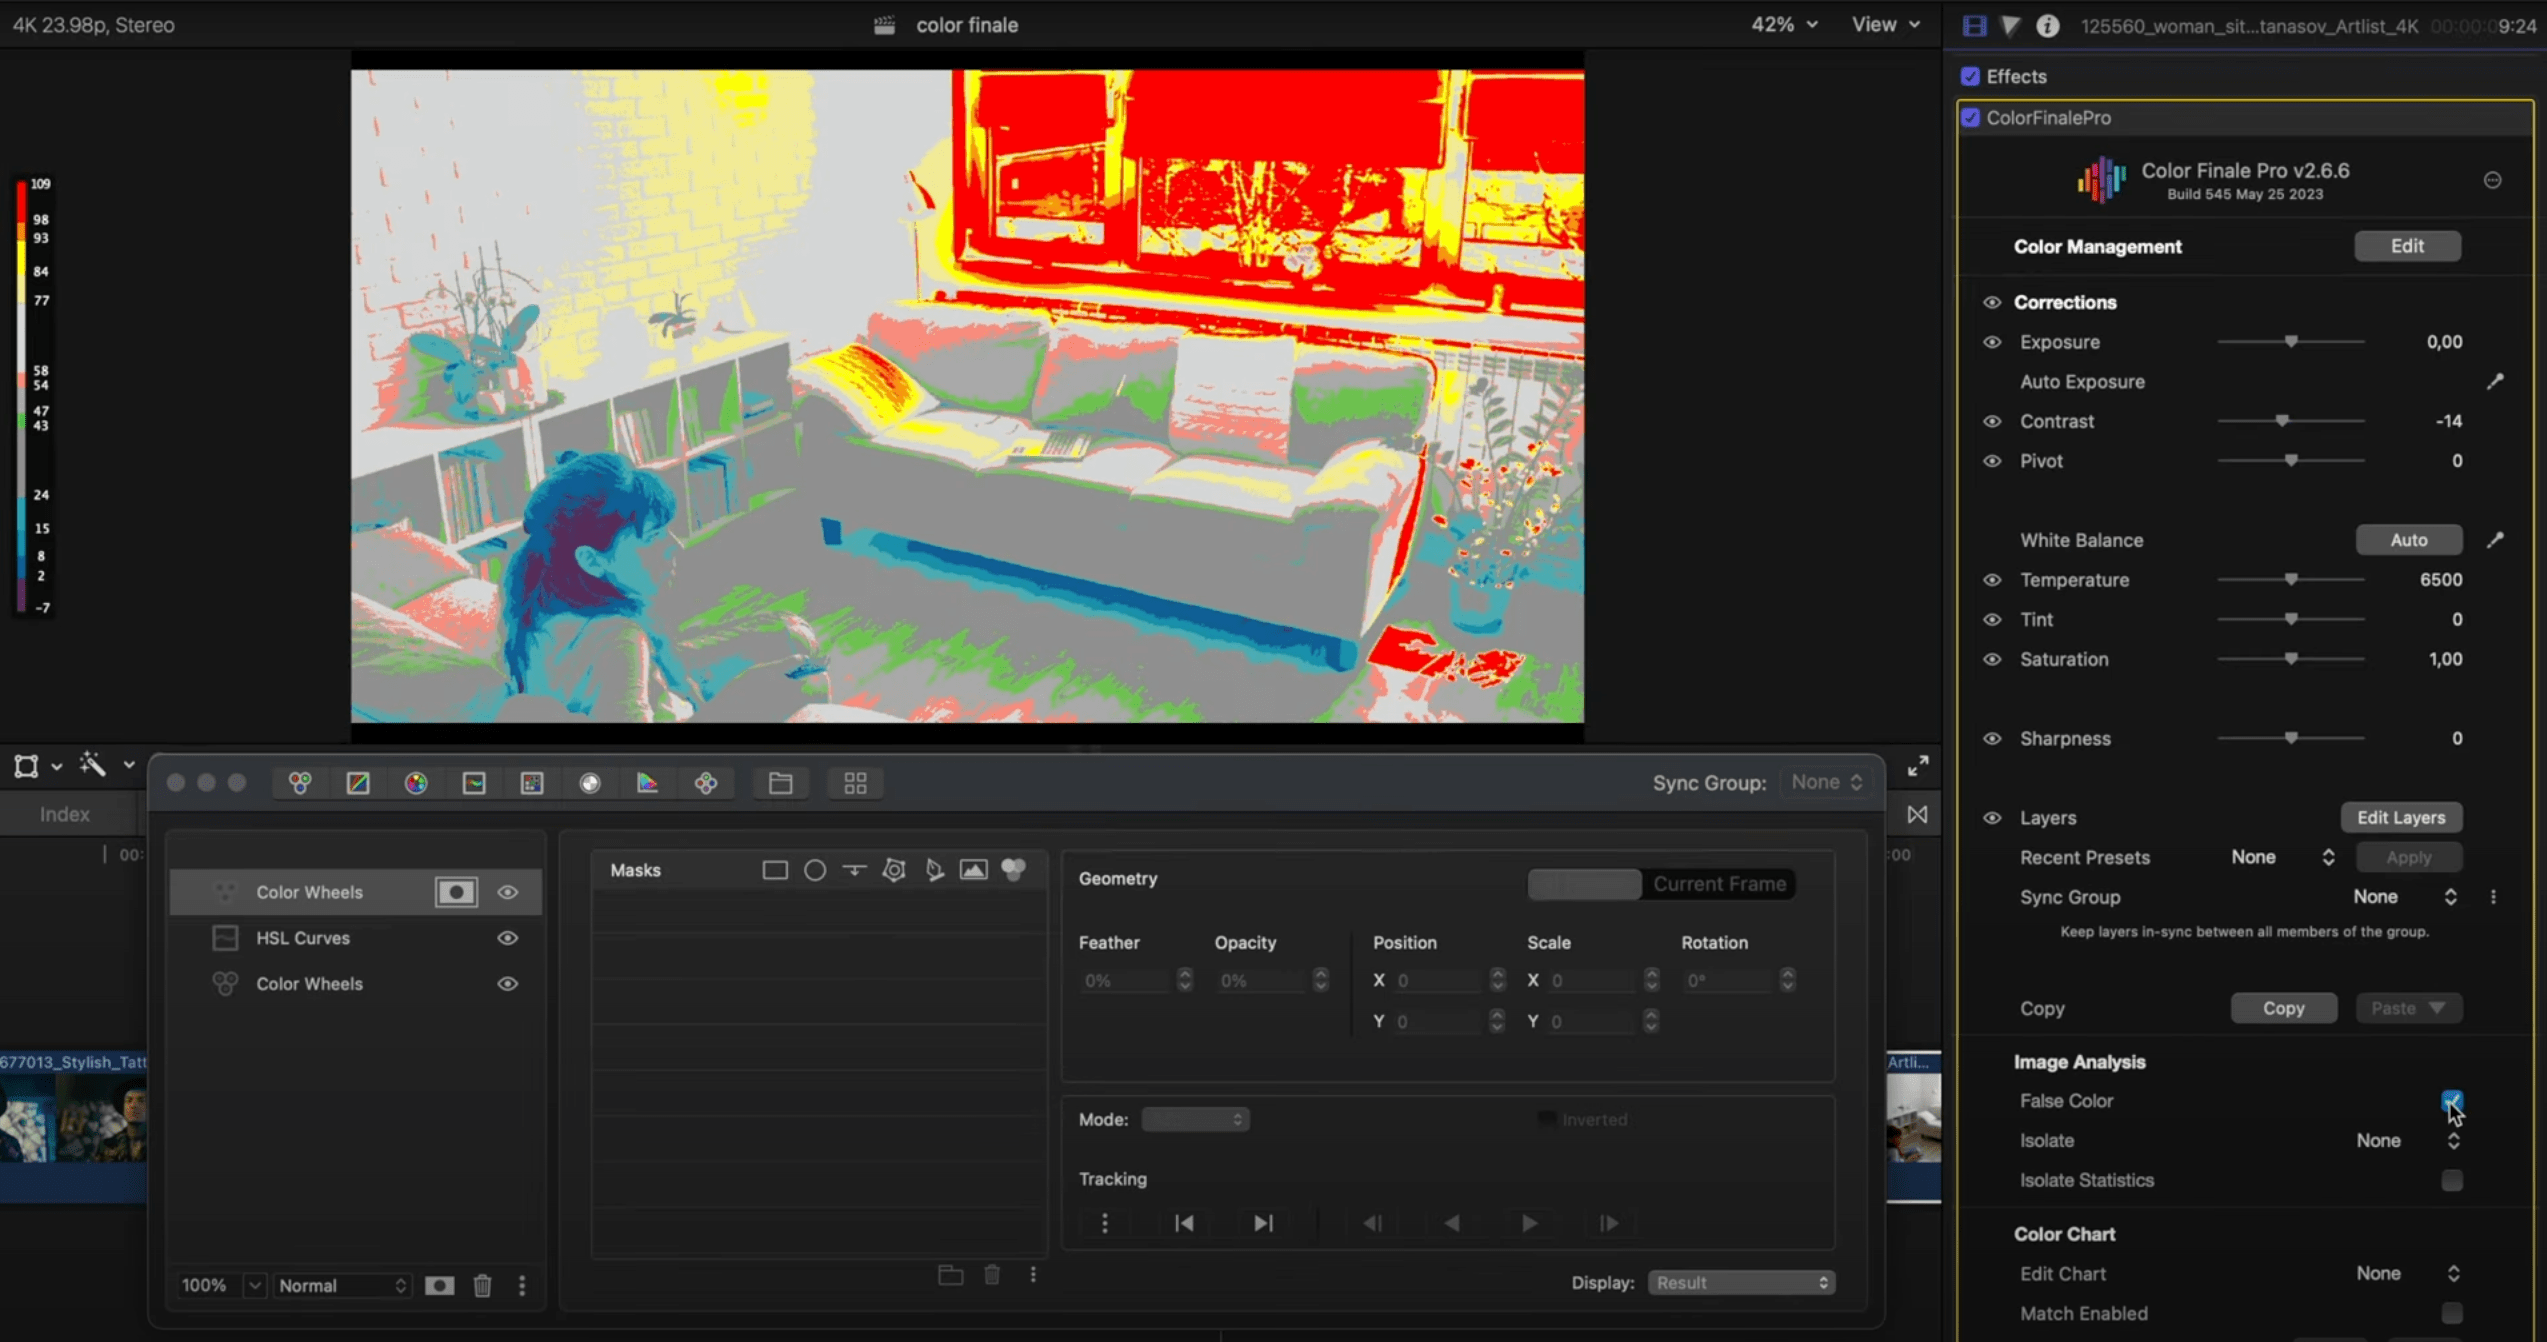
Using False Colour, we can confirm that the window is dangerously in the red. Assuming we have the dynamic range to recover some of the highlights, or just to bring them under 100 IRE, we can use a mask to cover the blown out areas and decrease the brightness with Color Wheels.
Review
If you want to try any of this out for yourself, download the free 7-day trial of Color Finale 2 Pro. Tag us with your results. Thanks for reading, and consider subscribing to our YouTube channel for video versions of this and other entries. Goodbye!