Introduction
A lot of editors love Final Cut Pro for things like the magnetic timeline, but wouldn’t it be great if it came with more options for working with the latest and greatest video formats? That's what we thought when developing Color Finale Transcoder 2. Shoot B-RAW, N-RAW, and other raw video formats while continuing to edit in a familiar interface.
And as you’ll find out, in some crucial cases you won’t even need to transcode.
Workflow
Transcoder 2 is a macOS app that once installed lives in the Applications folder as you'd expect. You can open it from there to use standalone, but inside Final Cut Pro you'll see that it also shows up as a workflow extension. Whichever way you open it, you’ll have the same window and user interface.
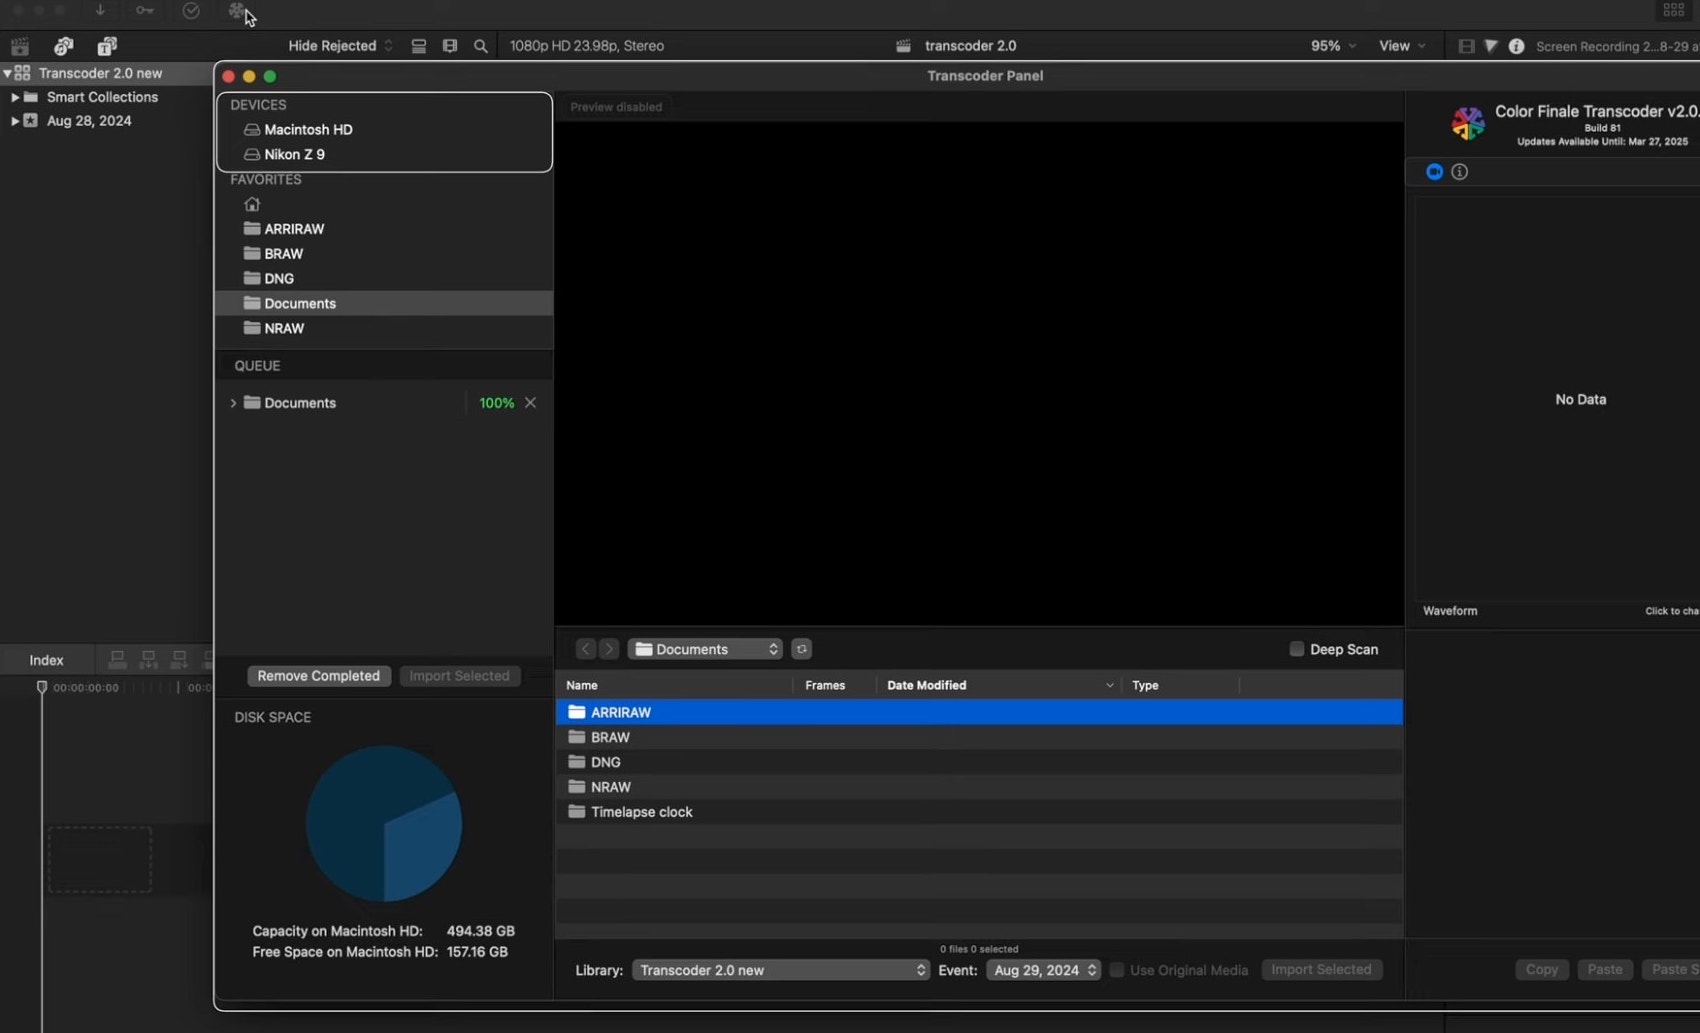
Let's say you've filmed some N-RAW footage. You've already mounted the card on your Mac, and want to start cutting it as quickly as possible. You’ll see all your internal and mounted drives in the left panel, and once selected the relevant files pop up in the media browser underneath the viewer.
Once you've found the clips you want to use, you can trim them using the I and O keys, or by dragging the in and out points.
Sometimes the raw clip might need some exposure and colour temperature adjustments. On the right hand side panel you’ll find raw parameter controls, and scopes to help you evaluate any changes you make. Metadata of clips is preserved too. You can access it by changing the tab from adjustments to the metadata view above the scopes. Adjustments made in this panel define the final look of the transcoded clip.
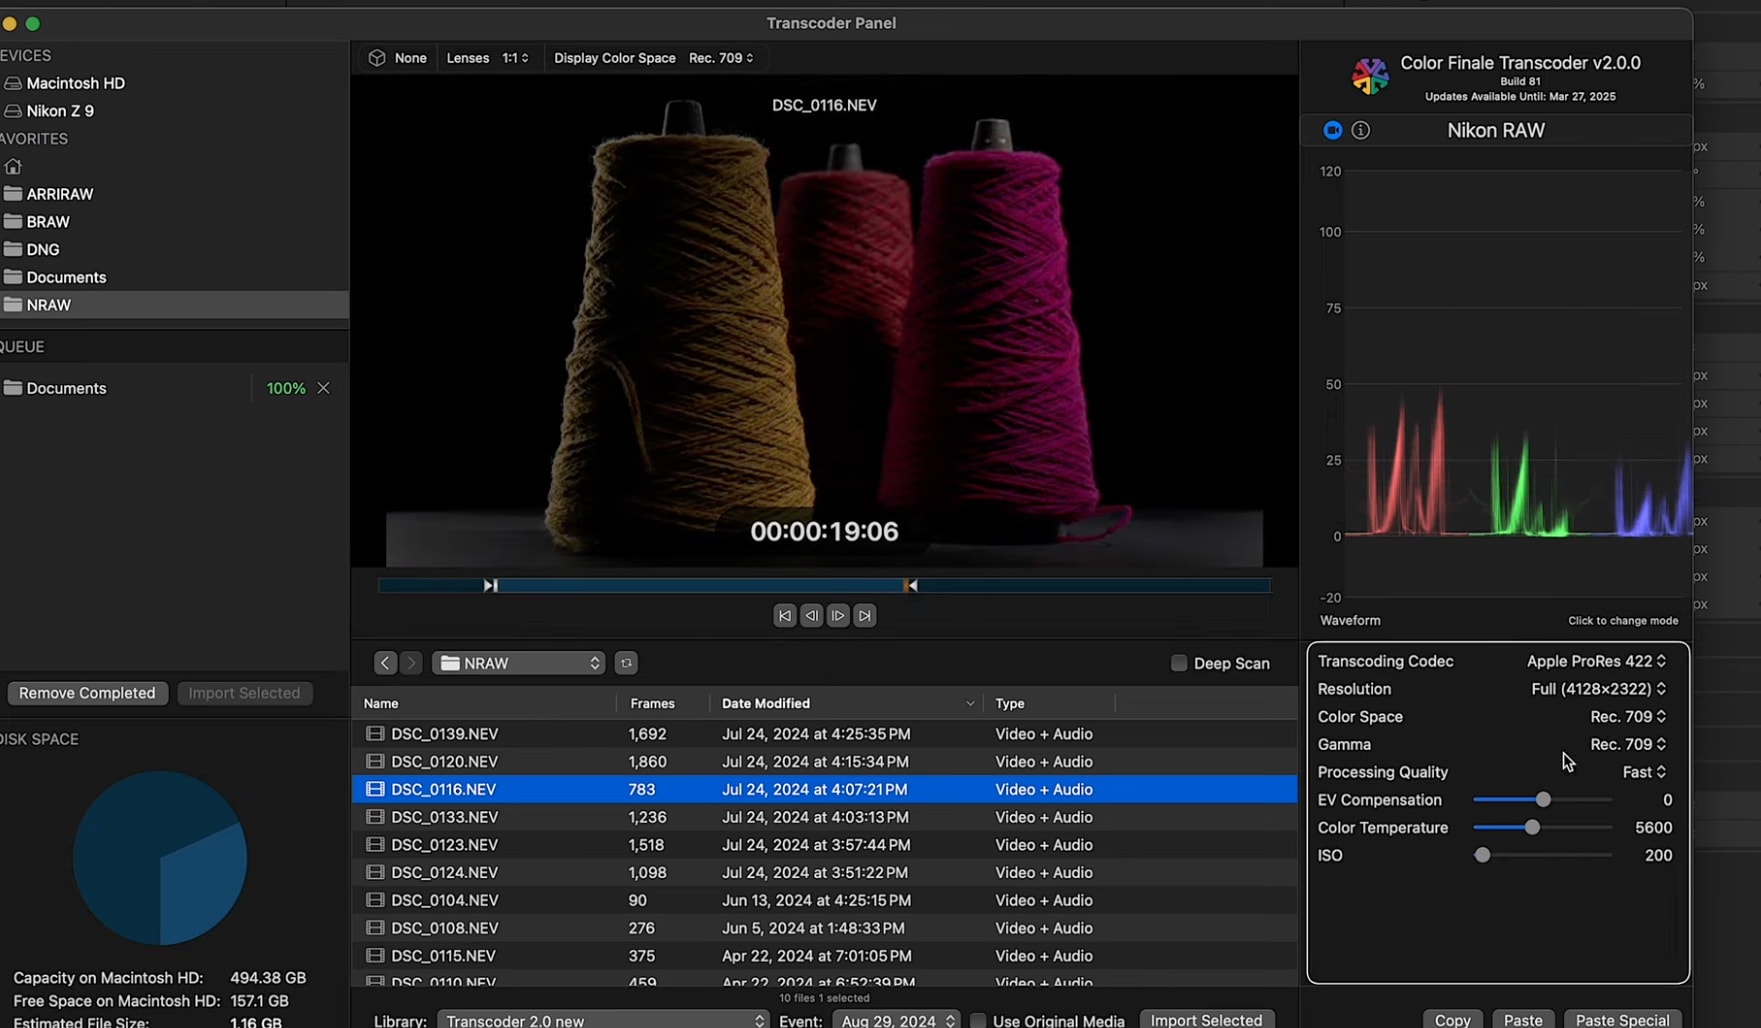
You will also see controls and options at the top of the viewer. These include a LUT picker that lets you put a LUT over a clip and an option to de-squeeze anamorphic footage. Note that these are the viewer’s settings, and they're not saved with the exported video.
Once you’ve selected, trimmed, and prepared your raw clips, it’s time to save them to a location. At the bottom, below the file browser, you can select which FCP library you want to put them into.
If you would like to save them outside of FCP, right click on the file and select 'Queue for Transcoding to...' to save to any destination, such as an external drive. The transcoding process is added to the queue on the left of the window, and once finished you can also import these files into Final Cut Pro just by dragging and dropping from the queue into the Library or directly onto the open timeline.
Using Original Media
Alongside the Library import options at the bottom of the Transcoder 2 window there is an option to import original media. Turn this on and you don't even need to transcode N-RAW and B-RAW clips! Transcoder 2 comes with two plugins for the respective formats that are added automatically during import. They include controls over several parameters like color temperature and exposure.
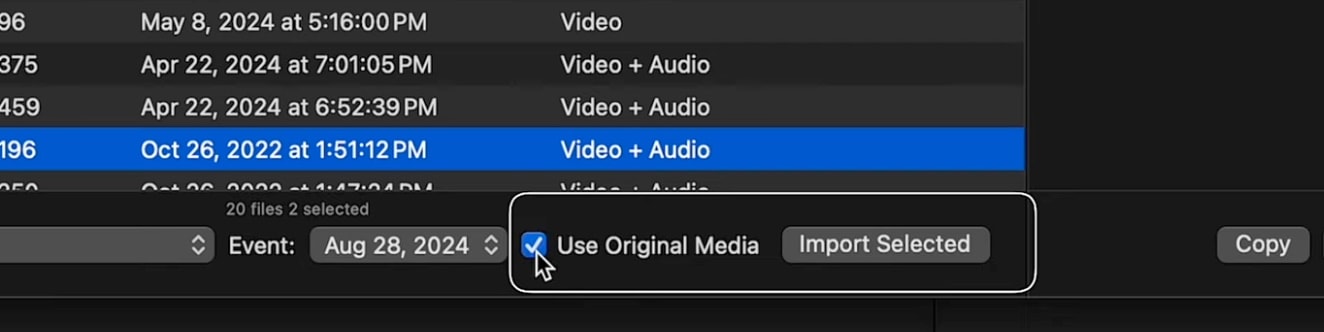
With this original media option is turned on, it's the original raw files that are being used, so they have to be available at all times while you’re editing — that means if you have the files stored on an external drive, make sure to keep it mounted.
That's it. The next step is to edit and colour grade!
If you’re not a Final Cut Pro user or just want to quickly get a big raw file into a state that you can share or use in other editors, 'Queue for Transcoding to...' is what you want.
Image Sequences
Color Finale Transcoder 2 can also combine raw stills sequences into a video. For example, you can shoot a time-lapse and then save it as a .mov file.
Simply browse to the folder where the images are located, and if they are in sequence, they will automatically show up under one file name, just the same as with a raw video file. You can then select the framerate, adjust raw parameters such as exposure, white balance and contrast, and even set the start and end points as before. Finally, export using 'Queue for Transcoding to...'
Here are some examples of common file name patterns that will be picked up by Transcoder 2 and collapsed into one file in the browser:
- example.####.jpg
- example.1.jpg
- example.0001.jpg
- @.jpg
- name####.jpg
- name0001.jpg
Conclusion
Now you know how easy it is to work with N-RAW, B-RAW, and other raw video formats in Final Cut Pro using Color Finale Transcoder 2. You can try free for 7 days or buy Transcoder 2 at our web store.