Intro
Log footage might look dull and flat right out of the camera — but that’s a feature, and exactly what makes it so powerful. But you’ll need to put in a bit of work to get it looking great.
In this tutorial, we'll tell you how to quickly transform Sony S-Log3 footage into a clean base using Color Finale 2 Pro, a color grading plugin for Final Cut Pro.
We’ll focus on building a strong foundation: normalising and balancing S-Log3 footage as a starting point before color grading.
The workflow that we'll show is designed for Sony's S-Log3 in mind, but the same principles apply to other Log profiles like Canon C-Log, Panasonic’s V-Log, and Blackmagic Film.
Let’s get started.
Normalising Your Footage: Three Practical Workflows
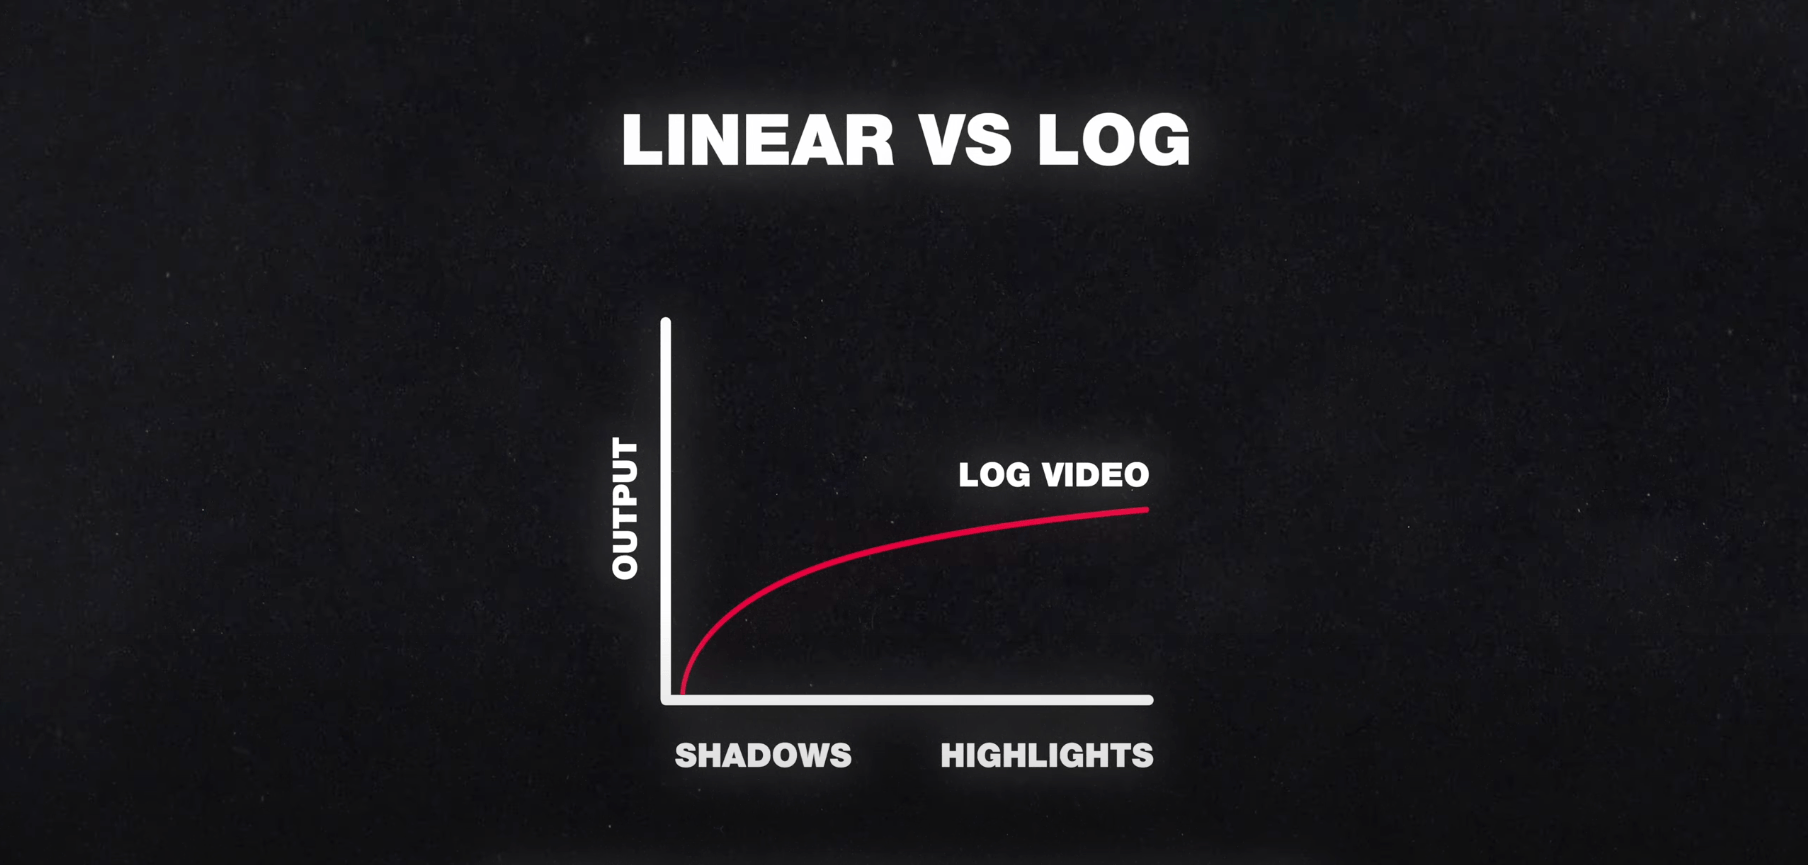
Log footage isn’t designed to be viewed directly — it encodes dynamic range using a logarithmic curve to fit more highlight and shadow information into a compact digital format.
On a side note, is there a difference between a raw video files and log? RAW is unprocessed, linear sensor data — very flexible but requires extensive post-processing and a process called debayering. Log footage is further down the line. S-Log3 is already encoded video, only one that uses a logarithmic transfer curve to preserve dynamic range in a compressed format. It’s processed to some extent, but still offers that crucial flexibility that makes it great for colour grading.
To make Log footage viewable and gradable, we need to transform it into what we’ll call a video-like colour space — typically based on Rec.709.
Color Finale 2 Pro gives you three practical ways to do this:
1. Technical LUT – Fast Log-to-Video Conversion
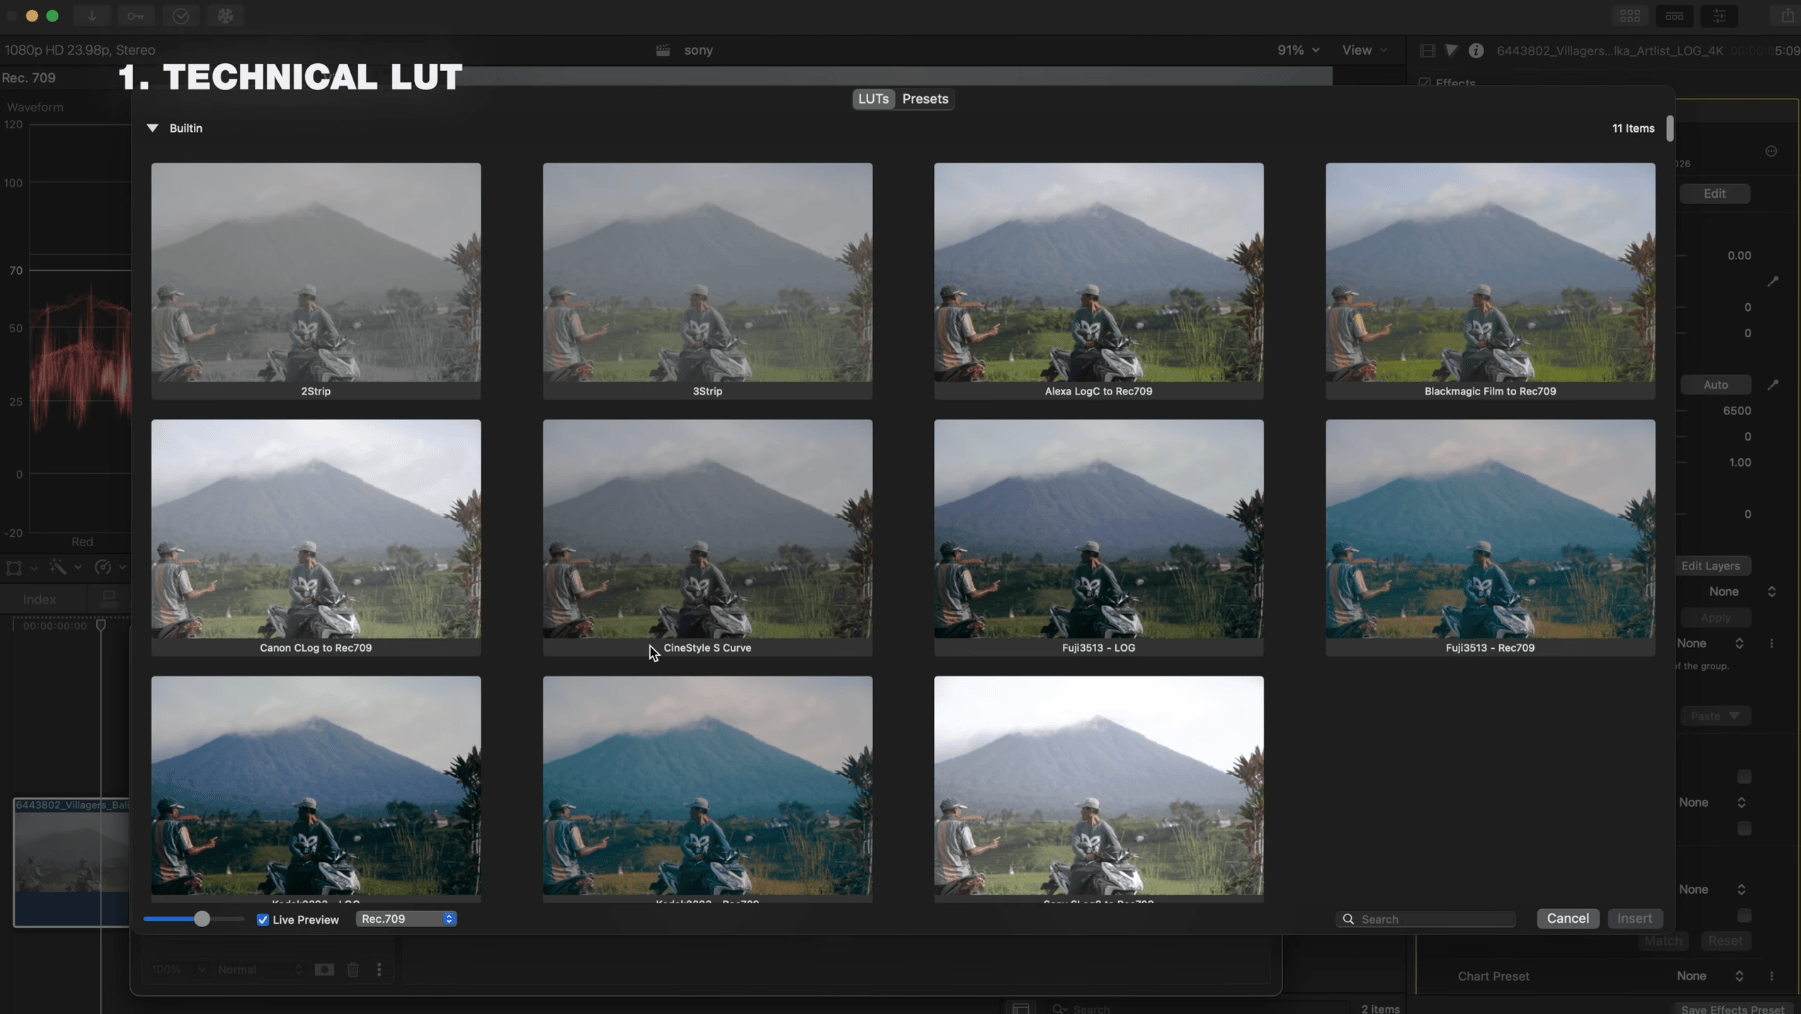
Use a technical conversion LUT to bring your Log footage into a video colour space.
• Add a LUT layer in the layers panel
• Select a conversion LUT that matches your Log format (e.g., S-Log3 to Rec.709)
• If available, use exposure-compensated versions (for example -0.5EV). This is to better match the lighting conditions in your shot.
This method is quick and convenient — but the transform is baked in and not colour managed. It’s useful for speed, but you’ll have limited control over the image once the LUT is applied.
2. Log Wheels – Display-Targeted, Scene-Aware Grading
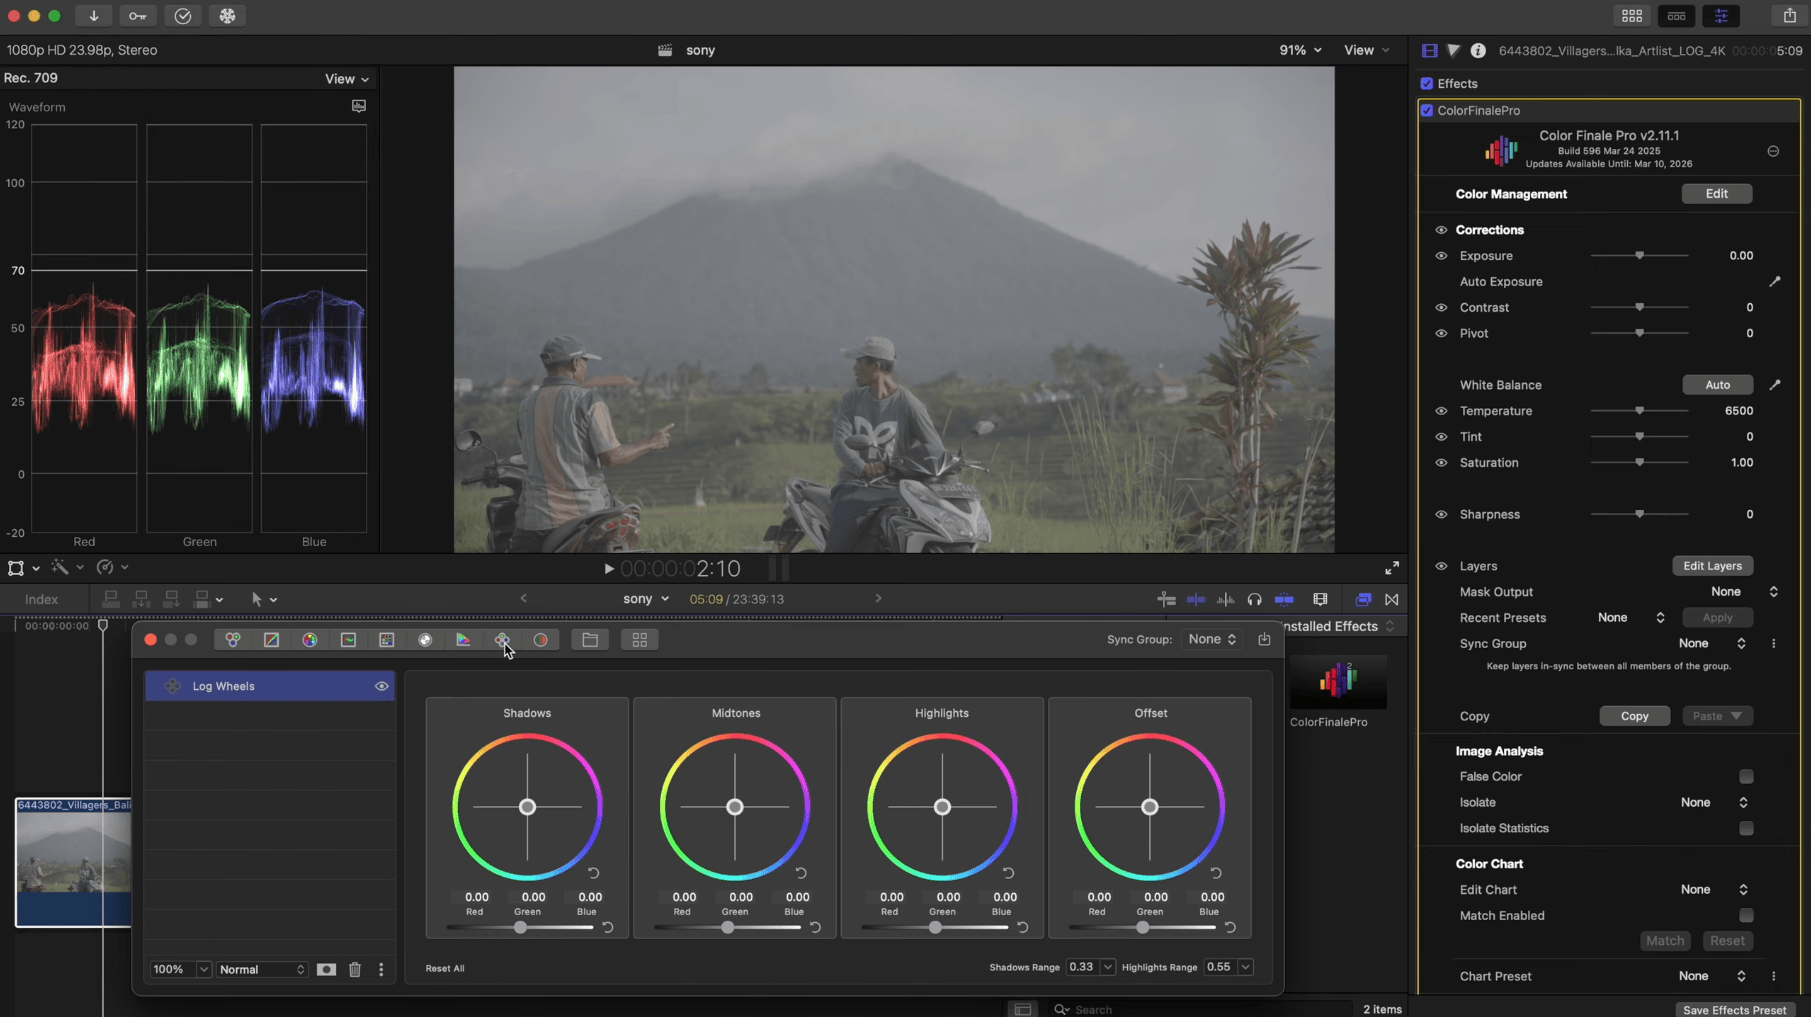
A powerful second option is to grade directly in Log using Log Wheels, then apply a display LUT or film look on top.
• You shape the tonal range manually within the Log space • And then apply a LUT as a final output transform
This tool is ideal for balancing the image while maintaining full dynamic range. A few adjustments here can go a long way:
• Lower the overall exposure slightly using the Offset wheel
• Add warmth by nudging the Offset tint toward orange and yellow
• Balance shadows, midtones, and highlights for a clean, natural result
This method isn’t fully scene-referred (because we’re still grading for a specific display), but it offers maximum control over how Log data is interpreted before display compression.
You can always go back and adjust Log Wheels under the LUT to recover or enhance shadows and highlights. Just make sure to keep the Log Wheels layer below the LUT layer.
This is a preferred method for many colorists working with Log footage — it's flexible, intuitive, and powerful.
3. ACES – Scene-Referred Workflow
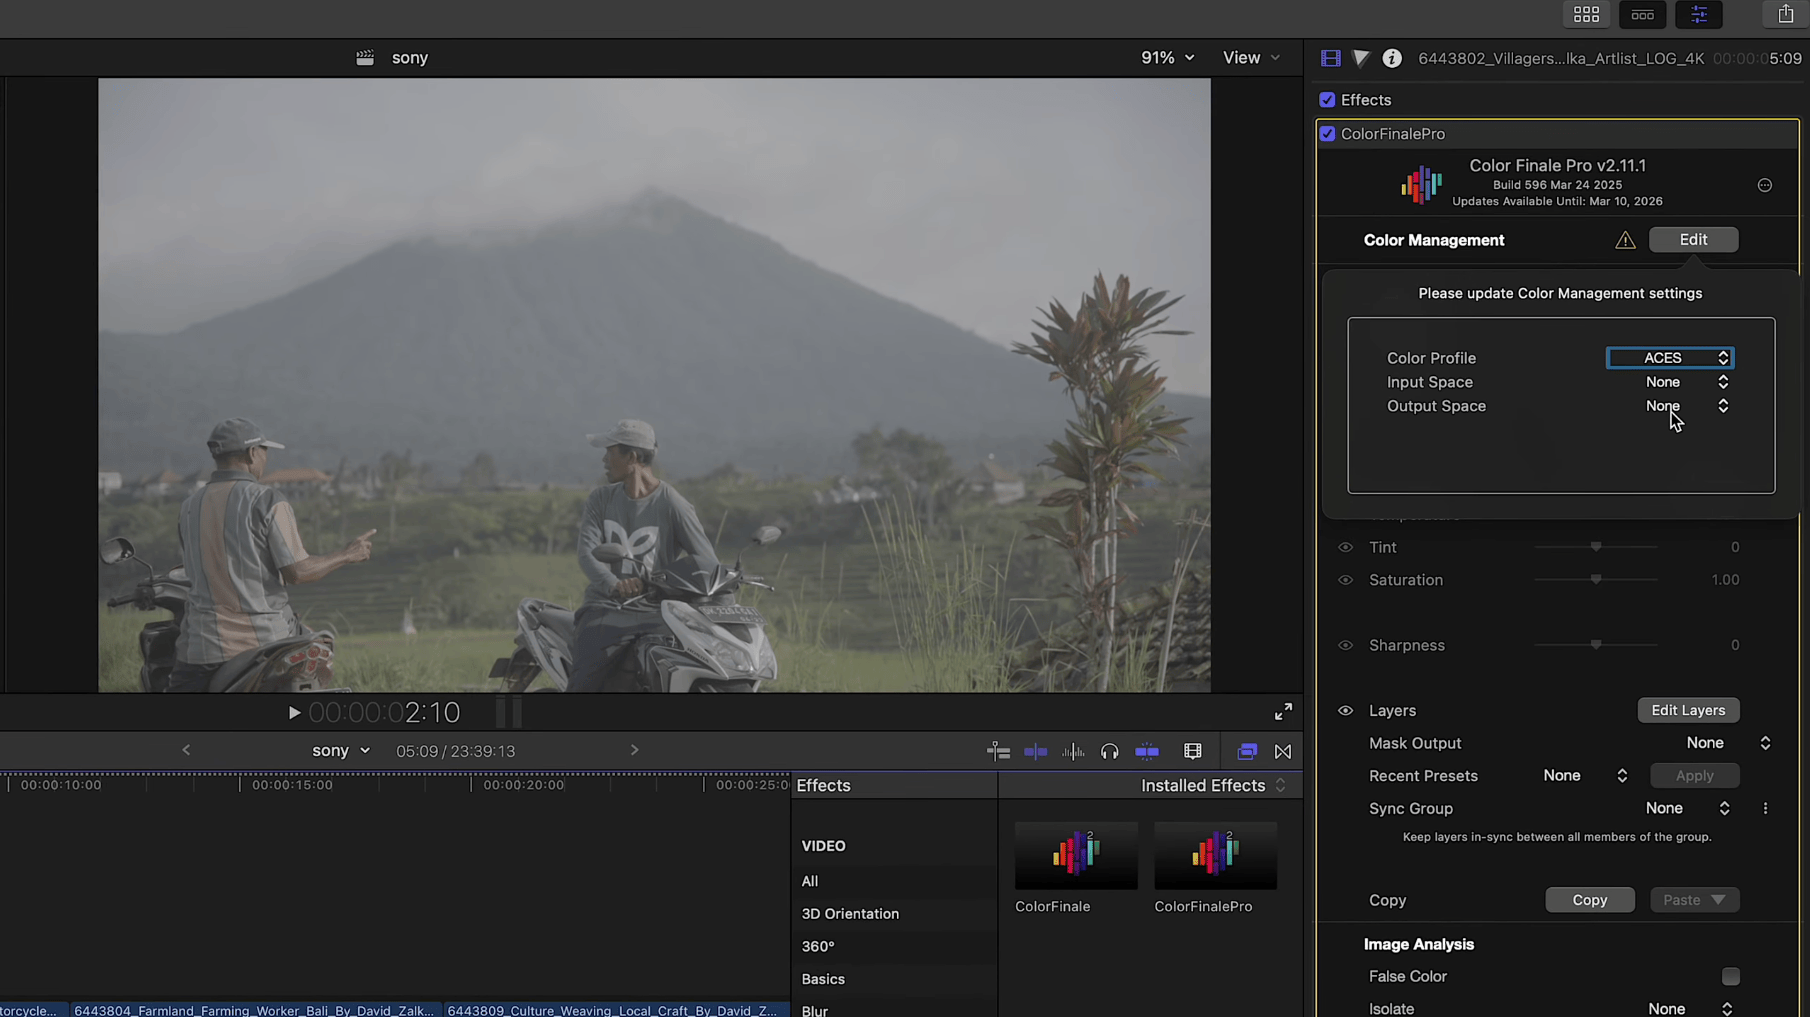
If you’re working with supported cameras and want a structured, scene-referred pipeline, Color Finale 2 Pro supports ACES:
• Set your Input Transform for example, S-Log3/S-Gamut3.Cine)
• Set your Output Transform, typically Rec.709 at 100 nits works well
This keeps your grading decisions tied to the original scene lighting. It’s consistent and technically robust — but best suited for professional environments and supported cameras.
Summary
• You can use a technical LUT for fast conversion, but it’s the least flexible option.
• Log Wheels: full control under your own terms, within a display-targeted context.
• ACES: robust scene-referred workflow for supported cameras.
Try for yourself
Interested in trying these features out for yourself? Try a free 7-day trial of Color Finale 2 Pro to see how it can improve your Final Cut Pro workflow!