Contents
- Introduction
- What’s a good skin tone?
- Tools of the trade
- Scopes
- Image analysis
- Primary corrections
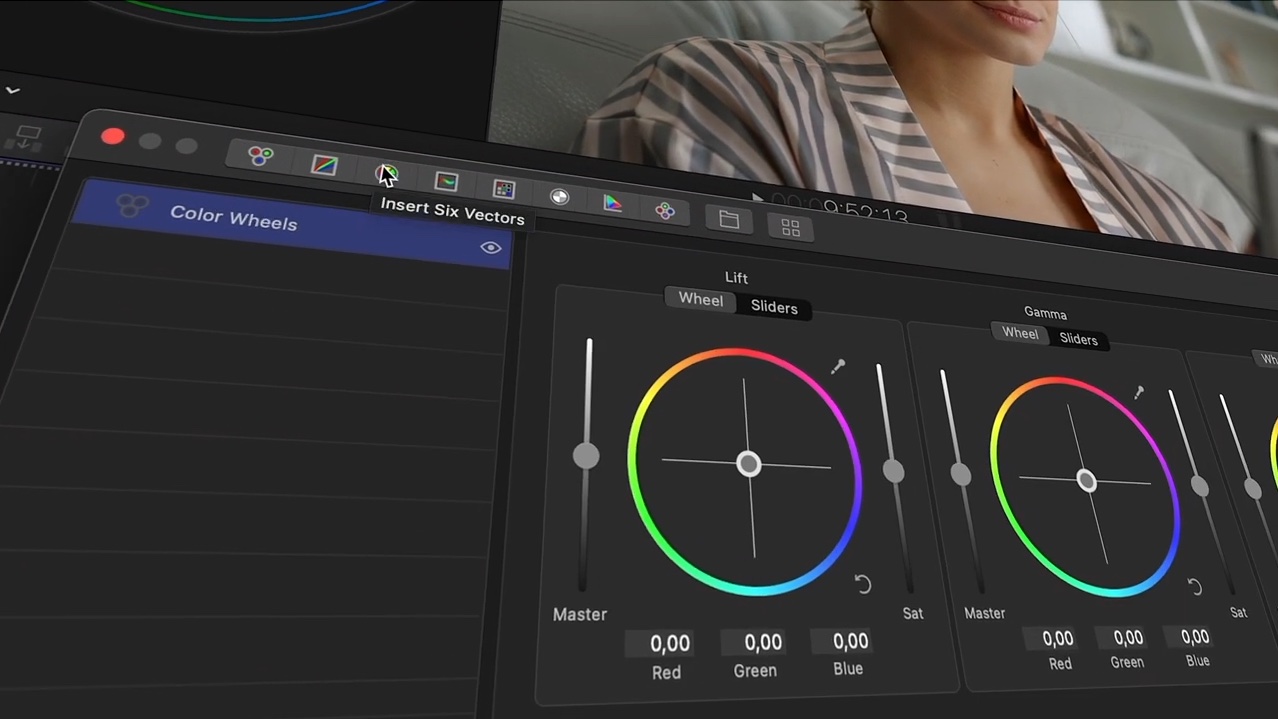
- Six vectors
- HSL curves
- Camera matrix
- Subtractive grading
- Advanced: using masks

Why does the person above look healthy, and the one below, doesn’t?

Our vision is highly attuned to recognise healthiness in individuals, we've had hundreds of thousands of years of practise. We're really good at it. So seeing even small deviations from that can have a big impact on our enjoyment of a film or video.
We’re going to show you how to colour correct your footage to create natural-looking skin tones using the powerful tools in Color Finale 2 Pro, a colour grading plugin for Final Cut Pro.
Download the free 7 day trial to follow along.
What's a good skin tone?
We can all agree that there probably isn't such a thing as a 'perfect’ skin tone in videography, but we can consider a job well done once skin tones read well within the context of a scene.
The best thing anyone can do to promote this is to get as much as possible done well in-camera, at the time of shooting. That along with primary colour correction where you set appropriate exposure and white balance might just in itself fix the appearance of skin—but of course in practise, in your colour grading role you will inevitably be faced with footage that needs a lot of work.
Tools of the trade
Color Finale 2 Pro has everything you need to help you create high quality results.
So when down in the trenches you’ll be using various tools to inspect, then change the luma, hue, and saturation values of an image. We'll go through several of these shortly.
To evaluate the result, you'll use your eyes as well as the built-in video scopes.
Scopes
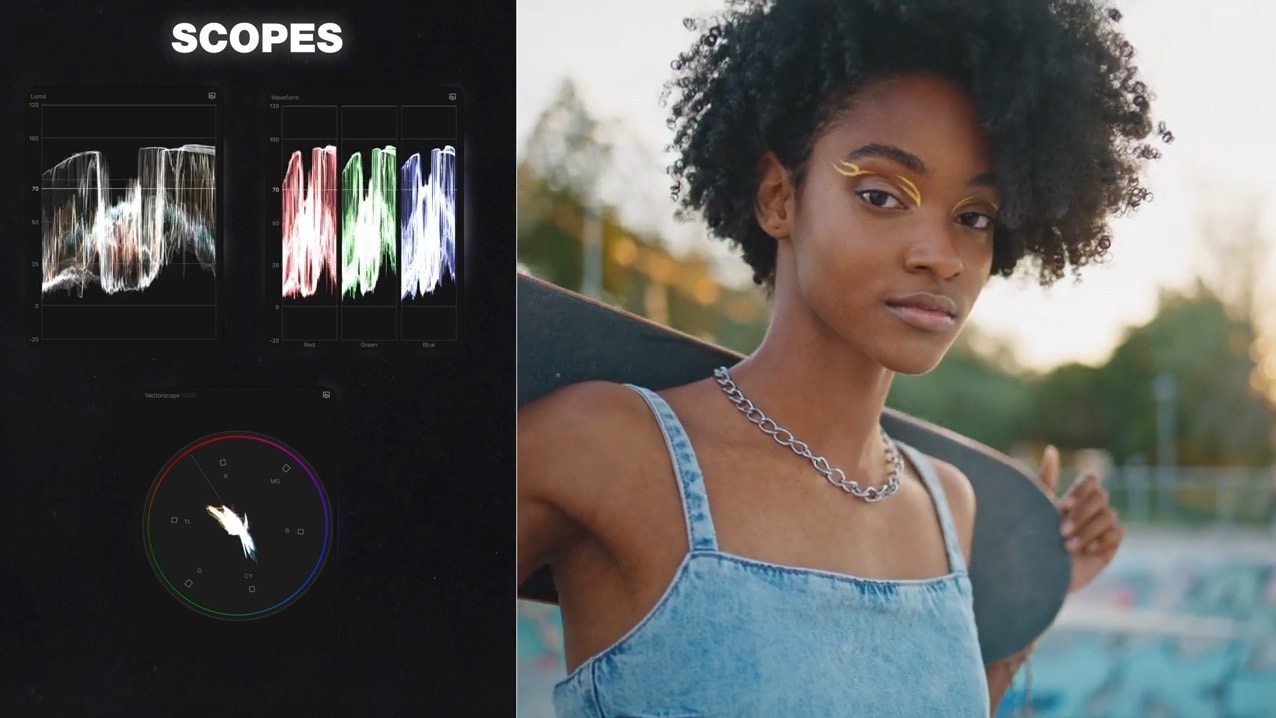
Scopes give an additional way to analyse a video image and can be invaluable to getting quality and repeatable results across multiple clips.
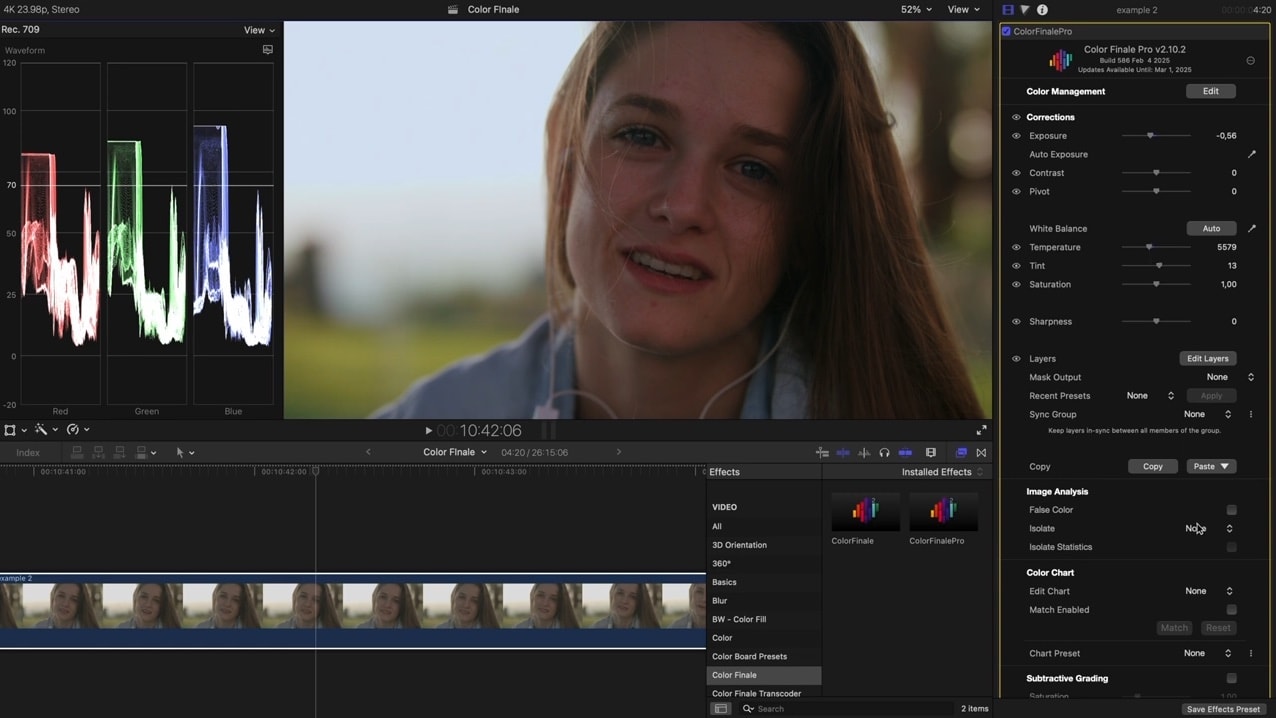
The waveform monitor (top left) shows luminosity levels, or tones. It's great for checking black levels and highlights. In RGB parade mode (top right), it's also useful for white balancing since each colour channel is displayed separately. Then it's easy to see what the effects of a parameter change are on a single channel, for example on red.
Now the vectorscope (bottom) is basically a colour wheel that displays the hue and saturation (or chroma). Glancing at it you can easily see if there is any overall colour cast, and how saturated the colours are. The closer to the edge, the more saturated.
Image analysis tools
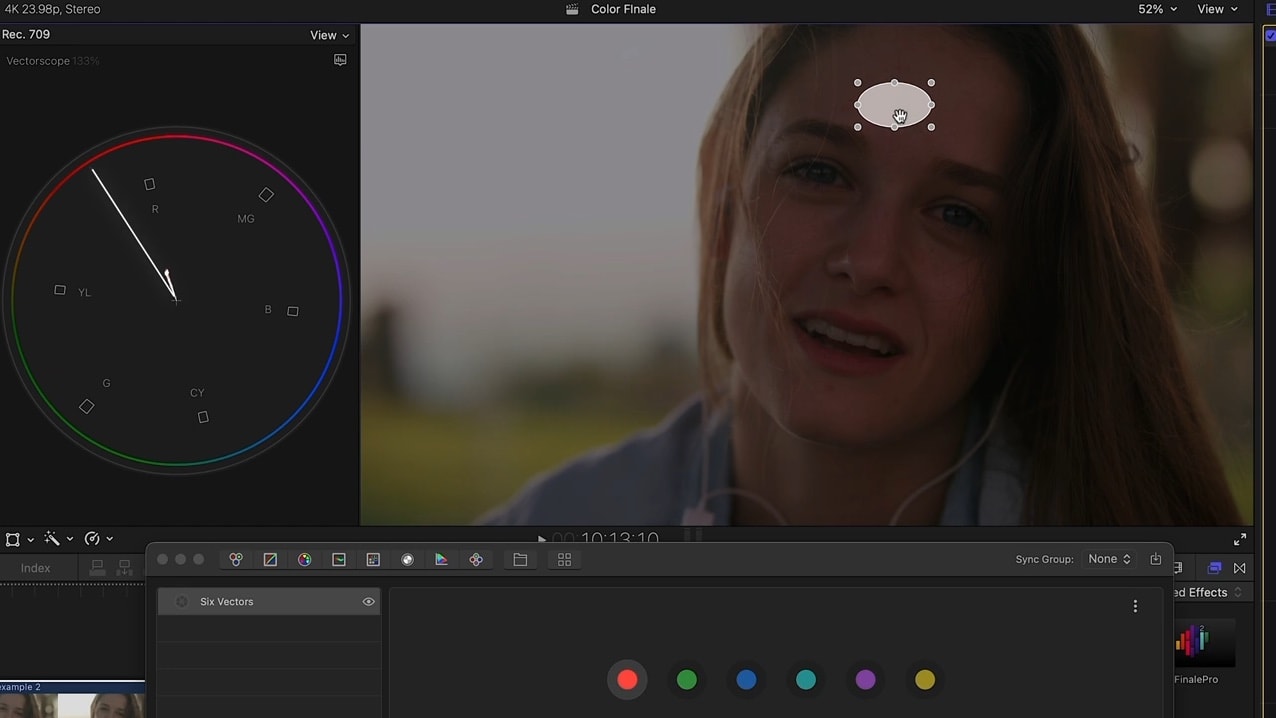
Pair these scopes with Color Finale's image analysis tools to discretely analyse any part of the image. This is where it gets good for skin tone work. For example, if we isolate the face you can see that the vectorscope only shows those colours that are within the image analysis mask. And same for the luma waveform, but for tone instead of colour.
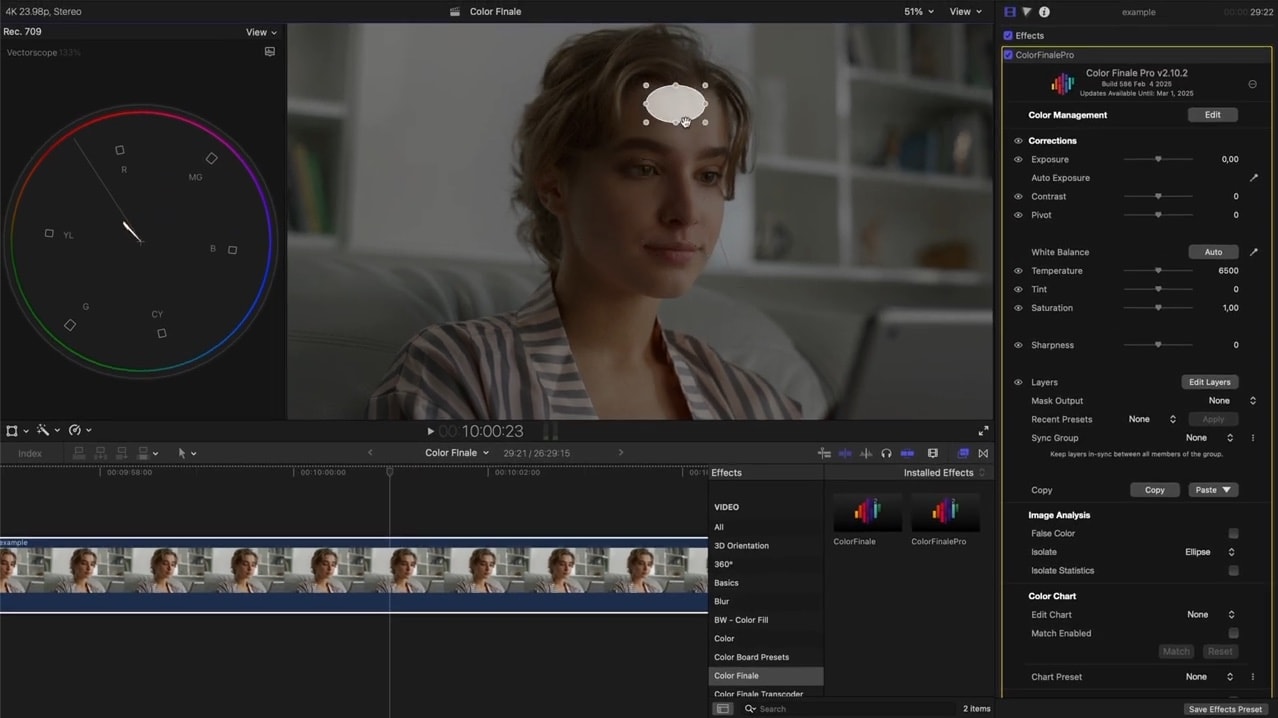
Select the plugin in the inspector to see on-screen controls
Quick side note. You must always have the plugin selected in the inspector to see Color Finale's on-screen controls and graphics, like these image analysis tools. This is how modern Final Cut Pro interacts with all plugins.
Examples
To keep focus on skin tones the following example material has already been brought into the Rec.709 video colour space. This gives us a working tonal range, or contrast.
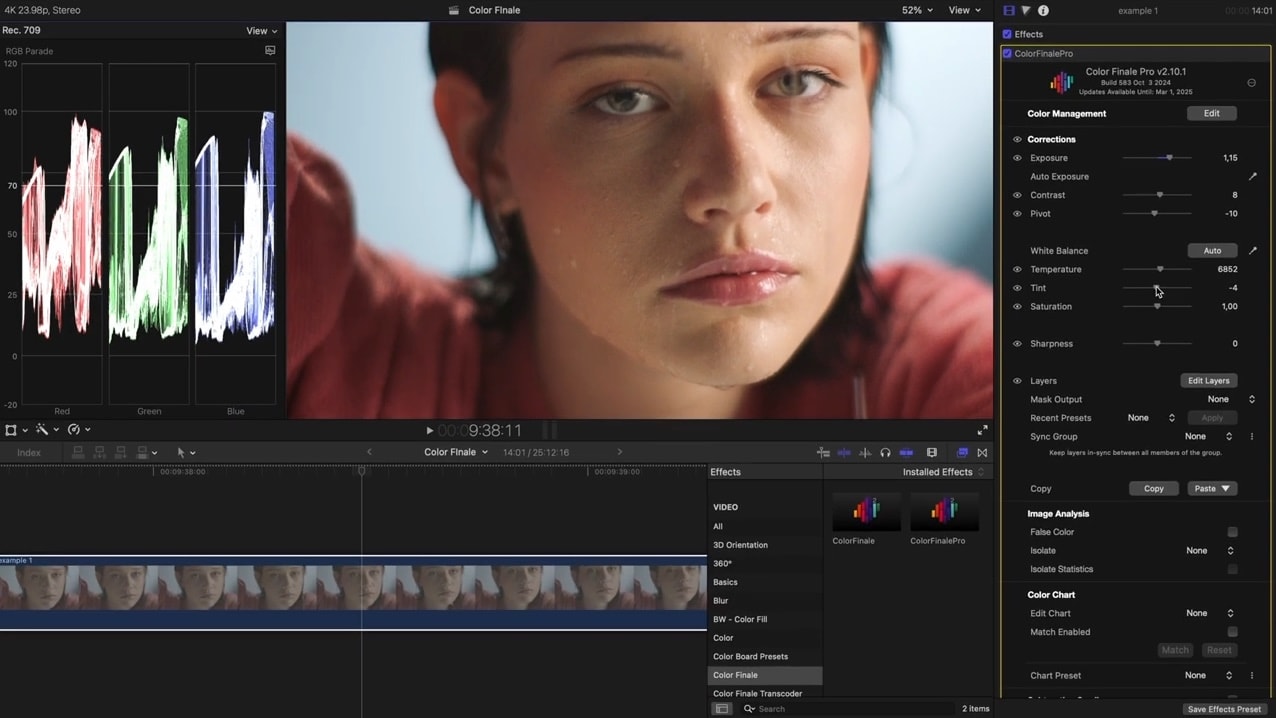
Setting the exposure and white balance: primary corrections
So let's set the exposure and white balance first. Under soft sunlight, ideal skin tone falls between 40 and 70 IRE.
Turn on image analysis. Use the exposure parameter to adjust to somewhere within this range.
Next, white balance. Keep the waveform scope open, but change it to RGB parade. Use the temperature and tint parameters, or pick a neutral grey (if there is one) for auto white balance.
Now, the image might look balanced, and if the skin tone looks correct then fantastic!
But chances are the overall image exposure and white balance may look good, but something is off about the skin. It's not as full of life as we'd want it to be. So we'll need to target the skin and work from there. Here's what we can do about that. Time for secondary corrections.
Six Vectors
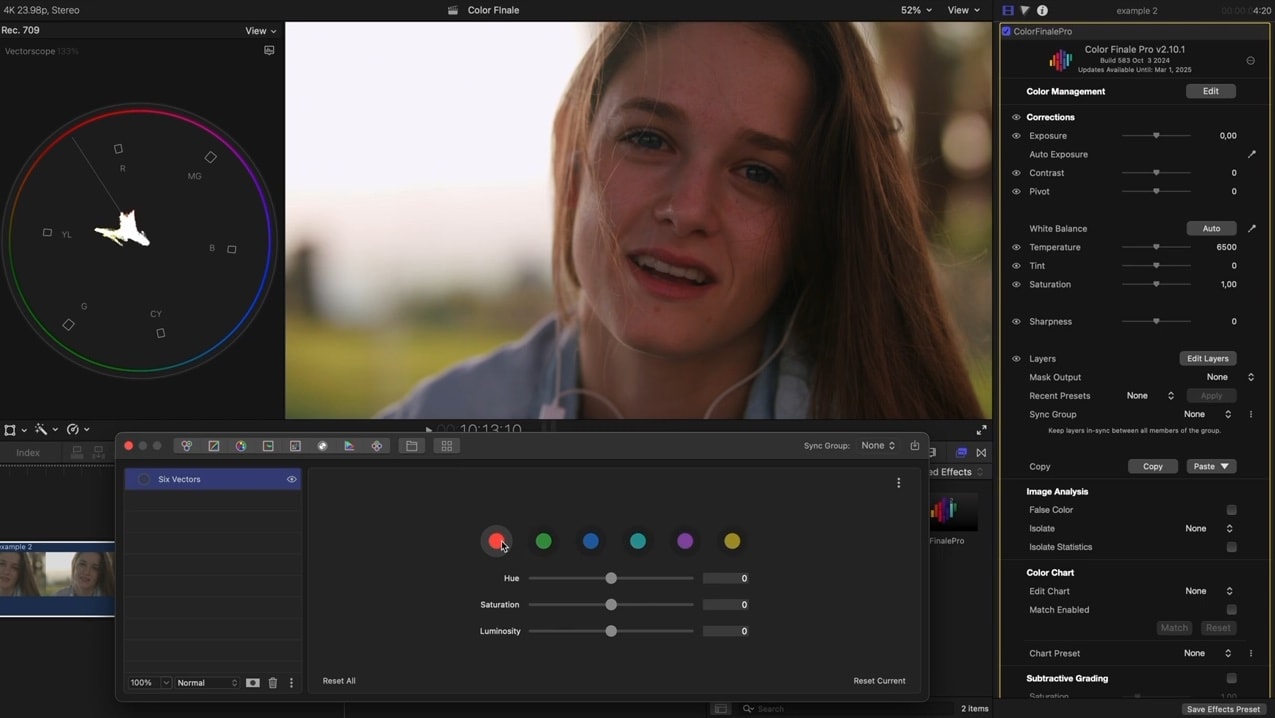
Six Vectors exposes hue, saturation, and luminosity parameters for six colours - red, green, blue, cyan, magenta, and yellow. That's the primary and secondary colours—and they are actually marked as targets on the vectorscope. There is a one-to-one connection.
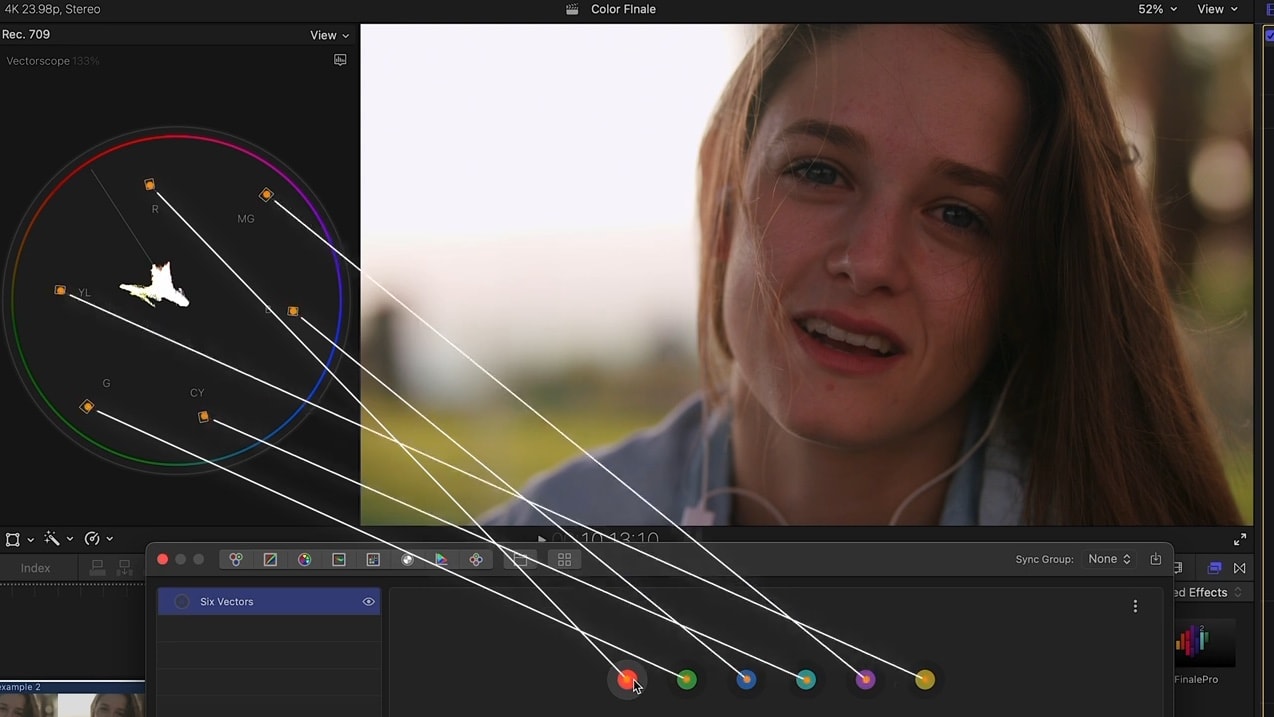
Human skin is predominantly in the reds and yellow no matter the talent's complexion, so let’s adjust these two colours. Because this task is generally hugely important, there's a predefined 'skin tone' line that you can show on the vectorscope. So while we have the image analysis mask turned on it's just a matter of intuitively matching what's displayed on the vectorscope with the line.
Quick and effective!
HSL Curves
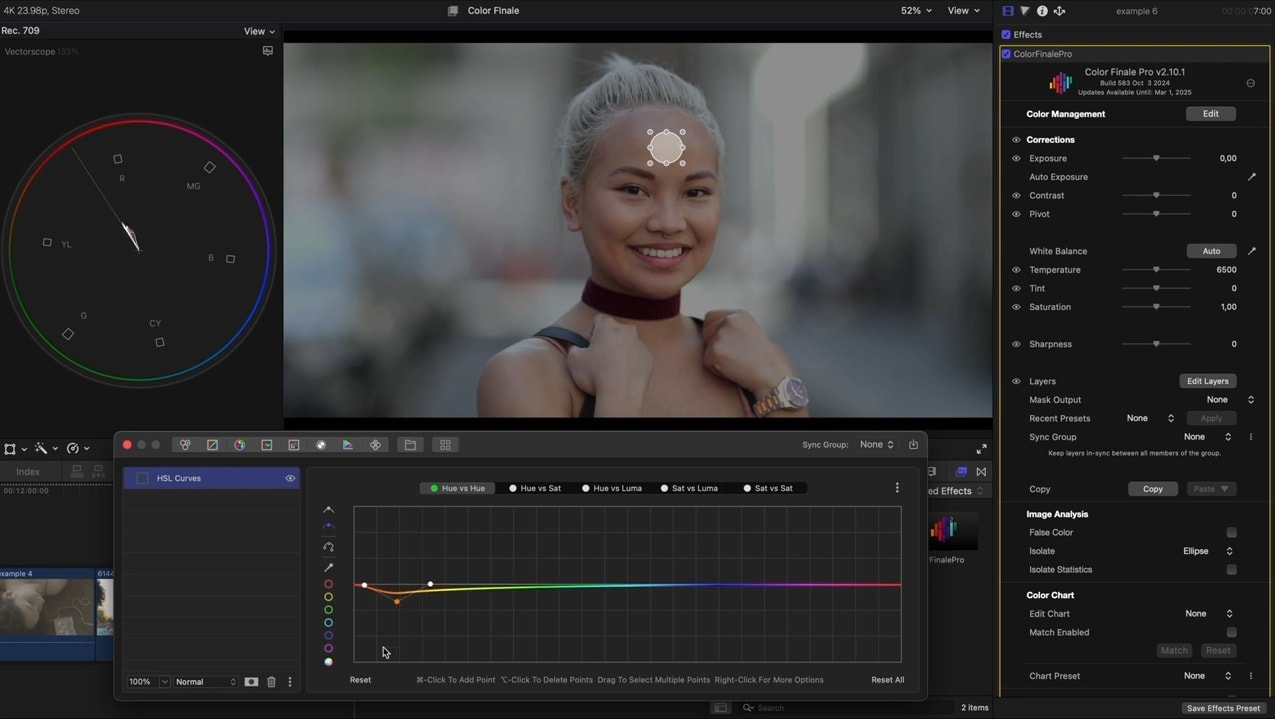
You can also use the HSL curves tool to target and modify skin tones. Keep the vectorscope open.
- Use the Hue vs Hue tab to shift skin tone towards red or magenta.
Command click on the line to add points along the curve. However, you might find this more useful: sample the middle-tone with the colour picker. You’ll get an automatic set of modifiable control points to work with.
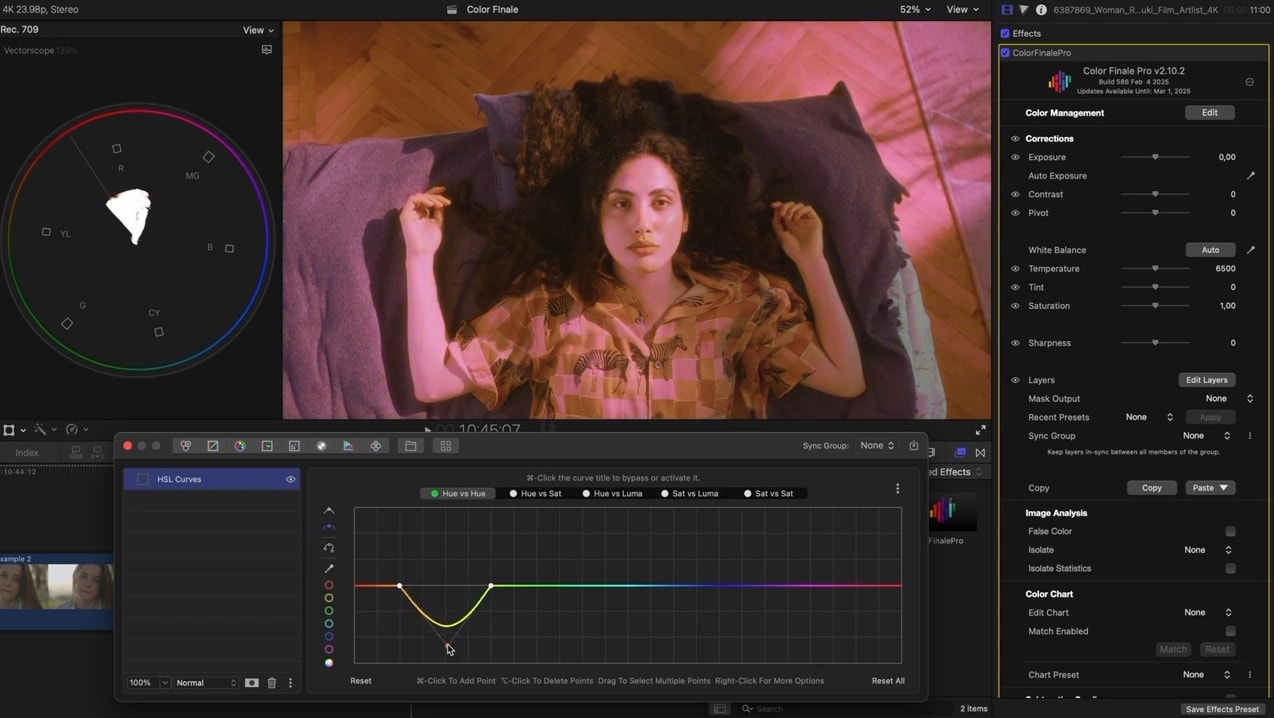
- Use Hue vs Sat to adjust saturation.
But this is a very precise tool, watch out for artefacts as a result of big adjustments. For example, banding between close colours.
For convenience, you might find that Six Vectors works best for 90% of the tasks, and you can supplement that with an HSL curves layer for the fine-tuning at the end.
Camera Matrix
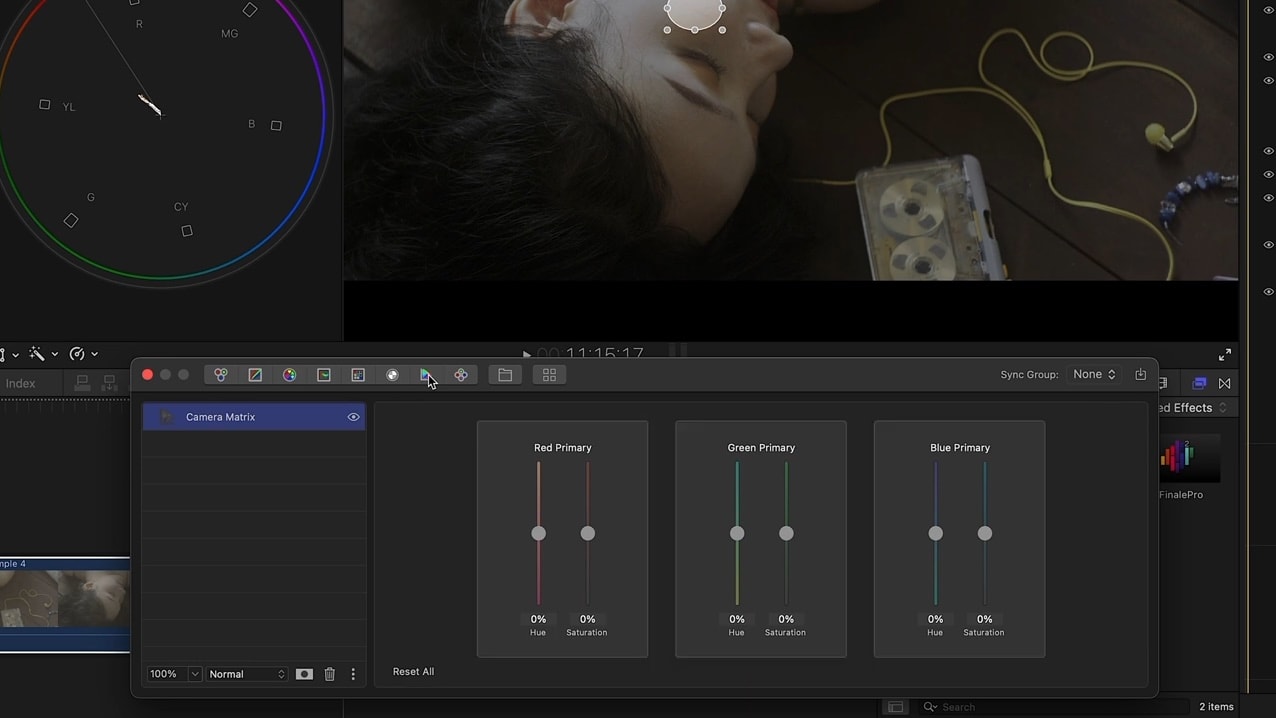
Camera Matrix is designed for fine independent adjustments to the hue and saturation of the red, green, and blue channels. This functionality enables precise control over primary colour components, making it useful for a wide range of colour correction tasks, such as skin tone adjustments. It lets you modify primary colours without affecting the overall white balance, which is essential for fine-tuning colours without disrupting the entire image. Simply adjust the red channel's hue and saturation sliders until the colour aligns with the skin tone line.
Subtractive grading
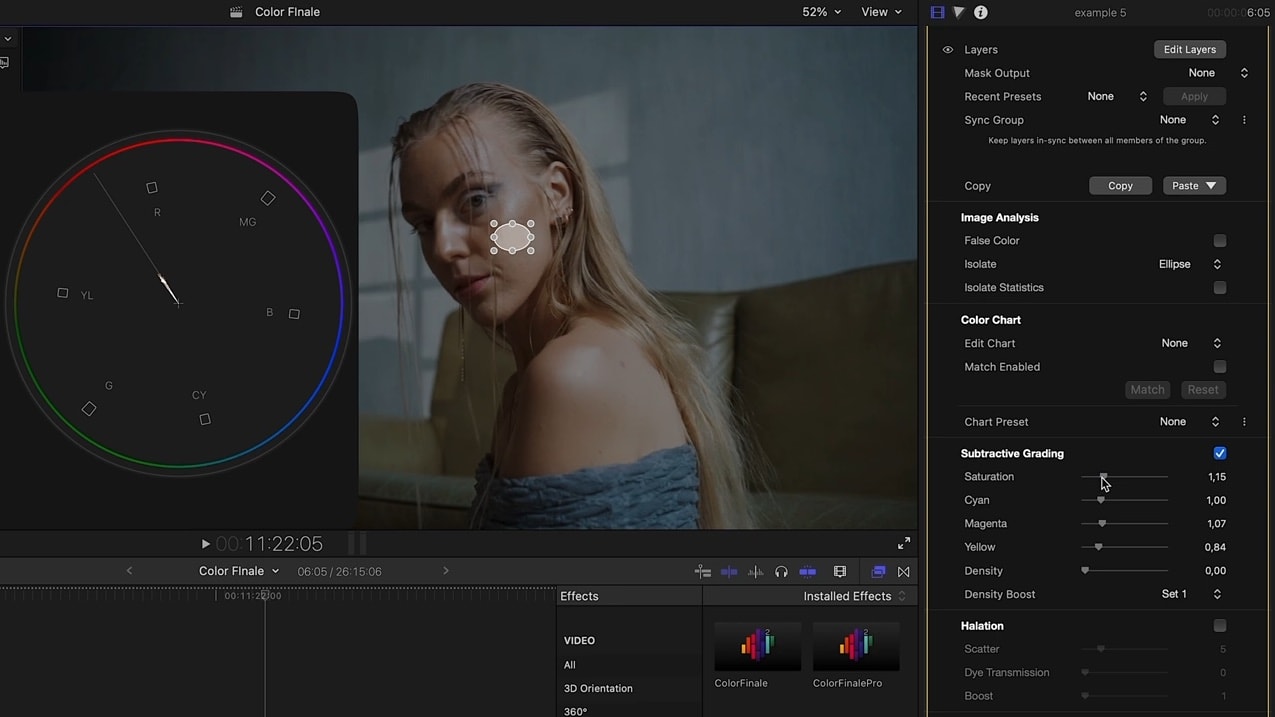
In one of the latest updates to Color Finale 2 Pro we introduced exciting new film emulation tools, including halation and bloom. But for now, let’s focus on the Subtractive Grading tool.
You don’t have to be doing film emulation to use subtractive grading. It’s just one of the features available to you and happens to be based on a traditional analogue method.
It can be incredibly helpful for adjusting skin tones. By working on Magenta and Yellow, you can achieve a clean, accurate skin tone with minimal effort.
Masking: advanced skin tone isolation
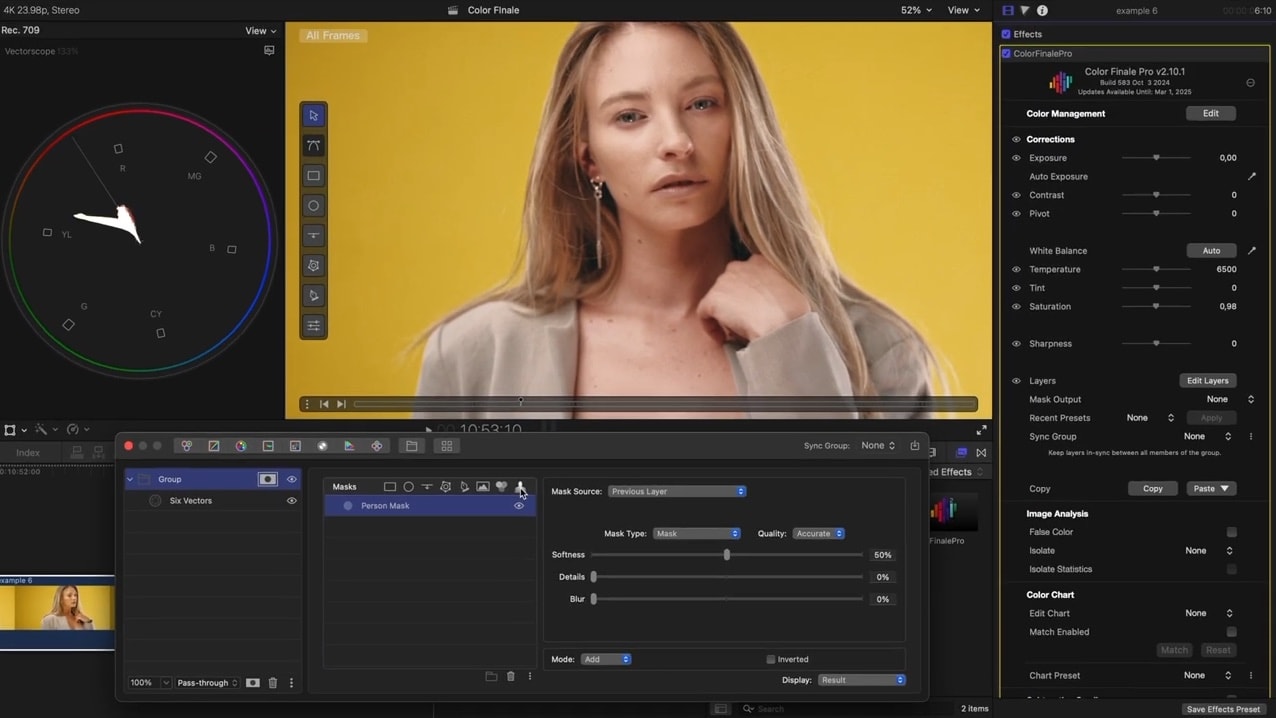
The examples we’ve covered so far were relatively straightforward, but what if the corrections for the skin tone affect the background as well? For example, if on the rare occasion your character and the set share a similar tint, all adjustments to the skin will clearly affect the colours of the set in the same way.
In such cases, masks such as the AI Person Mask are likely to be your best friend. They let you isolate the talent, so you can adjust the skin tones without impacting the rest of the image.
Simply apply the person mask to a layer group, then move or add your corrections inside. Combine Person Mask with an HSL mask to also exclude clothing and accessories.
Artistic vs. Technical Accuracy: Pushing Skin Tones to the Limit
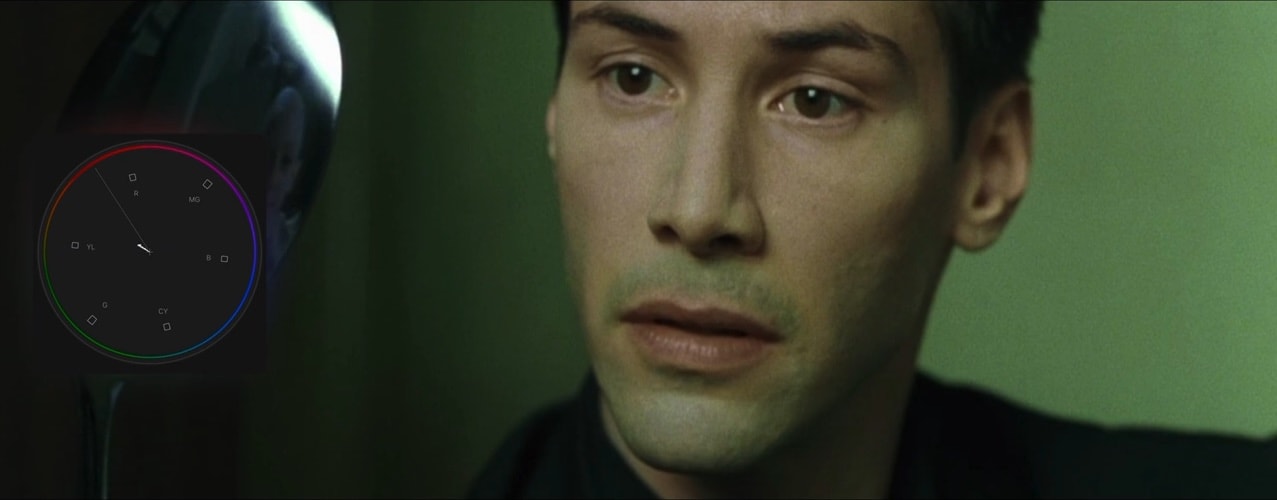 The Matrix is a good example of pushing colours into the greens
Sometimes, skin tones don’t need to be technically perfect. Skin tone correction is part of color correction, ensuring consistency and realism. But color grading is an artistic choice that sets the mood and style of a project. The skin tone line is a suggestion not a rule. Not everyone is standing under soft sunlight all the time. Color grading isn’t just about correction — it’s about storytelling.
Final Thoughts
We hope this helped you better understand how to achieve great-looking skin tones. This article is the text version of our video on skin tones. Consider subscribing to our YouTube channel for more tutorials about Color Finale 2 Pro and our other products. Thanks for reading!