Introduction
The quality of someone’s skin tone is one of the first things we notice while watching a video, so it's important to make it as appear as lively, natural, and balanced within a scene as possible.
What can we do to correct skin tones if how we imagined them is different to the result? This is one of the most frequently asked questions in colour grading.
In this post we'll explore simple techniques using Color Finale 2 Pro in Final Cut Pro that will let you get perfect skin tones in the simplest and fastest ways possible. Watch the full video above for a complete visual walkthrough featuring several examples.
When working on skin tones we mostly focus on three main parameters — the luminosity value of the skin (its brightness), saturation, and hue.
Brightness
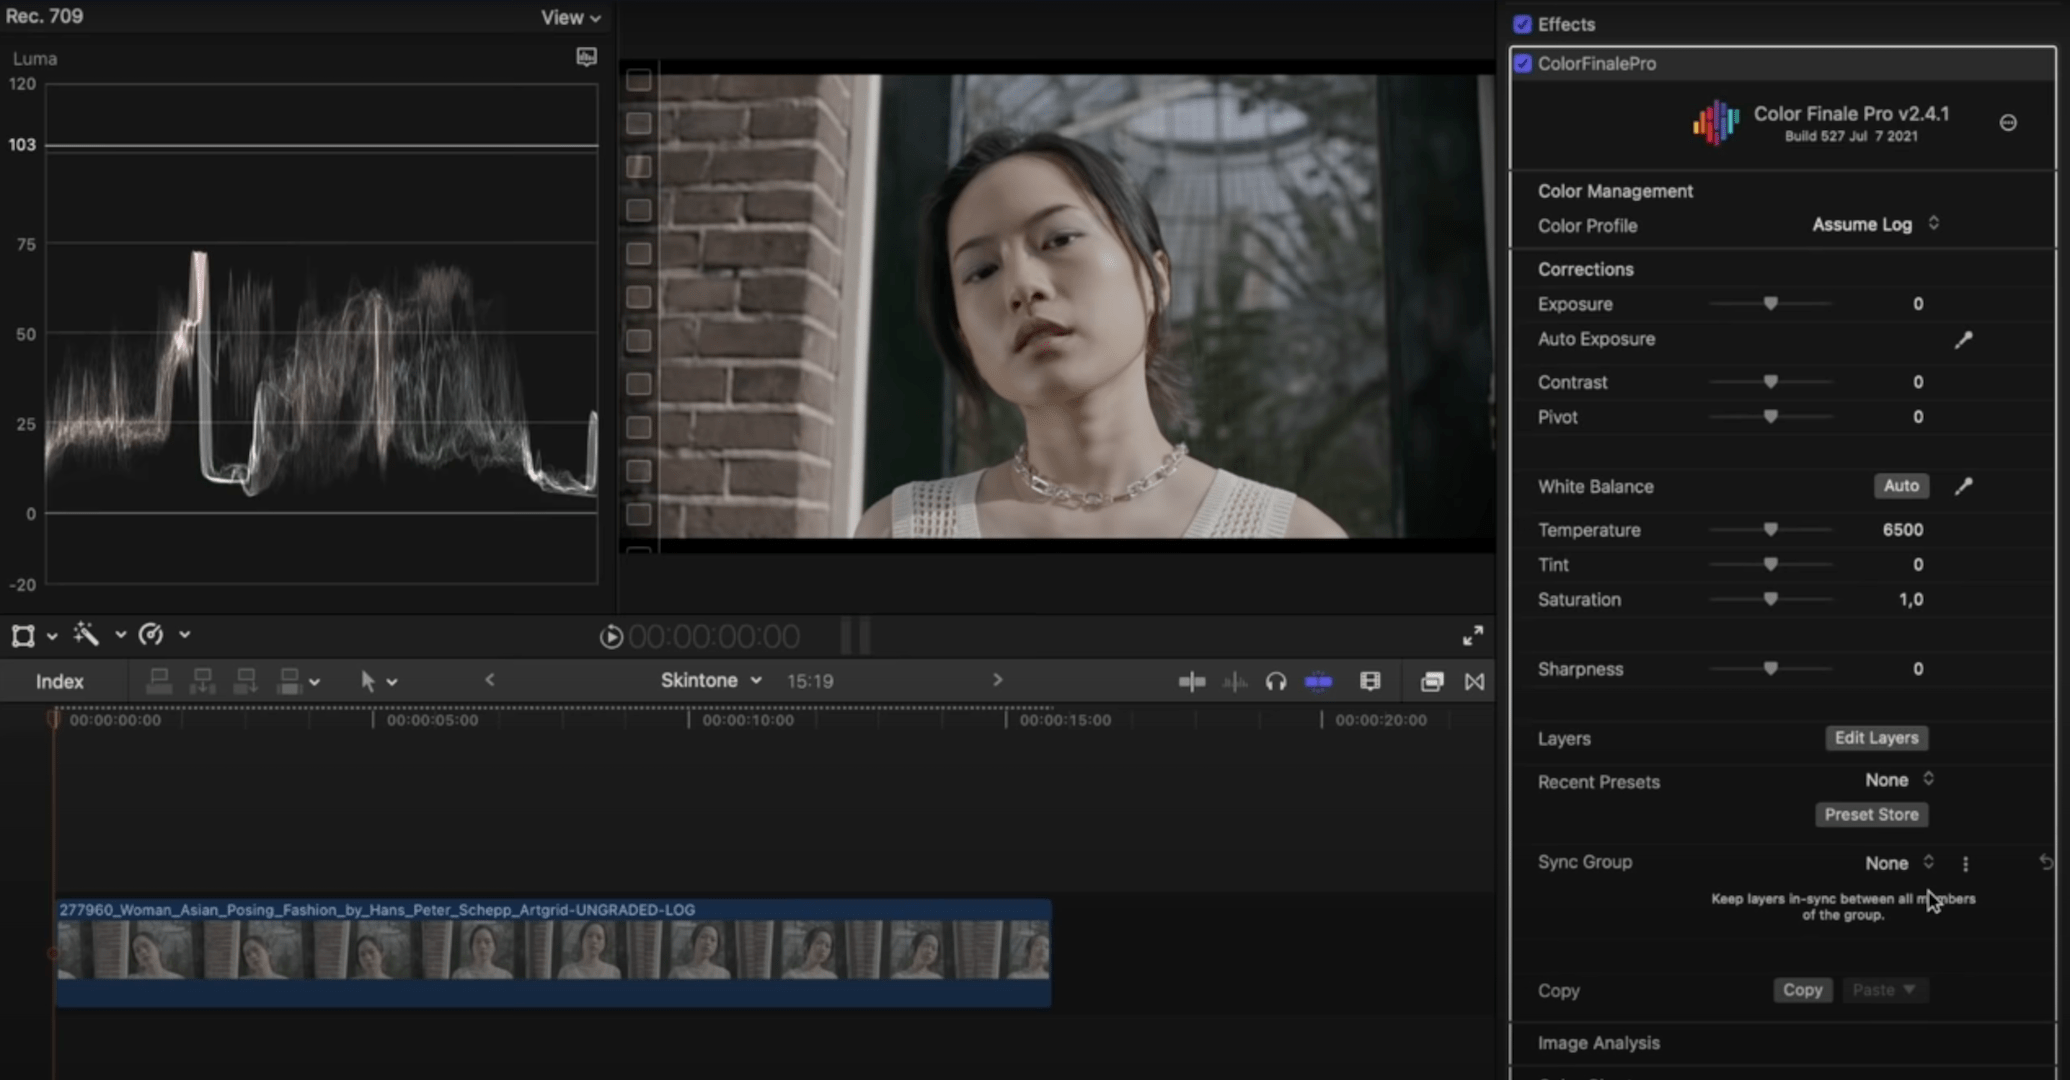
Once we have put ungraded clips on the timeline a good first step is to check and adjust the brightness of the image. While this can be done by eye, bringing up the luma scope helps with accurately evaluating and setting the levels.
With the scope open, the entire frame in the viewer is represented on the graph. For now we are mainly interested in giving the skin tones a brightness level that’s appropriate for the shot. We can isolate sections of the viewer using Color Finale 2 Pro’s image analysis mask — an ellipse mask works well to select faces.
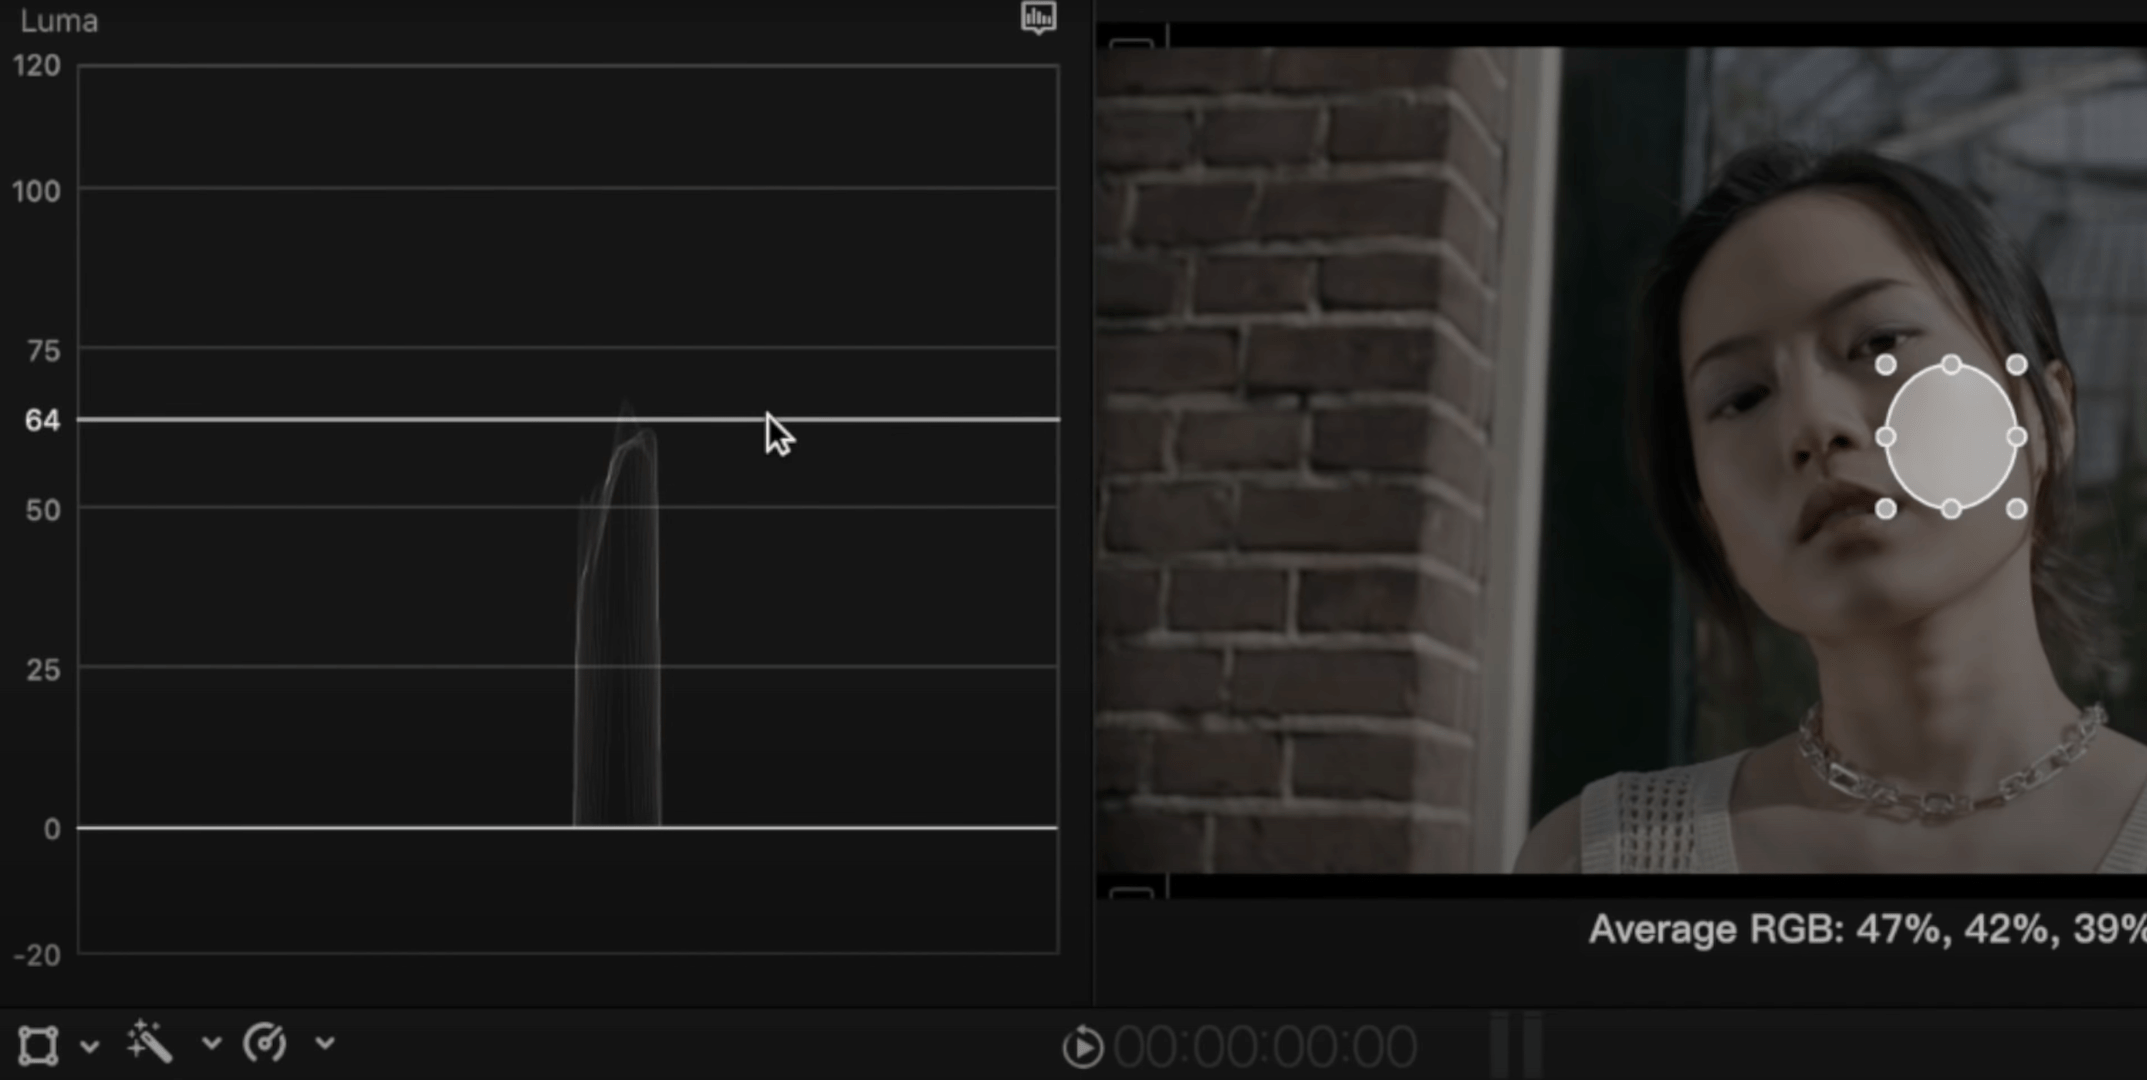
Place the mask avoiding the hair, eyes, and lips. Now the Luma scope accurately reflects only our selection: its range is between 35 to 64 units. In soft sunlight the brightness for skin should be around 40 to 70 units, with 40 being shadows and 70 the highlights. Use the Exposure slider in the inspector to modify the brightness, in this case bumping it up slightly.
Saturation and Hue
After we have found a level of brightness for the skin tones that works well for the shot, next we can work on the hue to make them start appearing more natural. The vectorscope with the skin tone indicator enabled is just the ticket for doing this.
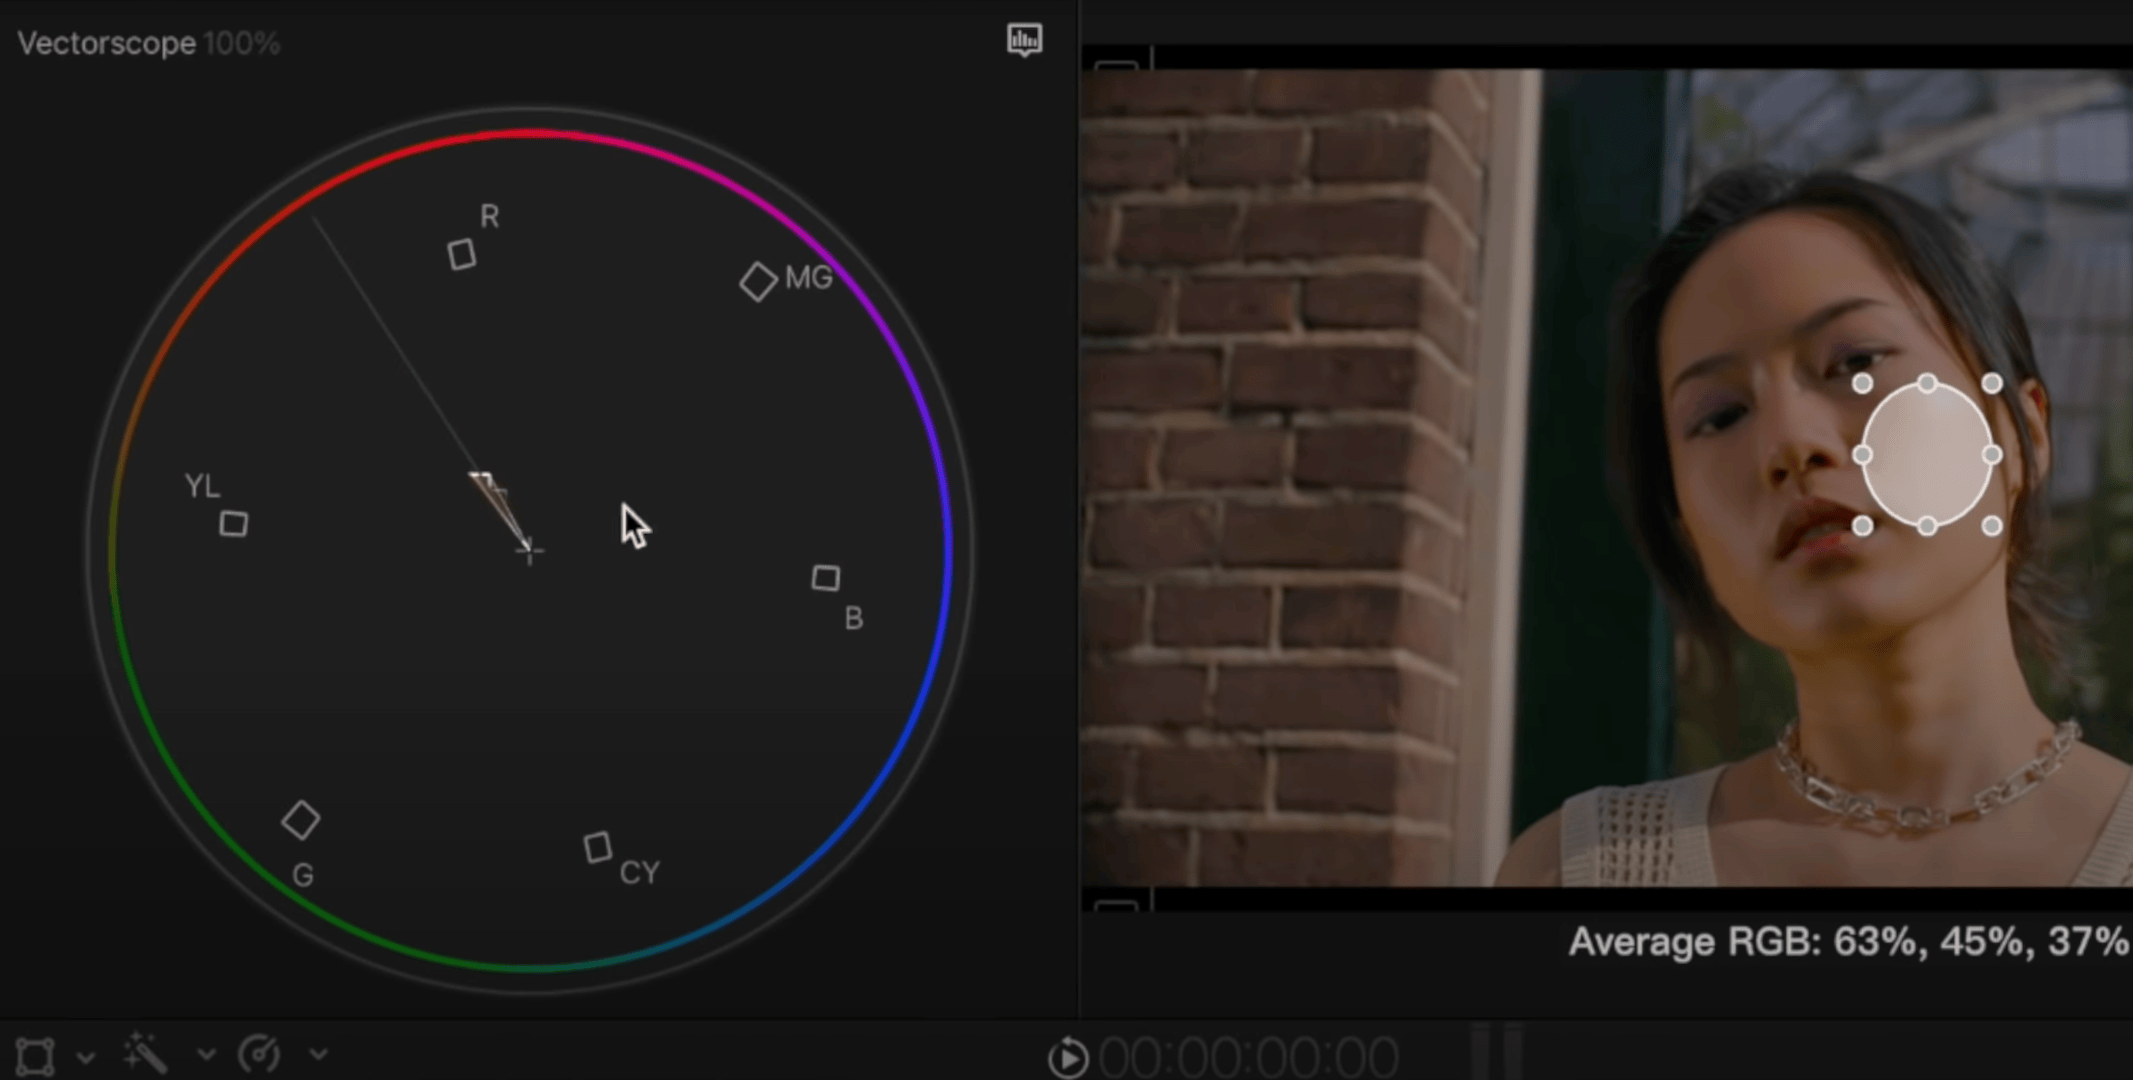
By keeping the image analysis mask placed over the skin we can determine its tone and saturation.
The skin tone line in the scope corresponds to the ‘ideal’ representation of skin tone. If the graph plot is directly under this line we know we’re on the right track.
And at this point there’s an obvious question. Does the skin tone indicator work for all skin complexions? Yes! Skin actually always has the same tone and only the saturation changes.
The saturation of skin inherent in people of Asian descent is usually quite high and can reach halfway to the edge of the scope, whereas dark skin is slightly less saturated and rarely exceeds 45% saturation. Light skin is the least saturated and in most cases does not go higher than 30%.
One of the simplest ways of adding saturation is via a Color Wheels layer in the Color Finale 2 layers panel. Increasing the saturation in the highlights and mid-tones, since the skin colour is mostly in those regions.
Fine tuning with HSL Curves
To really finesse the color, more advanced tools like HSL Curves can be used.
Let's reselect the skin, turn off the Color Wheels, and select the Hue vs Saturation tab.
In the Hue vs Hue tab, choose the colour picker and sample the skin colour. Now on our scope we have 3 points. The central point is the colour we have just picked and the two points on adjacent sides capture neighbouring tones. If we move the central point we can get the desired skin tone, Skin covers a wider range of colours than we have just selected, so we can also capture some of the yellow and magenta hues on the sides.
To add more control points, hold down the option key and left click with the mouse on the graph. And now we can have in our selection a wide enough range — and we can be sure that all the skin tones fall within this range. Clicking on a point while holding down Option deletes it.
Recovering from banding
So at this stage the skin tone might look fine, but sometimes after a closer inspection we can see that there is a red tint on the face that's causing some banding issues. This can sometimes happens when shooting in S-log2.
To fix this, again head to the layers panel and use the HSL Curves tool. Opening the Hue vs Hue tab use the colour picker and select the colour to get rid of. Now the selection is represented on the curve. Click on the point in the centre and raise it up so that the transition is less noticeable by removing some of the red, but not so much as to make the skin look green!
If this isn't enough, go to the Hue vs Saturation tab and again with the help of the colour picker select the colour which you want to make less prominent. Lower the middle point to reduce the saturation of this colour in the shot. And now the transition into the red has become less noticeable.
Conclusion
A few colour grading and image analysis tools can enable you to easily work on skin tones to get the desired result. In most cases, basic tools are sufficient for this purpose. But if the footage is more complicated, you may need to use slightly more advanced tools for working with colour. The layout and functionality of Color Finale 2 Pro allow you to do these sorts of corrections quickly and conveniently. Try the free 7-day trial for yourself and see how it can help with your professional colour grading workflow!
Reference
Color Finale Easy Reference Guide — Six Vectors