Contents
- Introduction
- Adding LUTs to Color Finale 2 Pro
- Applying LUTs to clips
- Combining Multiple LUTs
- Exporting Custom LUTs
- Review and more material
Introduction
Look up tables (LUTs) are used in video post-production to modify color of video for technical or aesthetic purposes. For example, they can convert footage from one color space to another such as Sony S-Log3 into Rec.709, or recreate the look of a certain film print.
Color Finale 2 Pro is a color grading plugin for Final Cut Pro (macOS). It offers a comprehensive set of tools for LUT management, manipulation and creation, and in this tutorial we’ll show how to use these features.
Apply Color Finale 2 Pro to a clip on the Final Cut Pro timeline and let's dive in.
Adding LUTs to Color Finale 2 Pro
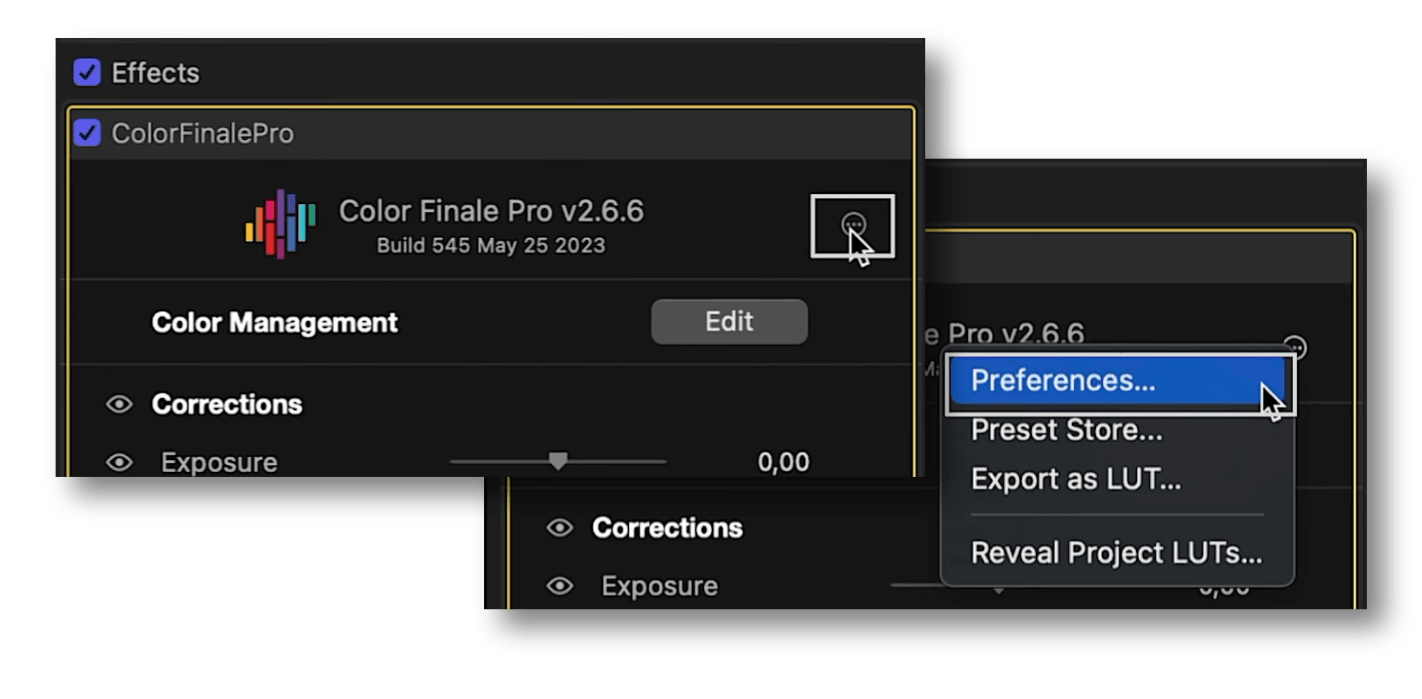
So you might have a bunch of LUTs stored somewhere on your computer and you want to use them in your Final Cut project. To add them to Color Finale 2 Pro, in the top right of the inspector click the 3-dot circle, Preferences. A panel will appear — go into the LUTs tab.
Under this LUTs tab is a whitelist of folders Color Finale 2 will monitor for LUTs. All .cube LUTs in the folders and subfolders that you add to this list will be automatically discovered by the plugin and visually displayed in a separate browser called the LUT Gallery. To add or remove a folder from the list, click on the + or - symbols.
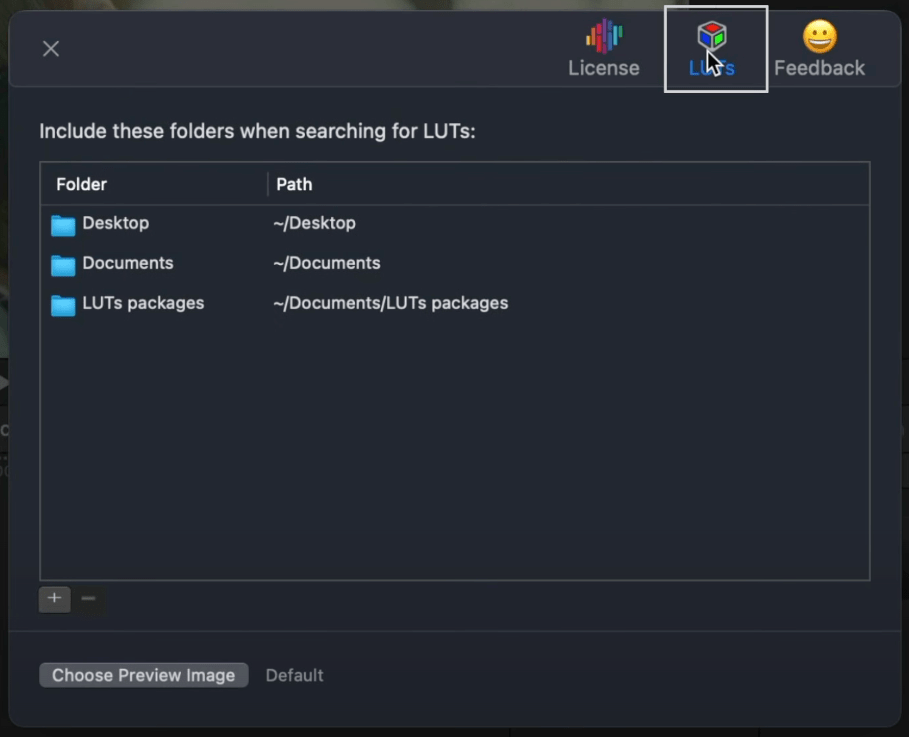
Once you've added the folder(s) containing the LUTs you want to use, you can close the Preferences panel.
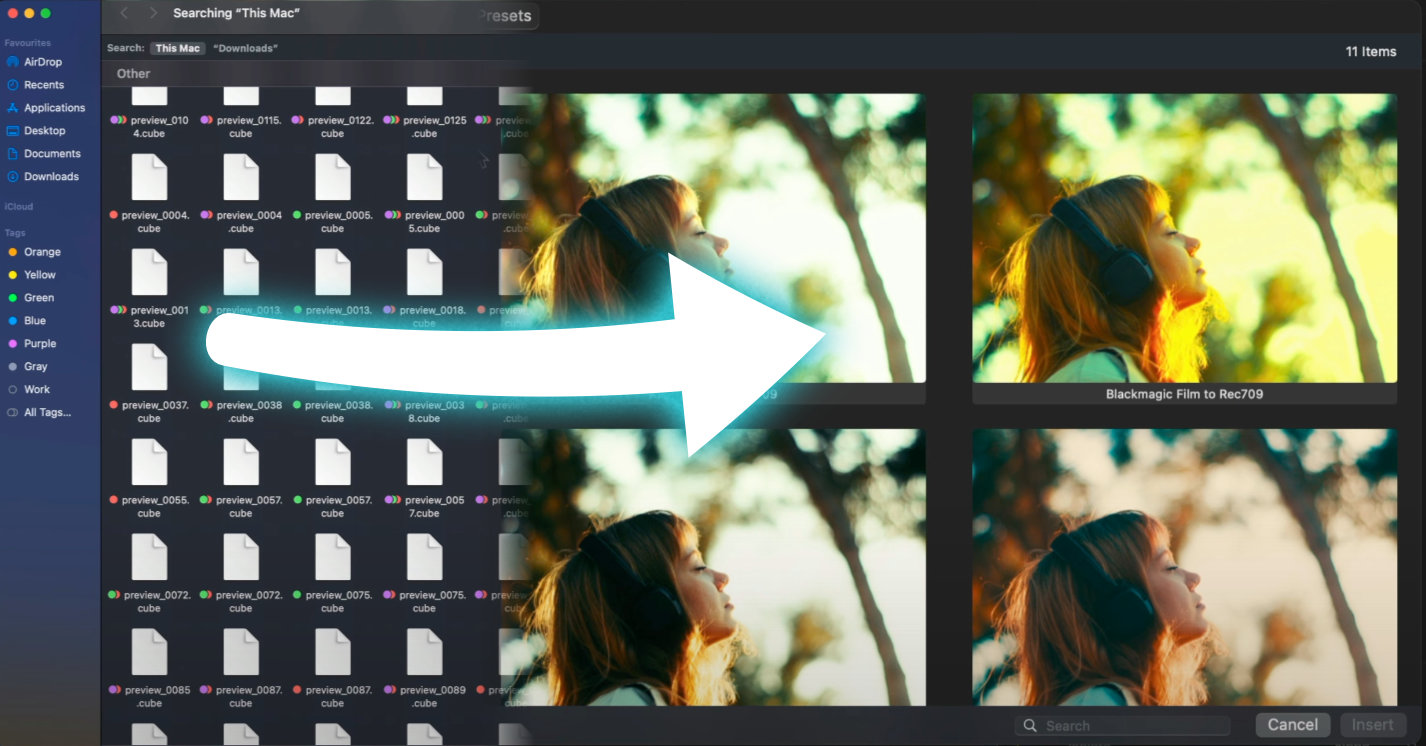
From this point, applying a LUT to a clip is straightforward — it’s a Color Finale 2 layer like any other. Clicking on the ‘Insert LUT or Preset’ button brings up LUT Gallery, a convenient visual browser that shows previews of all LUTs from the whitelist.
 Click on this button at the top of the layers panel to view the LUT Gallery
Applying a LUT to a Clip on the Timeline
To add a LUT to a clip from the LUT Gallery, double-click on a thumbnail or on the insert button when selected. The LUT is added as a new layer.
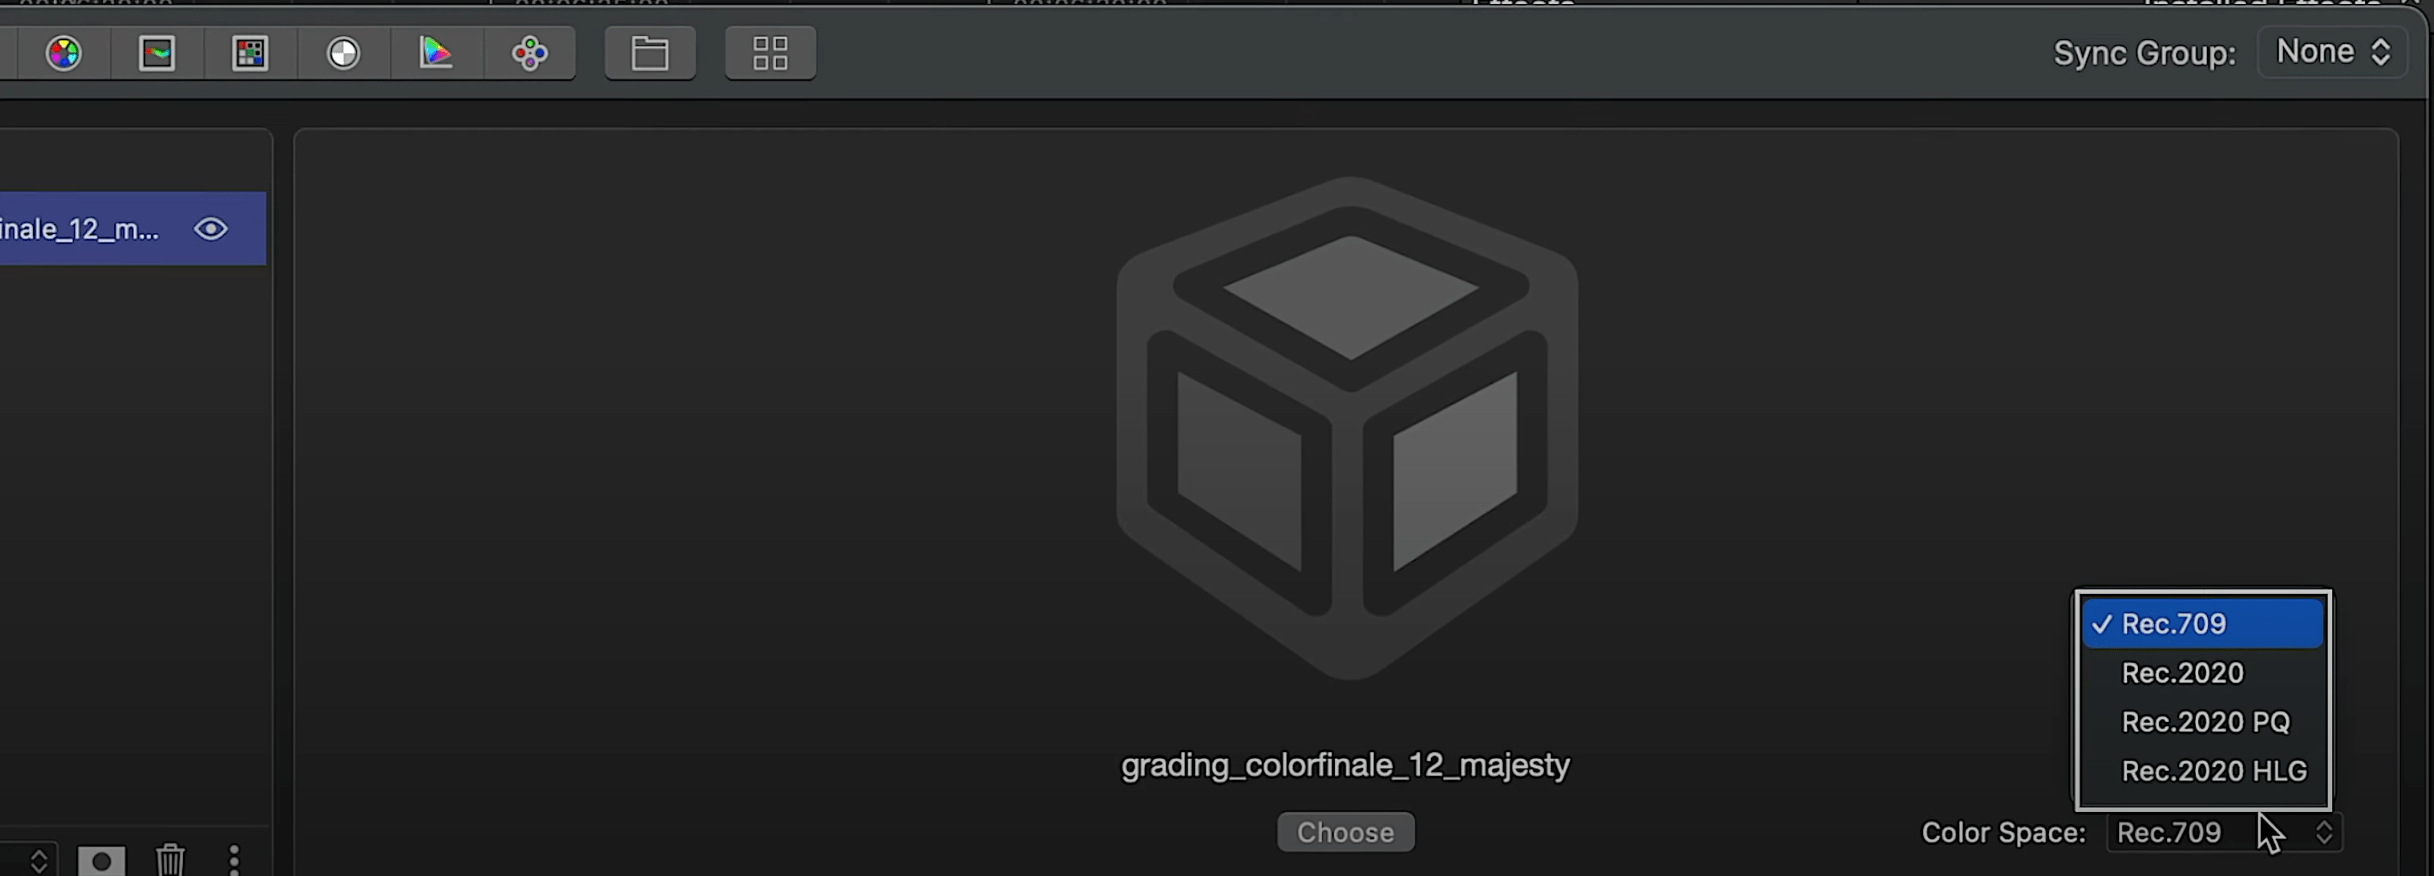
Note the color space selector at the bottom right — make sure you have the appropriate one selected for your LUT. Most out there are designed for the Rec.709 color space, so this is the default here.
If you’re interested in using LUTs or looking to expand your collection, you can find many free and paid LUTs online, including at our Color Finale LUT Packs page.
Combining Multiple LUTs
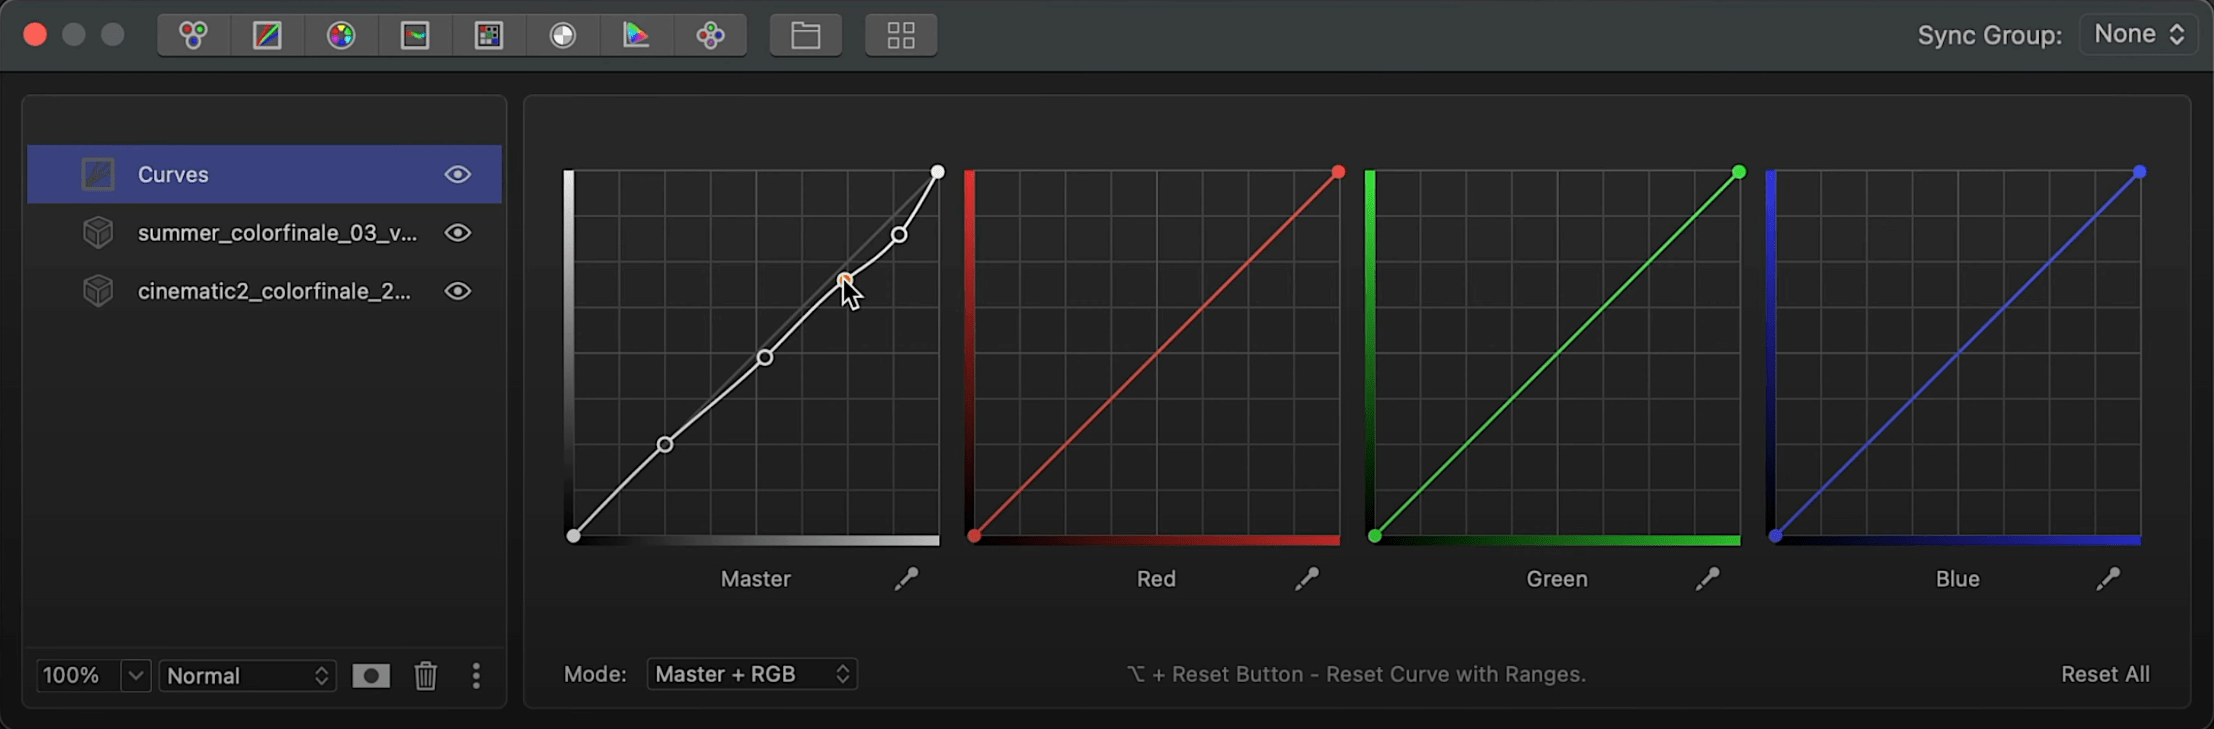
The LUT Utility tool, being a typical Color Finale layer offers additional flexibility and power. You can combine as many LUTs as you like, adjust their intensities, and use blend modes. You can also fine-tune the look using any other color correction tools available to you in Color Finale 2 Pro.
Saving and Exporting Custom LUTs
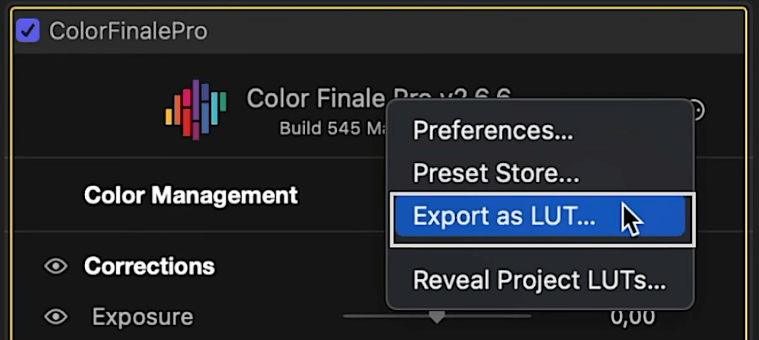
Color Finale 2 Pro includes the abilities to create and export LUTs that you make yourself. If you've created a specific look that you want to keep and reuse in Color Finale, directly in Final Cut Pro, or in any other software that supports the .cube format, you can export it as a custom LUT. It's worth noting that the results of applying LUTs across different software will be consistent as long as you are working in identical color spaces.
Review
By importing, applying, adjusting, and combining LUTs, you can effortlessly achieve professional and artistic color grades for your videos. In this short post, we showed how this can be done. Thanks for reading! Watch the video version of this and other Color Finale 2 tutorials on our YouTube channel.
Additional Info
Color Finale Easy Reference Guide — Create and share your own LUTs