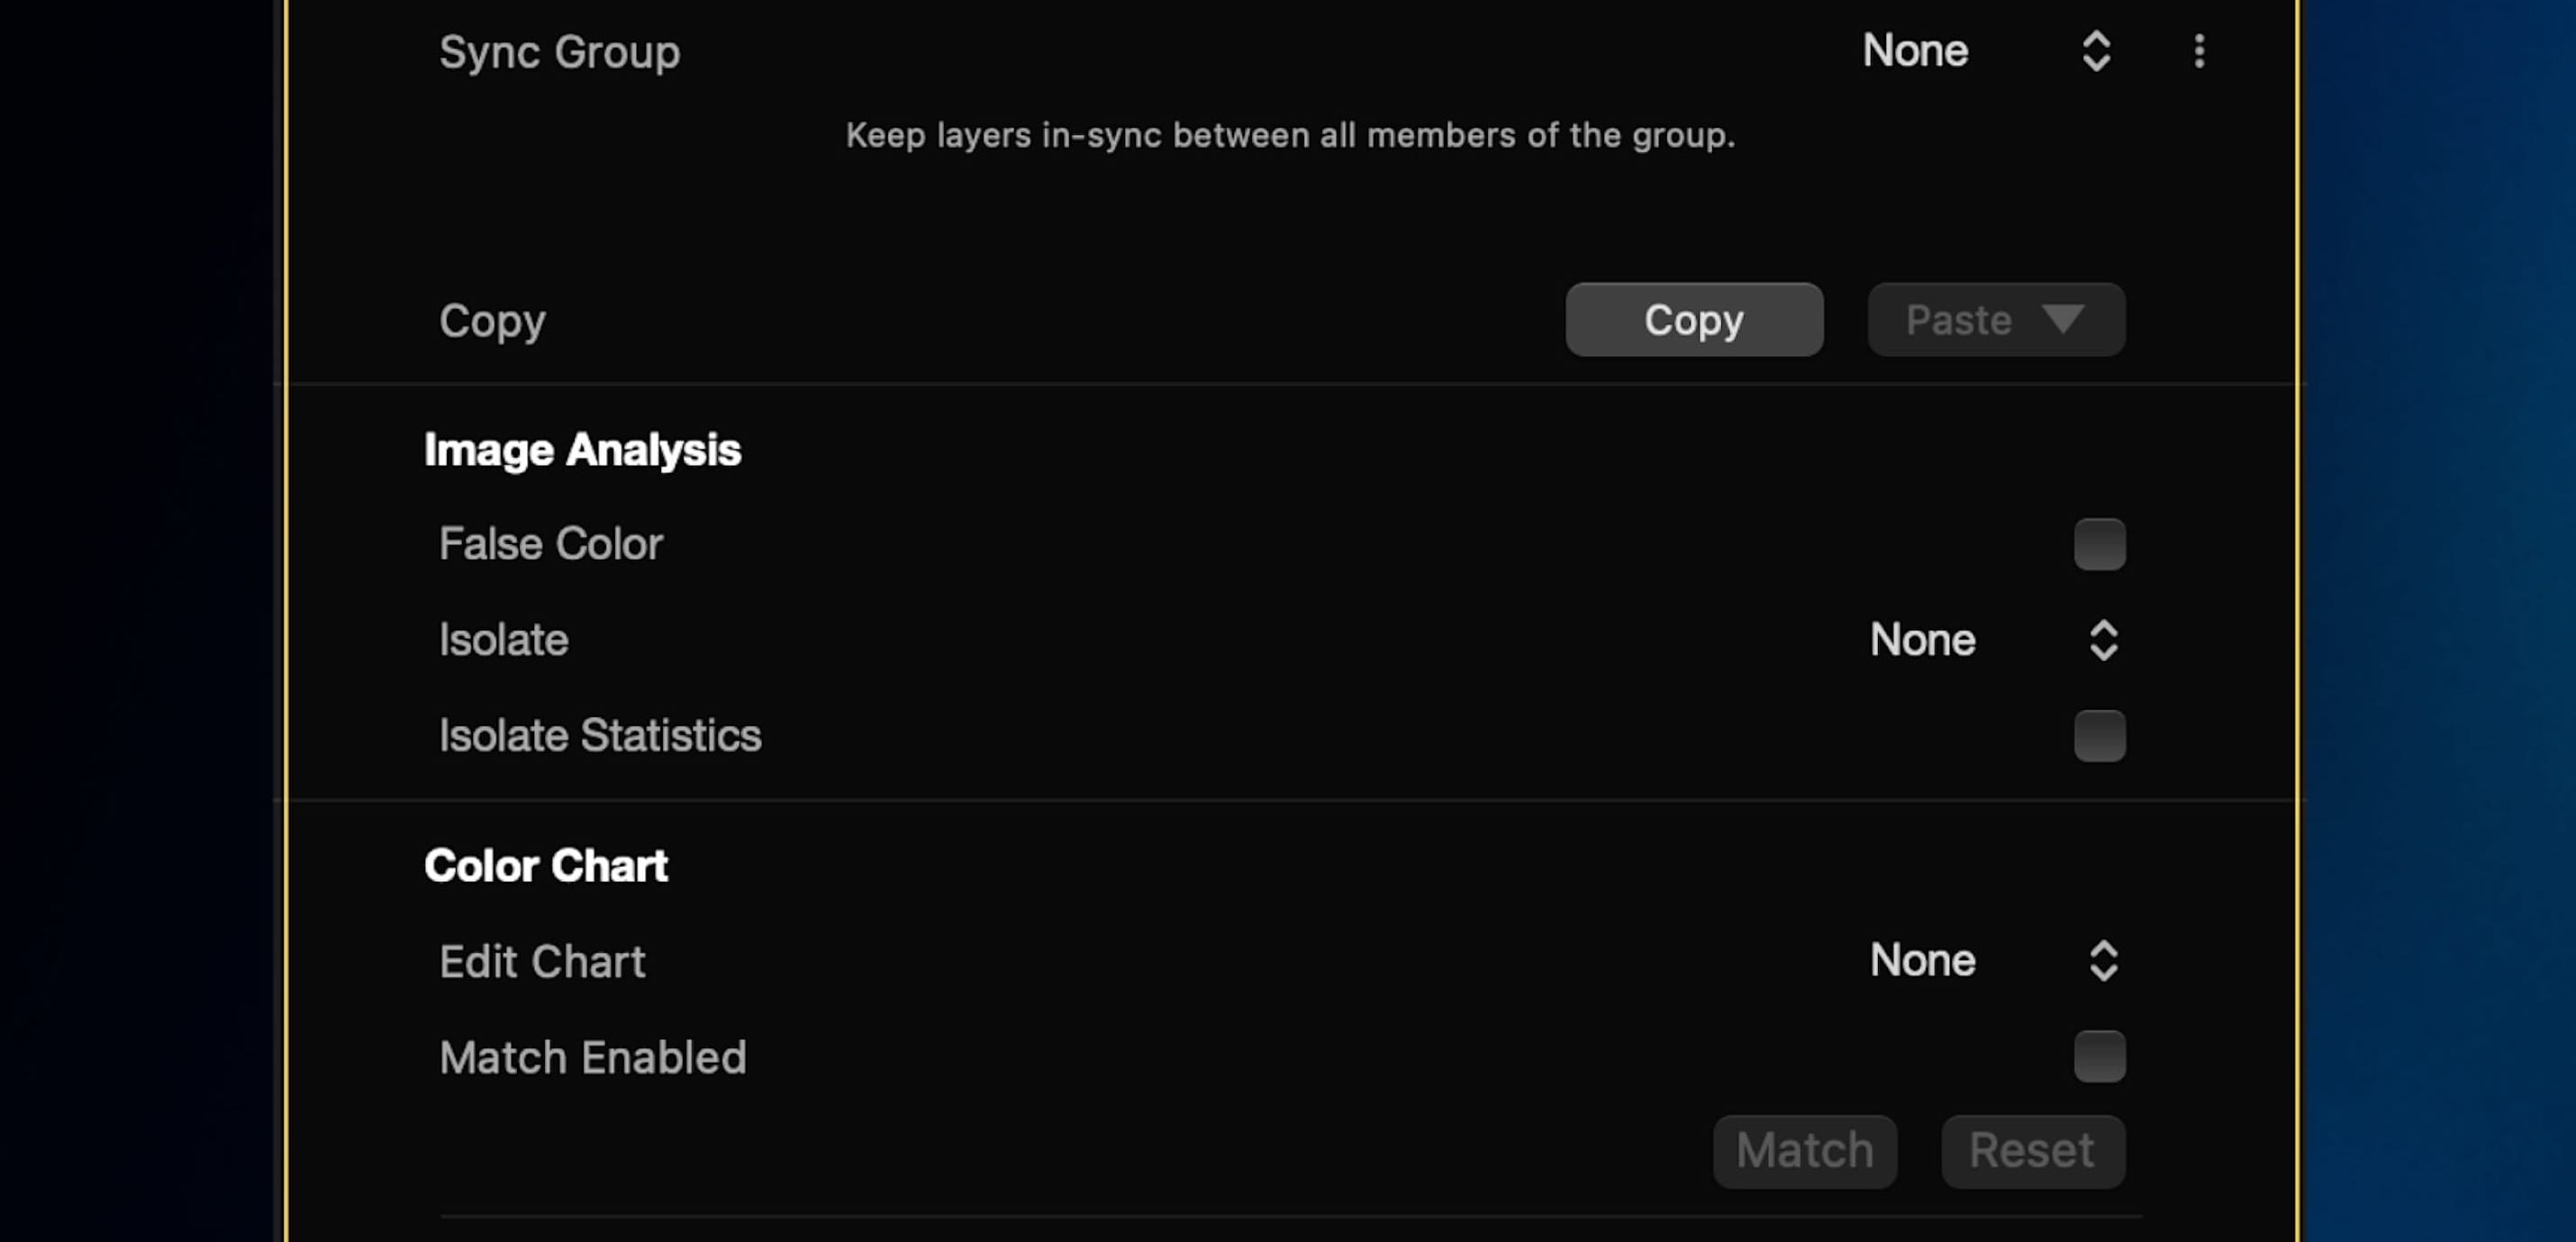
Image analysis tools
In this post we'll show you the image analysis tools in Color Finale 2 Pro, a colour grading plugin for Final Cut Pro.
A Short Overview of the Image Analysis Section
Find the image analysis section in the inspector panel. We will take a look at each tool and how it can help you get a quality image.
There are three instruments in this section: False Color, the Isolate Mask tool, and Isolate Statistics, which provides an on-screen readout, but more on this later.
When using image analysis tools, make sure you have the Color Finale 2 inspector selected to see the graphical overlays in the viewer. You can tell when the plugin has been selected by the yellow border around it.
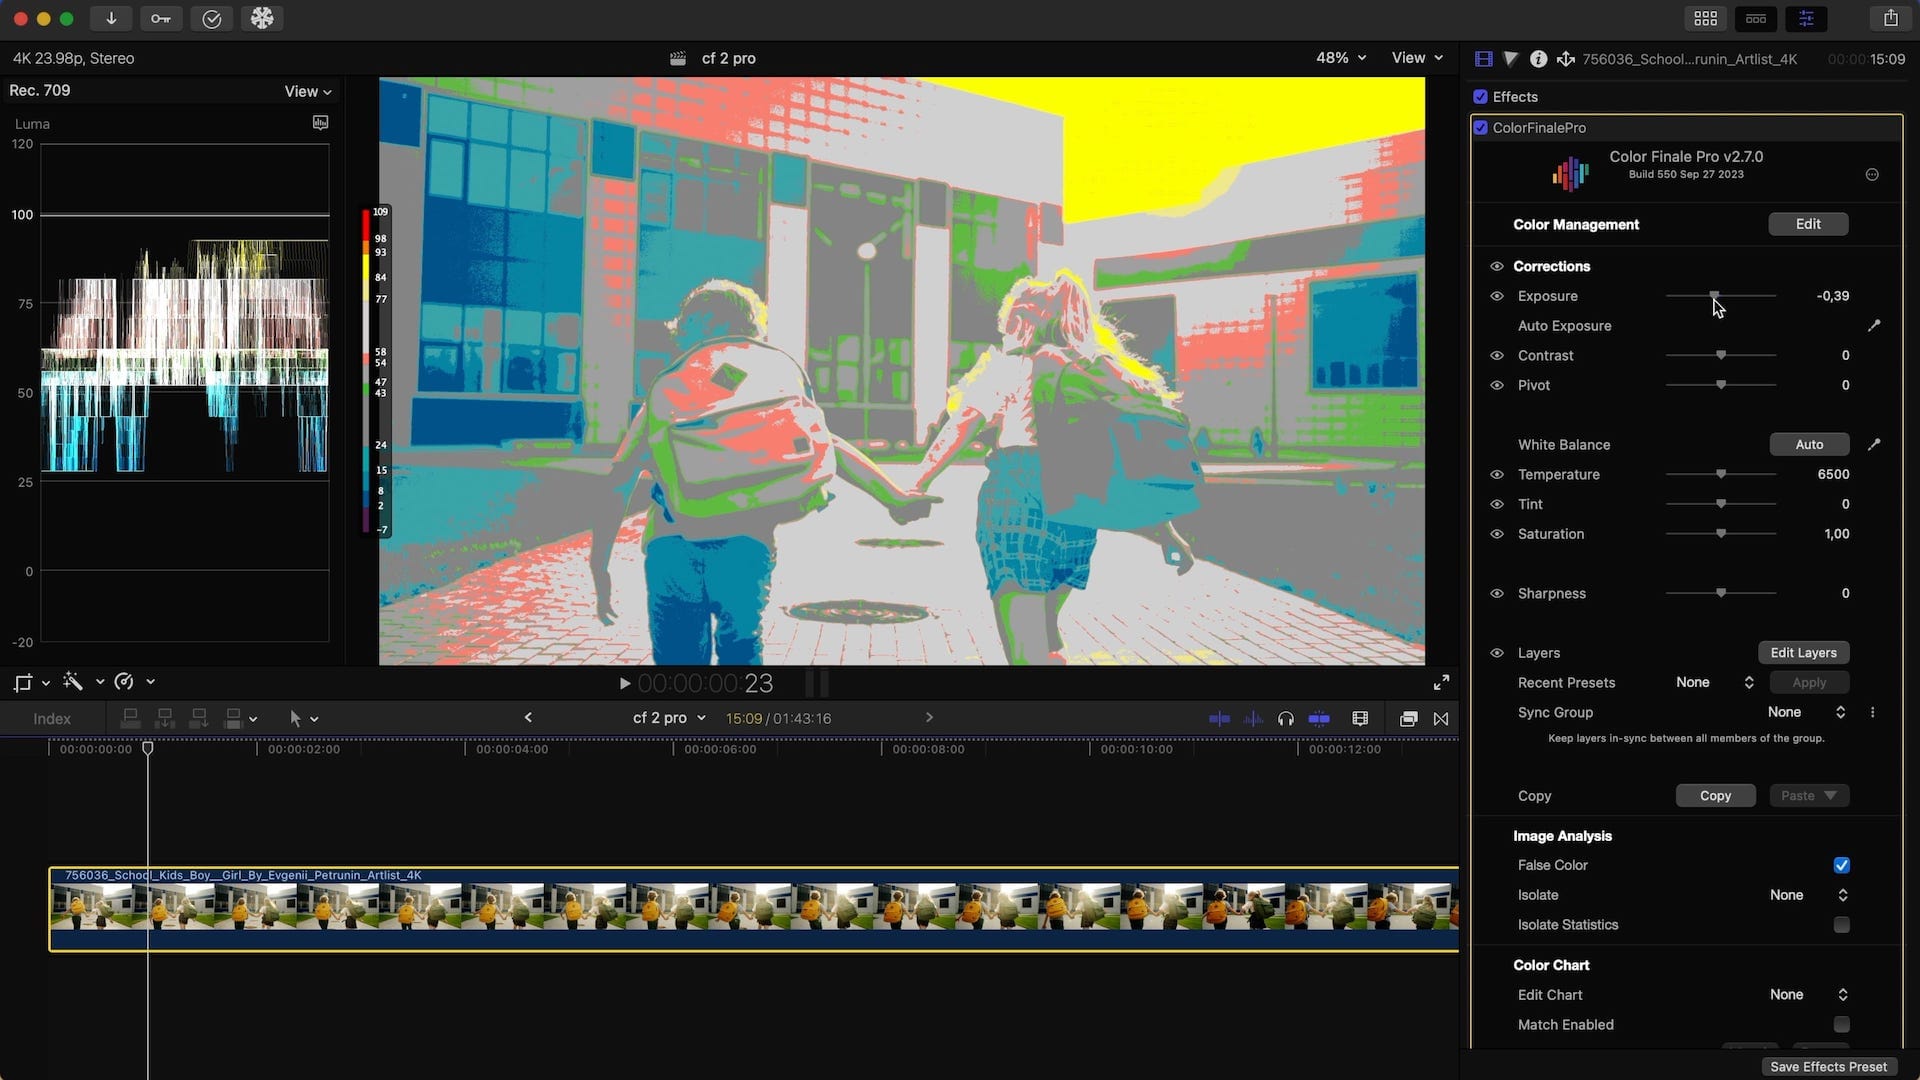
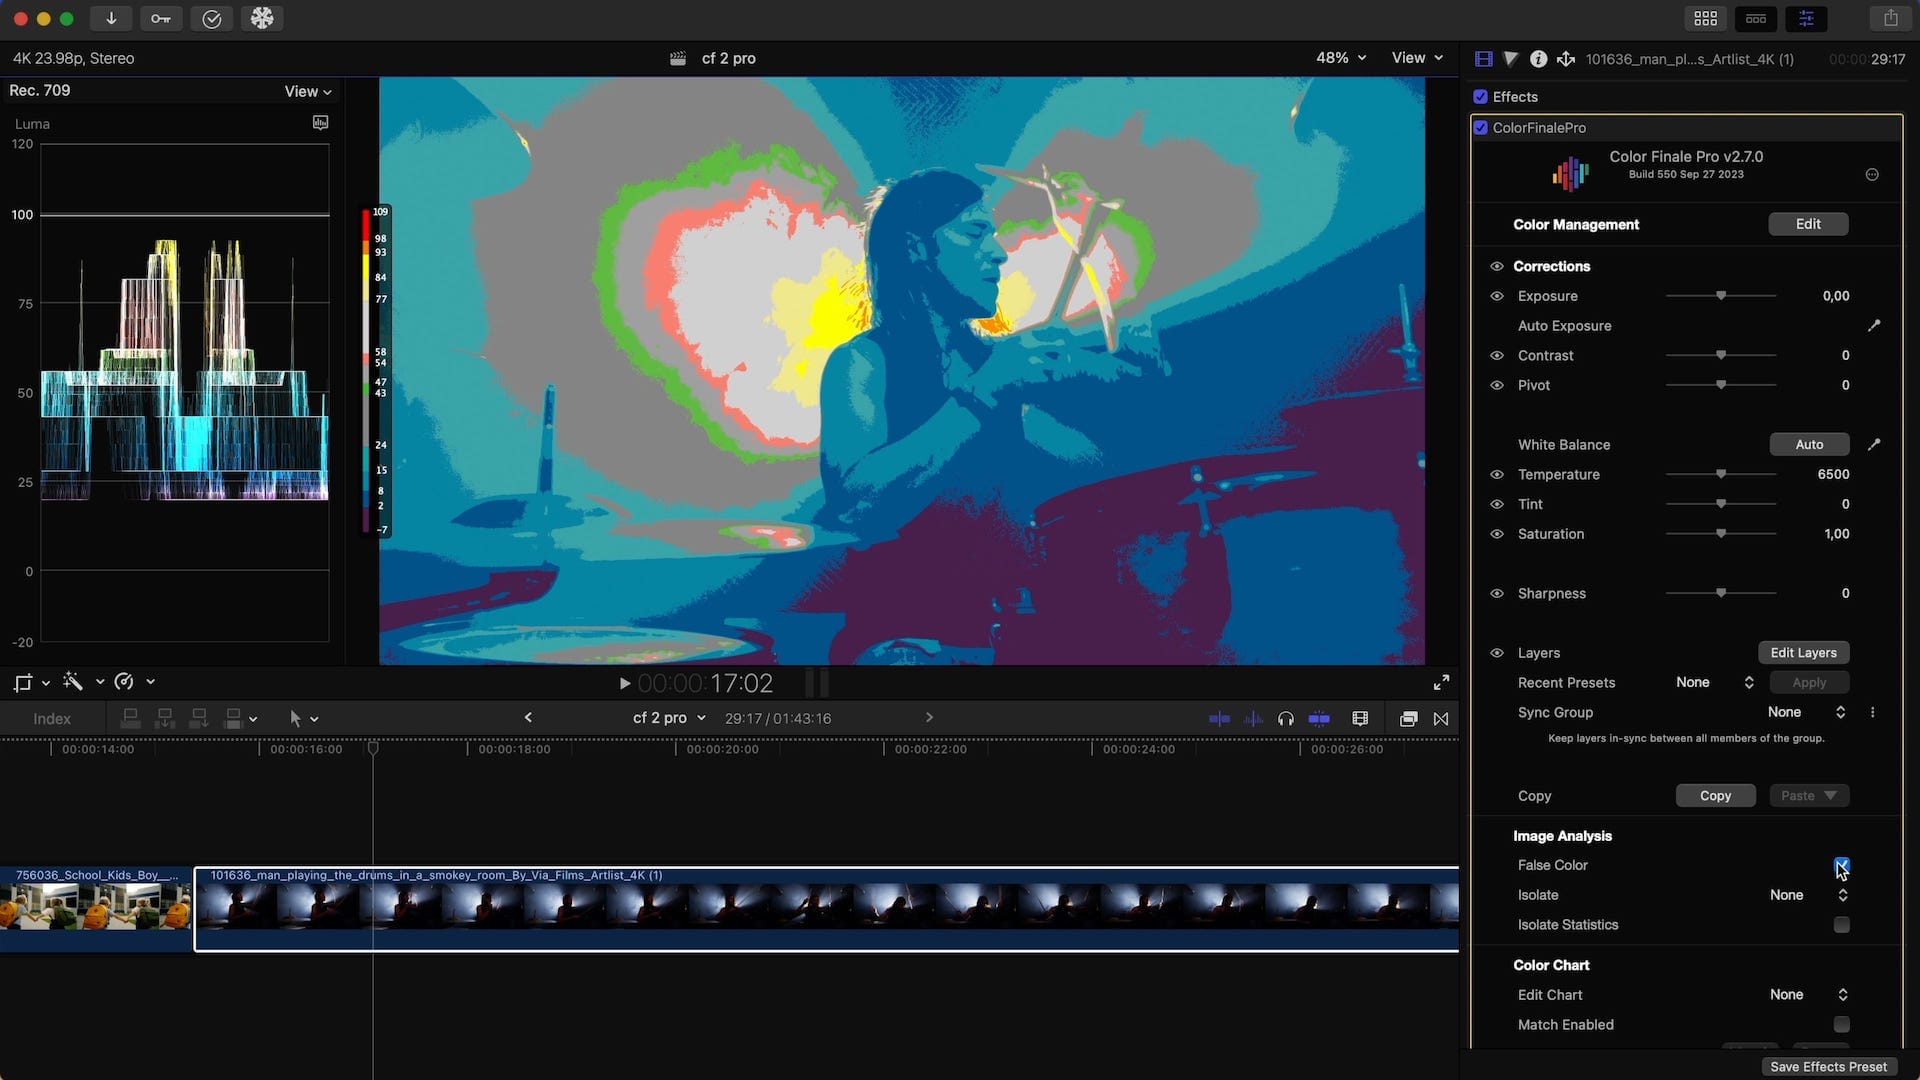
False color
Let's start with false colour. When you enable it you notice that the image in the viewer takes on this kind of psychedelic look. These are colour codes that can quickly help identify colours that are out-of-gamut and more.
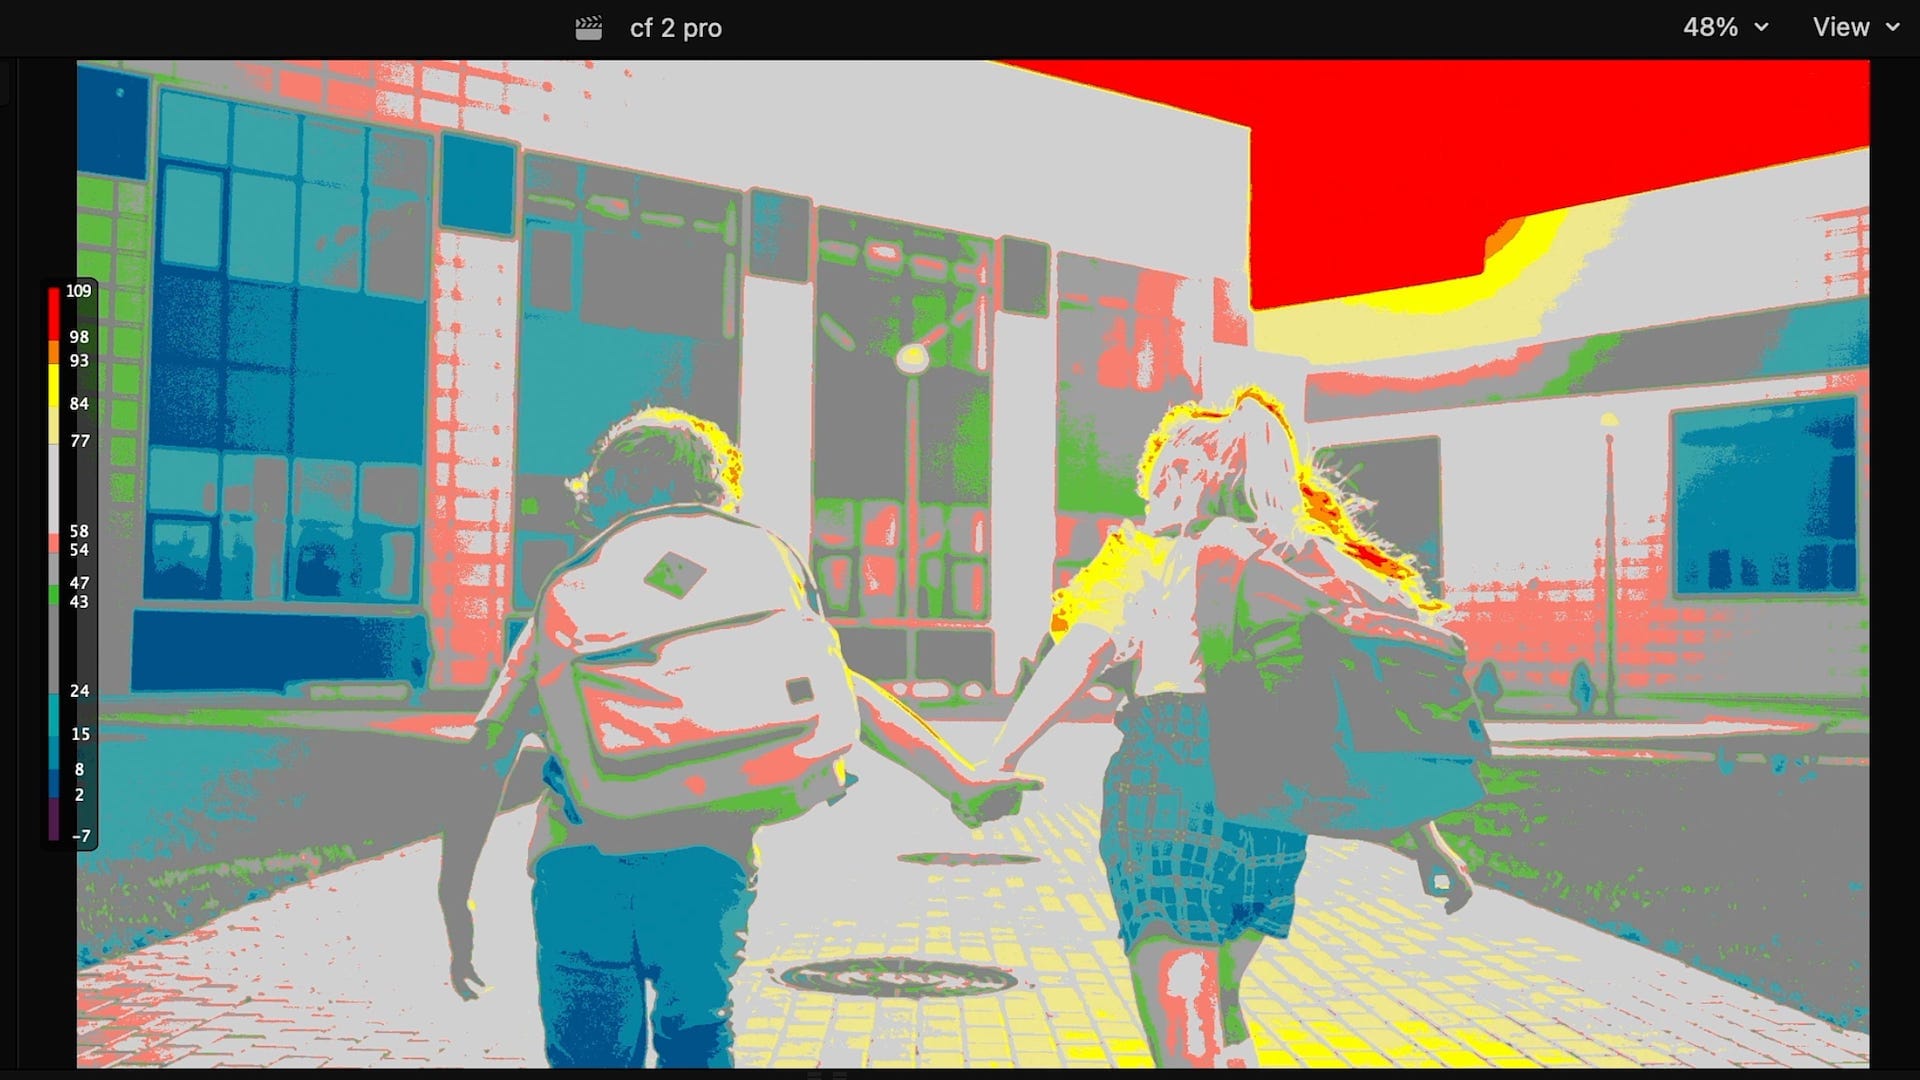
Darker parts of the image will appear in purples and blues, while brighter areas will be in yellows and oranges. When levels exceed the safe limits, they will be displayed in red. For instance, areas in an image exceeding 100 IRE in a Rec. 709 project will appear coloured in red.
Here are two different examples. In this one, the False Color tool confirms overexposure (indicated by the red colour). To address this, you can simply reduce the exposure.
In this second example, we can quickly confirm that our darkest areas are underexposed, so one possible solution is to simply lower the contrast.
Isolate tool
The Isolate tool offers three mask options: Rectangle, Ellipse, and Horizontal Line. Selecting one of these shapes will display it as an overlay in the viewer.
Move the shape over the areas you wish to analyse. While clicking and holding on one of these shapes, the Final Cut Pro scopes reflect only the area within the masked region. This can be extremely useful for things like evaluating skin tones.
Let's explore further with some examples.
Skin tone
A key application is isolating skin tone to make accurate adjustments. We want to get them right, since that's one of the first things we as viewers evaluate on a subconscious level.
Opening the vectorscope and toggling the skin tone line makes this adjustment much easier.
Isolate a portion of the talent's face using an ellipse or rectangle mask — whichever one fits best.
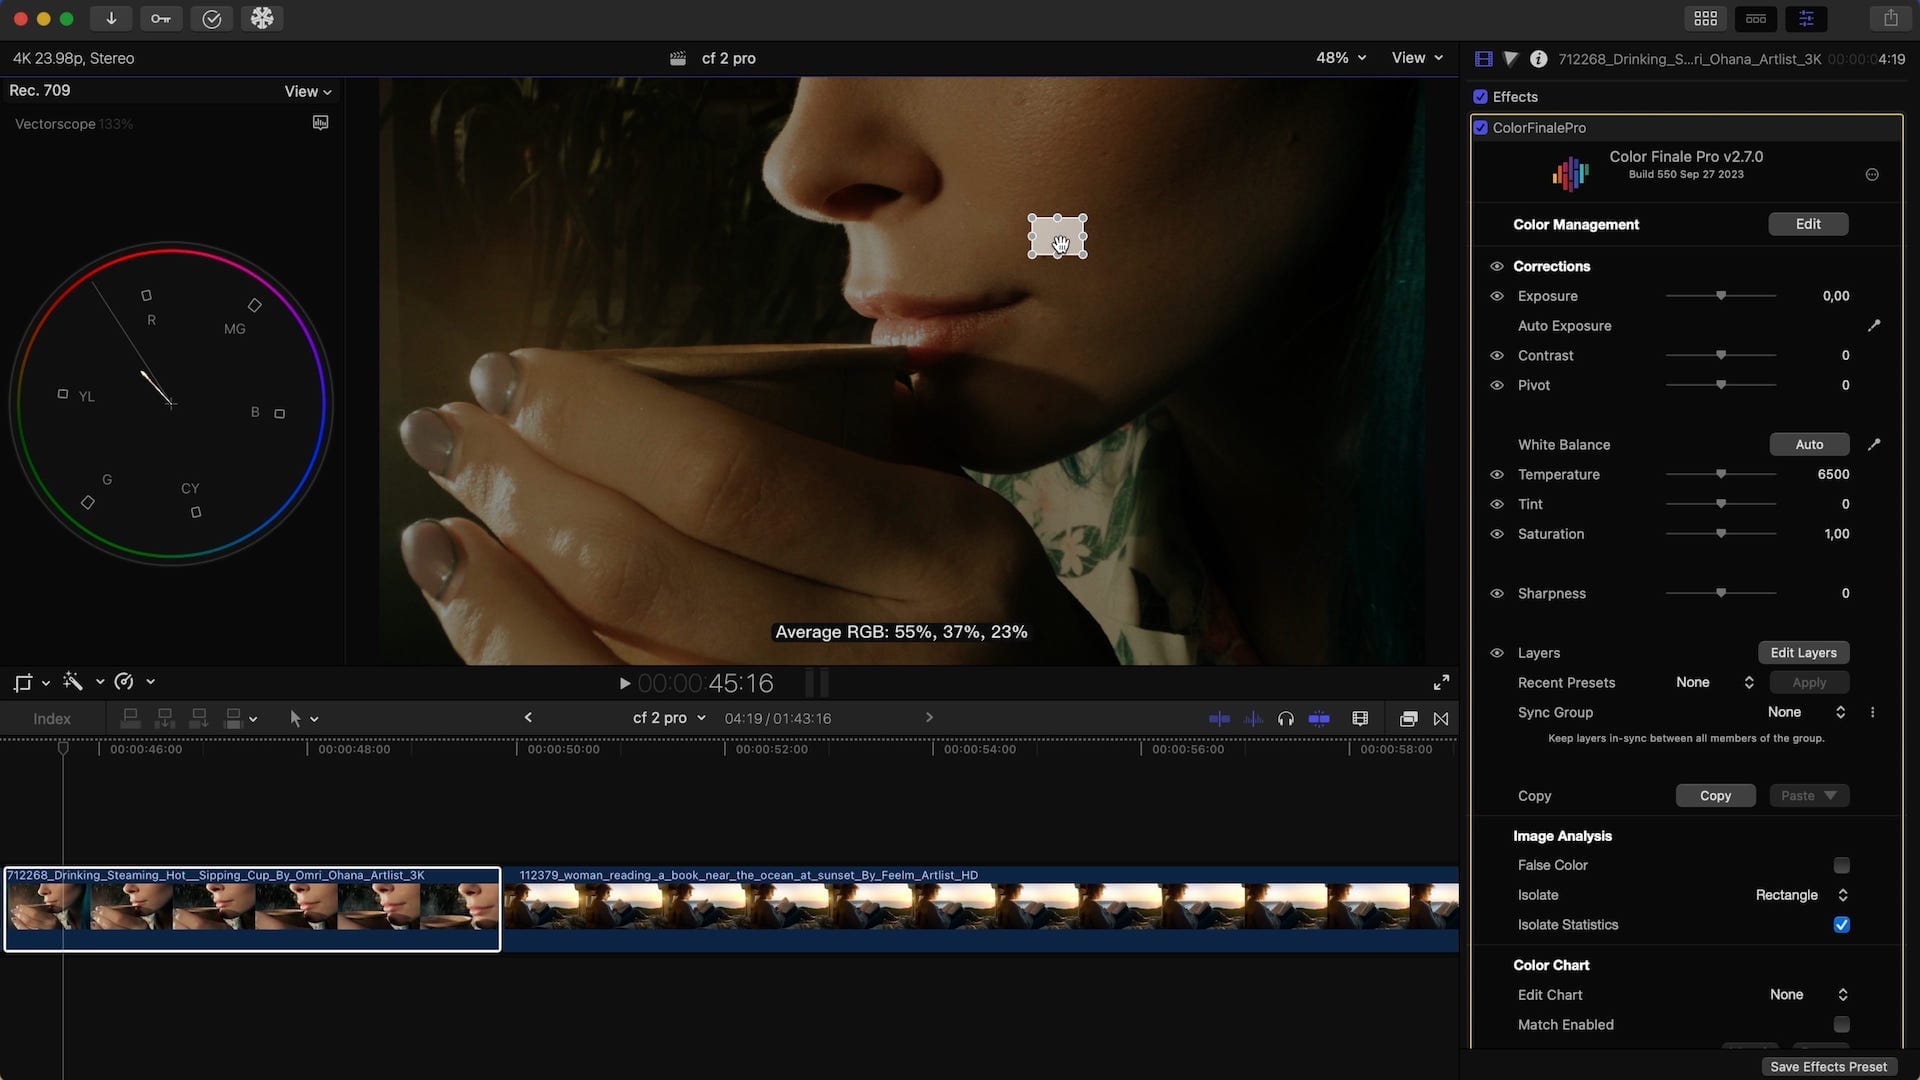
Now by referring to the scopes you can better determine if the skin tone needs correction. Typically, natural skin tone contains both red and yellow hues. You can use the six vector tool to increase or decrease these colours for a better-looking skin tone.
Overexposure
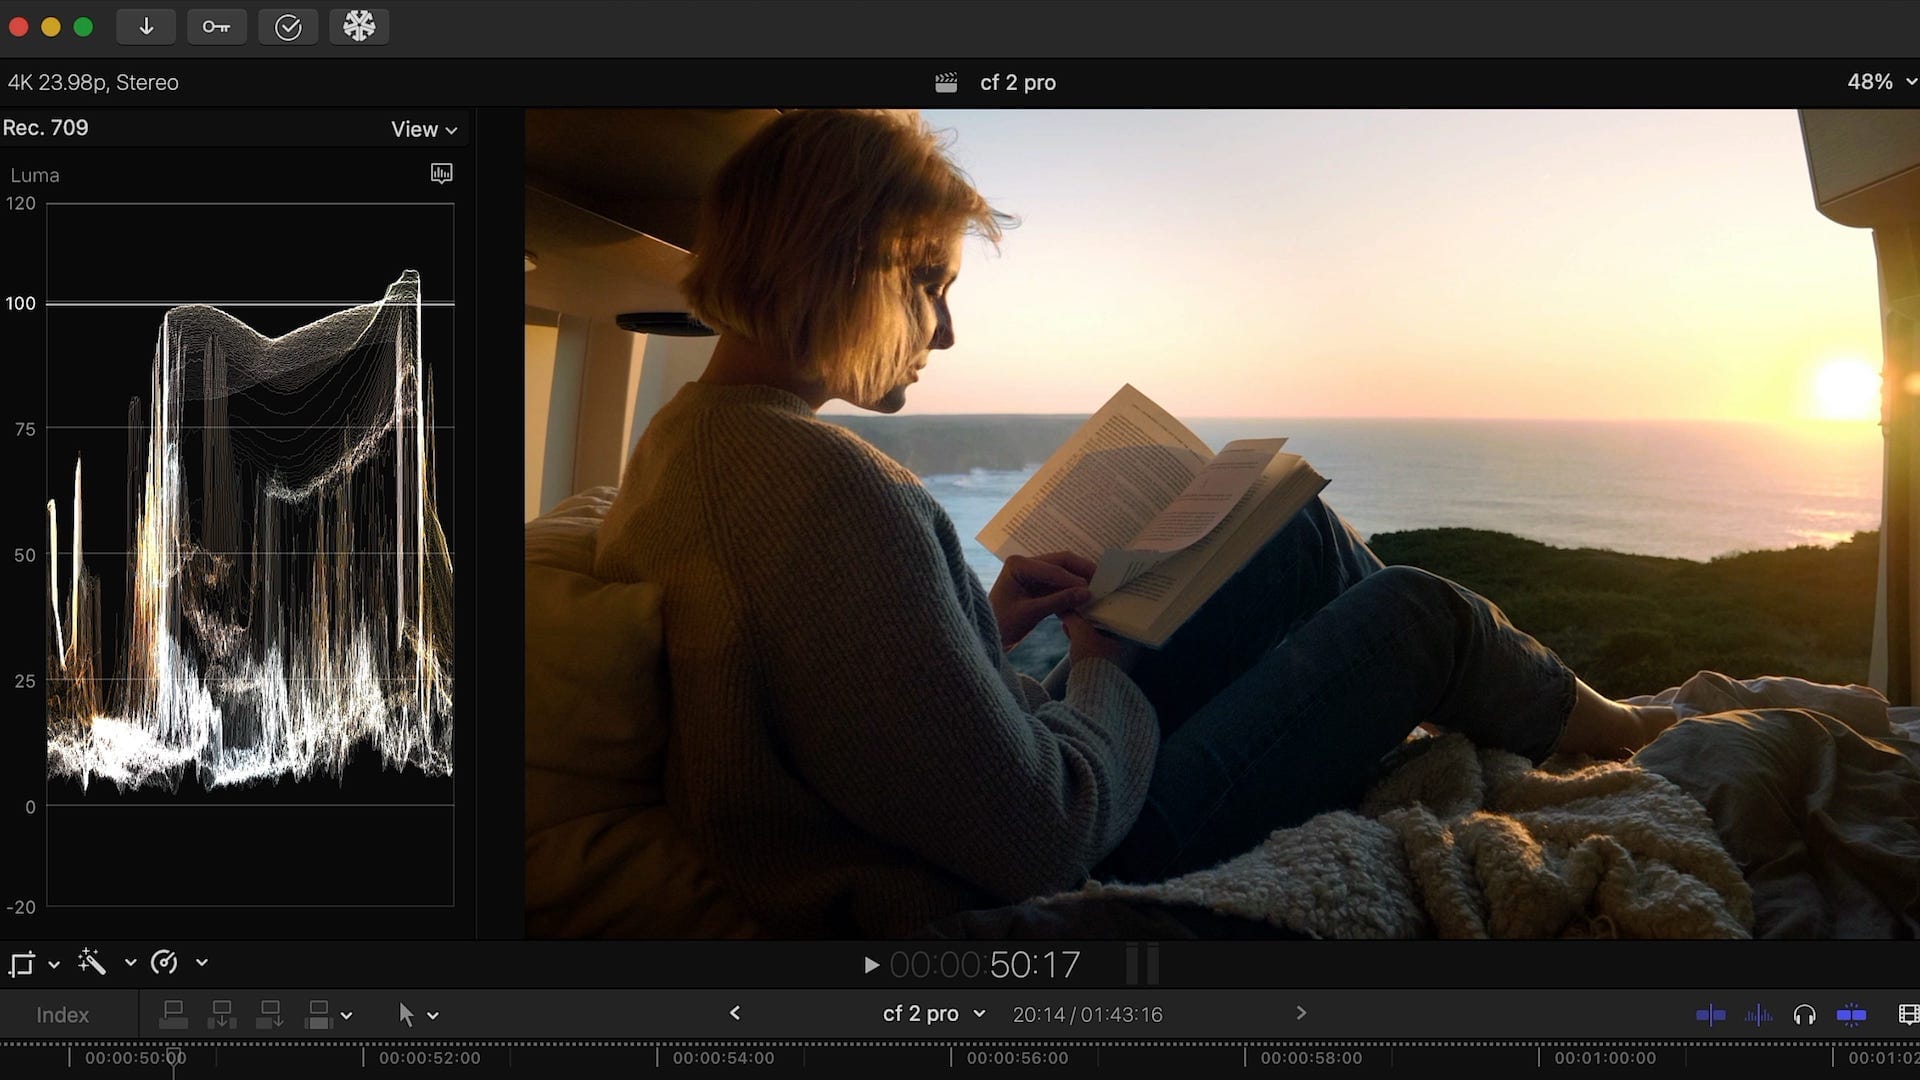
Consider this clip of a sunset. Our waveform confirms overexposure somewhere, but it's important not to rush to conclusions. When the sun is directly in the shot, some overexposure may be expected, and kept in. To gauge this, isolate a part of the image with a rectangle mask and examine the surroundings.
Then, drag the horizontal line mask up and down the image to confirm that only the sun is overexposed. Now you can make changes accordingly.
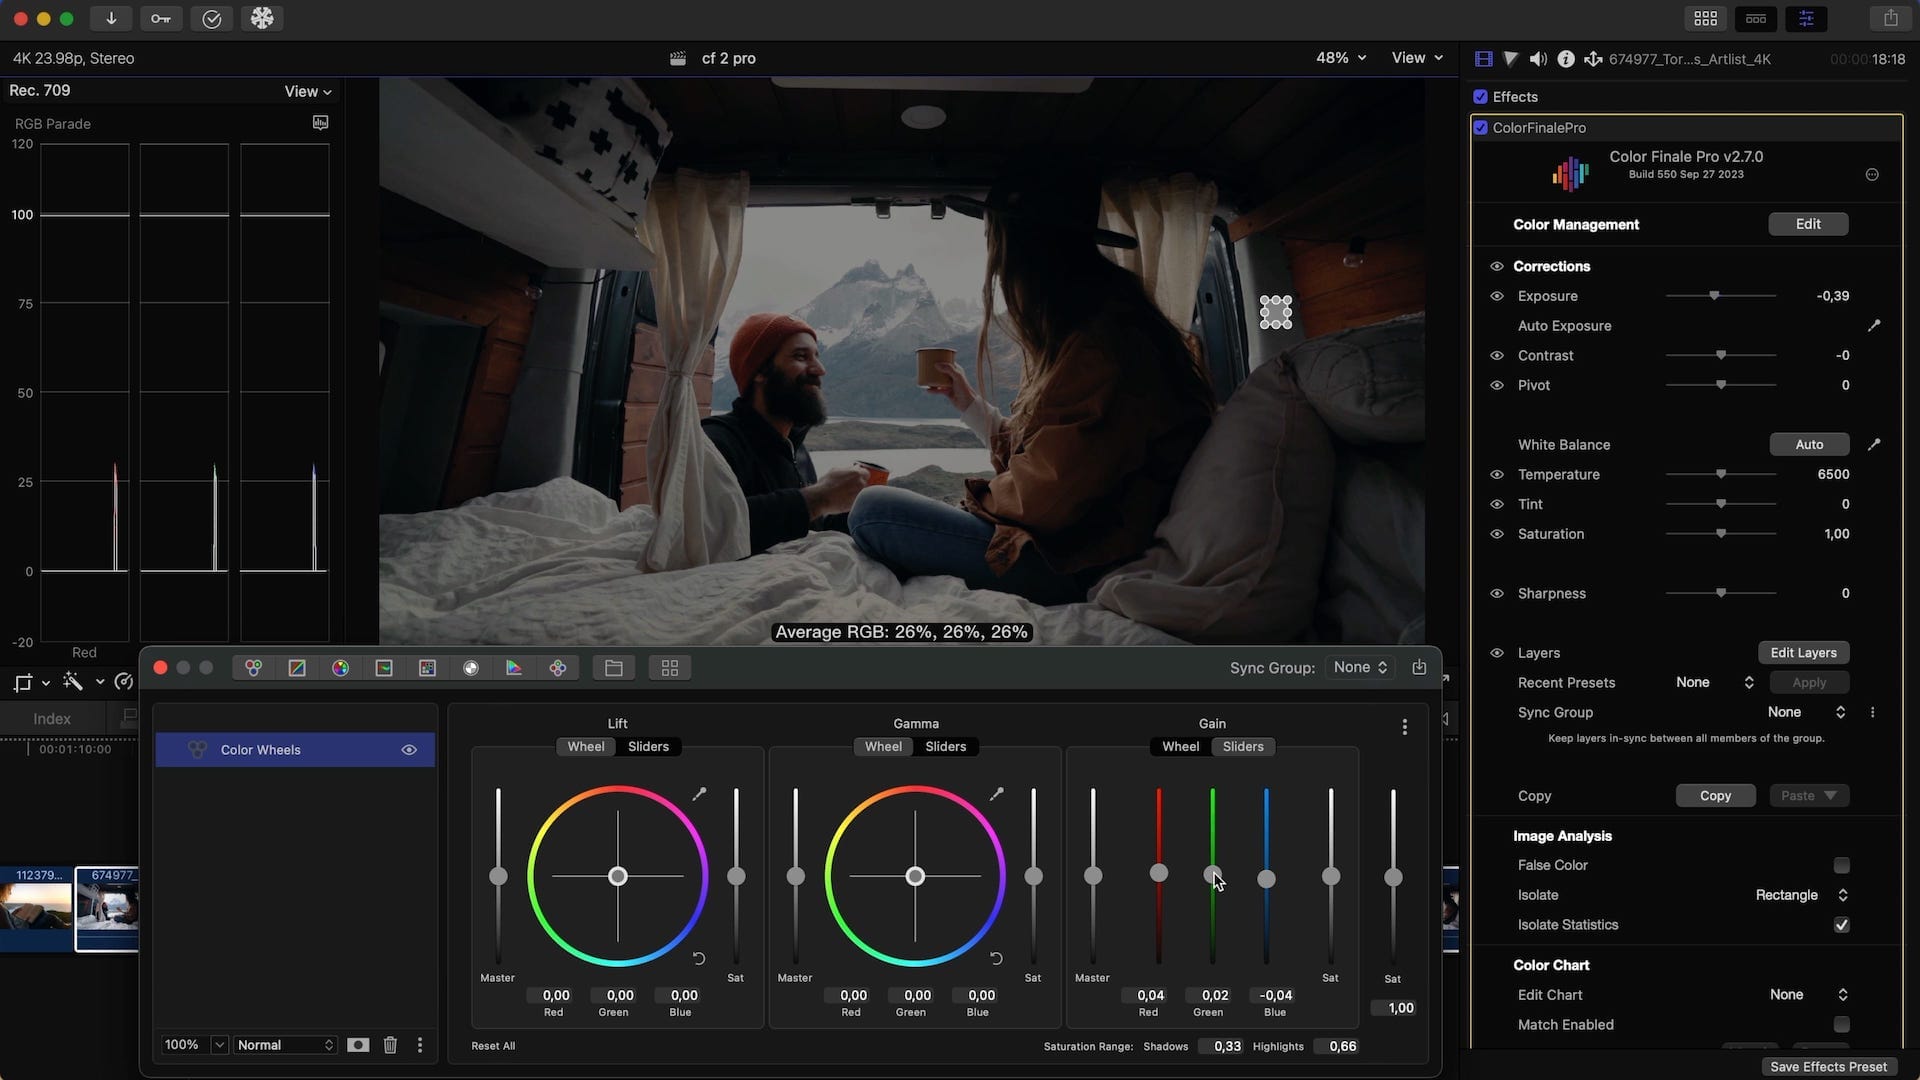
Color balance
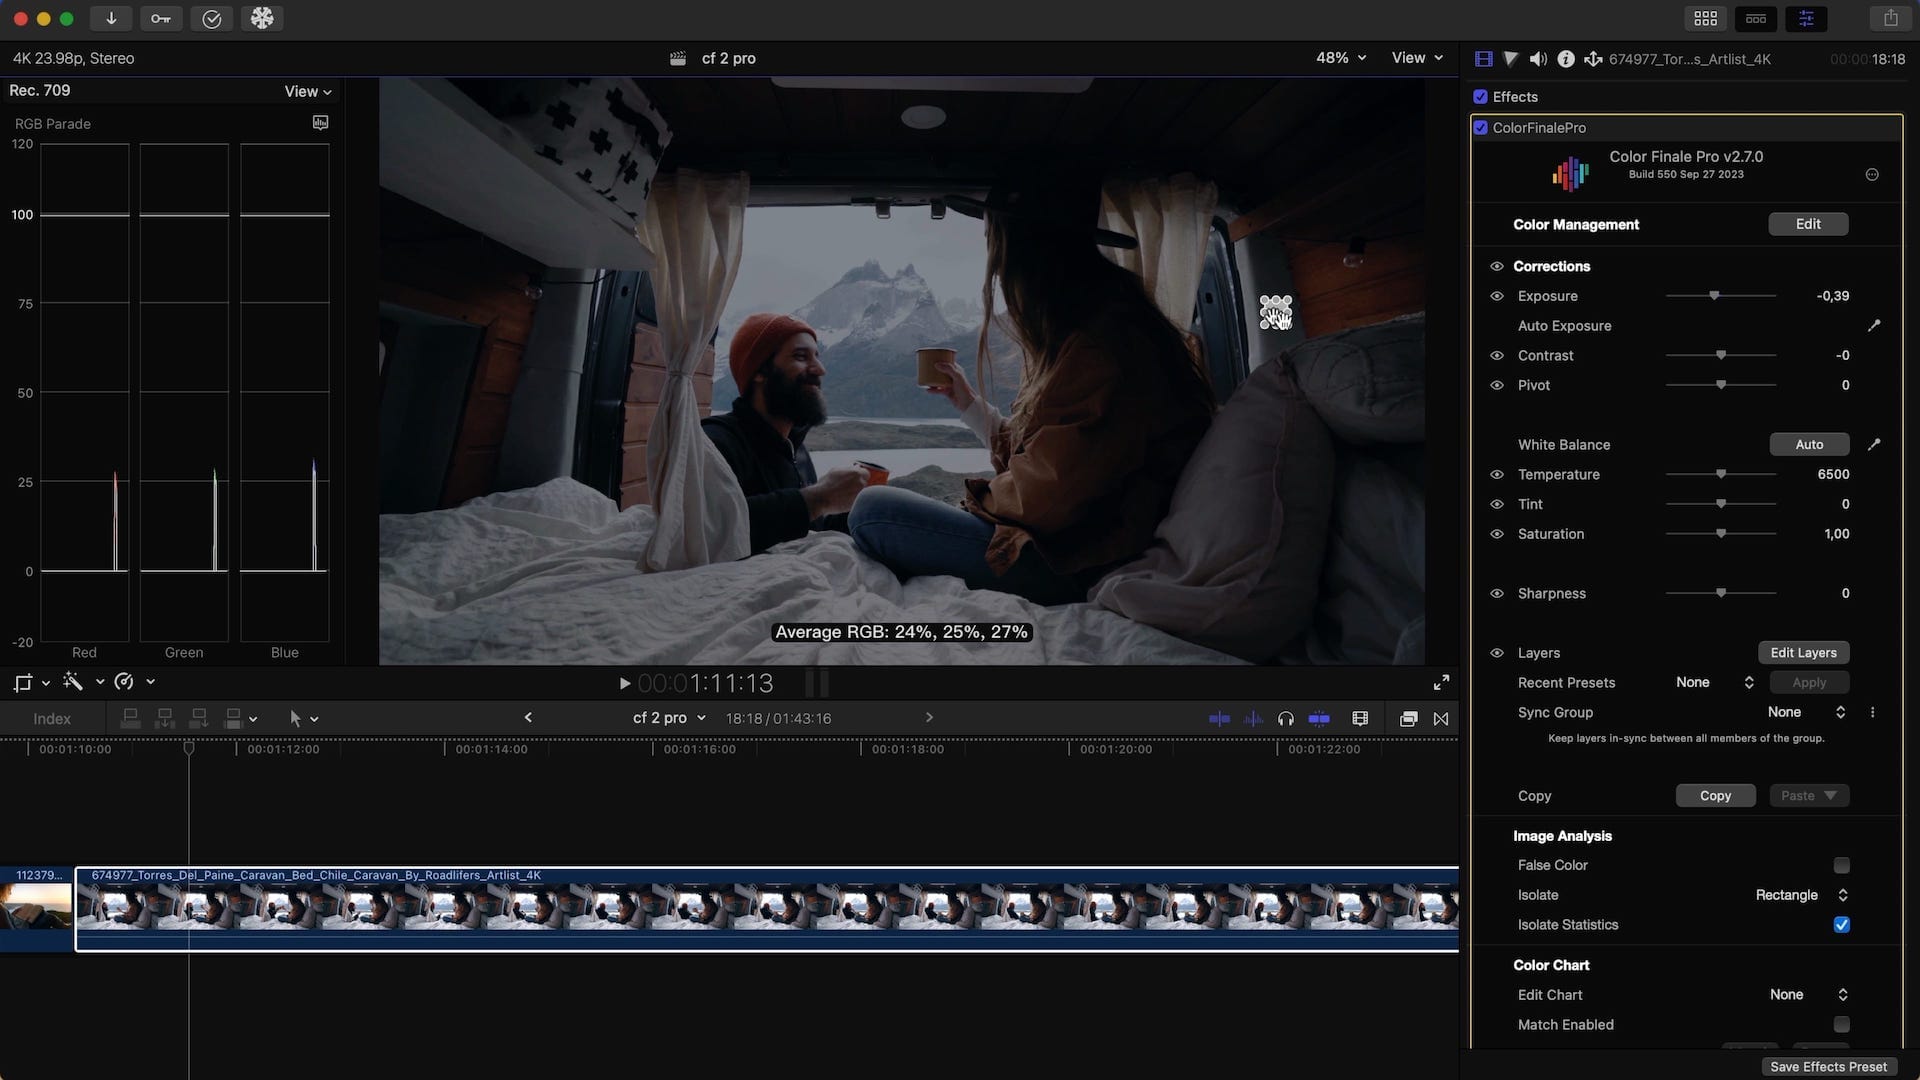
A straightforward way to balance an image is by identifying an area that you know should be neutral, and checking its colour balance. Above is an example with a grey area: isolate it, and now you can read off the average RGB value in the overlay. If there's an imbalance, using the colour wheels in sliders mode is a fantastic way to adjust the colour balance.
End
And that’s it for now, consider subscribing to our YouTube channel for regular tutorials about Color Finale 2 Pro, and check out our bundle offers in our store.