Introduction
Diffusion filters are pretty cool. They soften an image by reducing contrast between highlights and shadow areas.
They can create a more flattering look over skin make scenes look dreamy, out of this world.
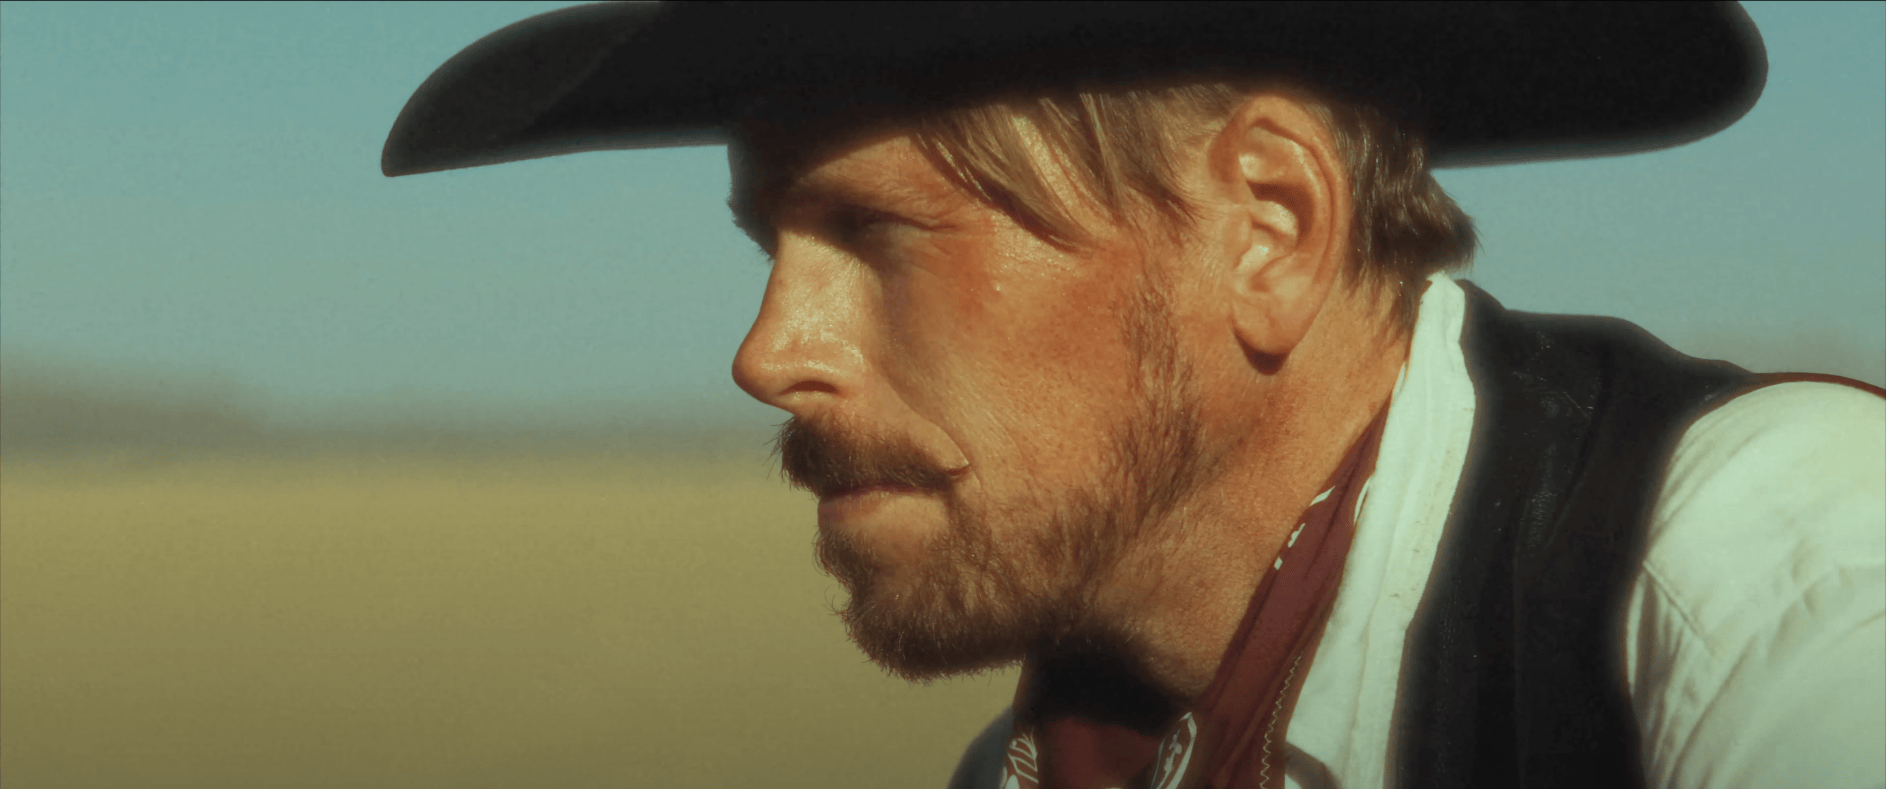
With Color Finale 2 Pro it’s easy to create all kinds of diffusion, anything from simple whole-image diffusion to a more subtle effect, as well as getting creative—like in this image where the shadow areas have been selectively diffused:
This tutorial is for you if you ever need to recreate the looks of diffusion filters, and through this process you will also learn how to use the Image and HSL masking tools in Color Finale 2 Pro. Follow along with a free 7-day trial.
First Example (Diffusion over whole image)
Let's first create diffusion over the whole image, the simplest form, and then see how we can get that looking more like Pro-Mist or Glimmerglass filters.
Instead of duplicating clips like you might do on the Final Cut timeline, we can do everything neatly over one clip from the Color Finale 2 layers panel. Add a filter layer—gaussian blur. We've chosen to have it at around 30%. Set blend mode to Lighten. Control the strength of the effect with the opacity slider.
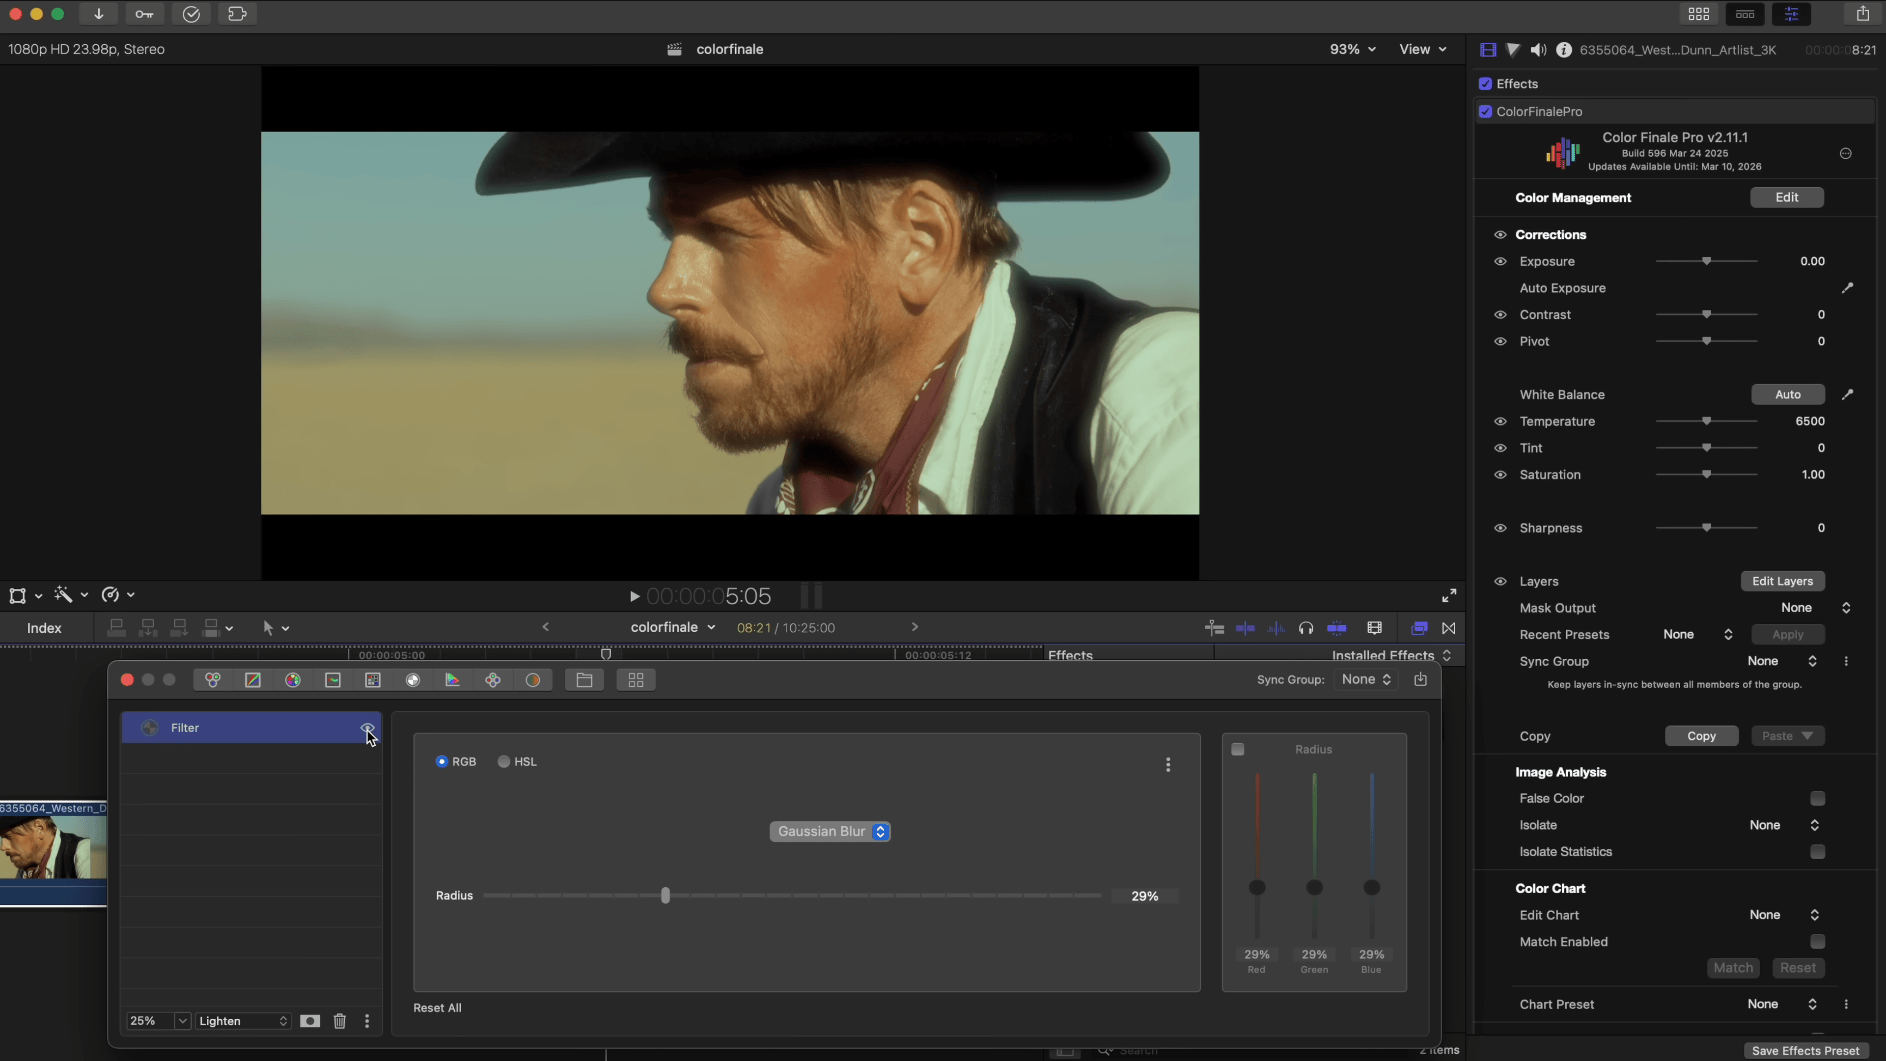
This works to get the effect up and running quickly, and maybe it'll be enough in some cases. But how can we control it better, that is, can we apply diffusion only to certain regions of the image?
Second example (diffusing highlights)
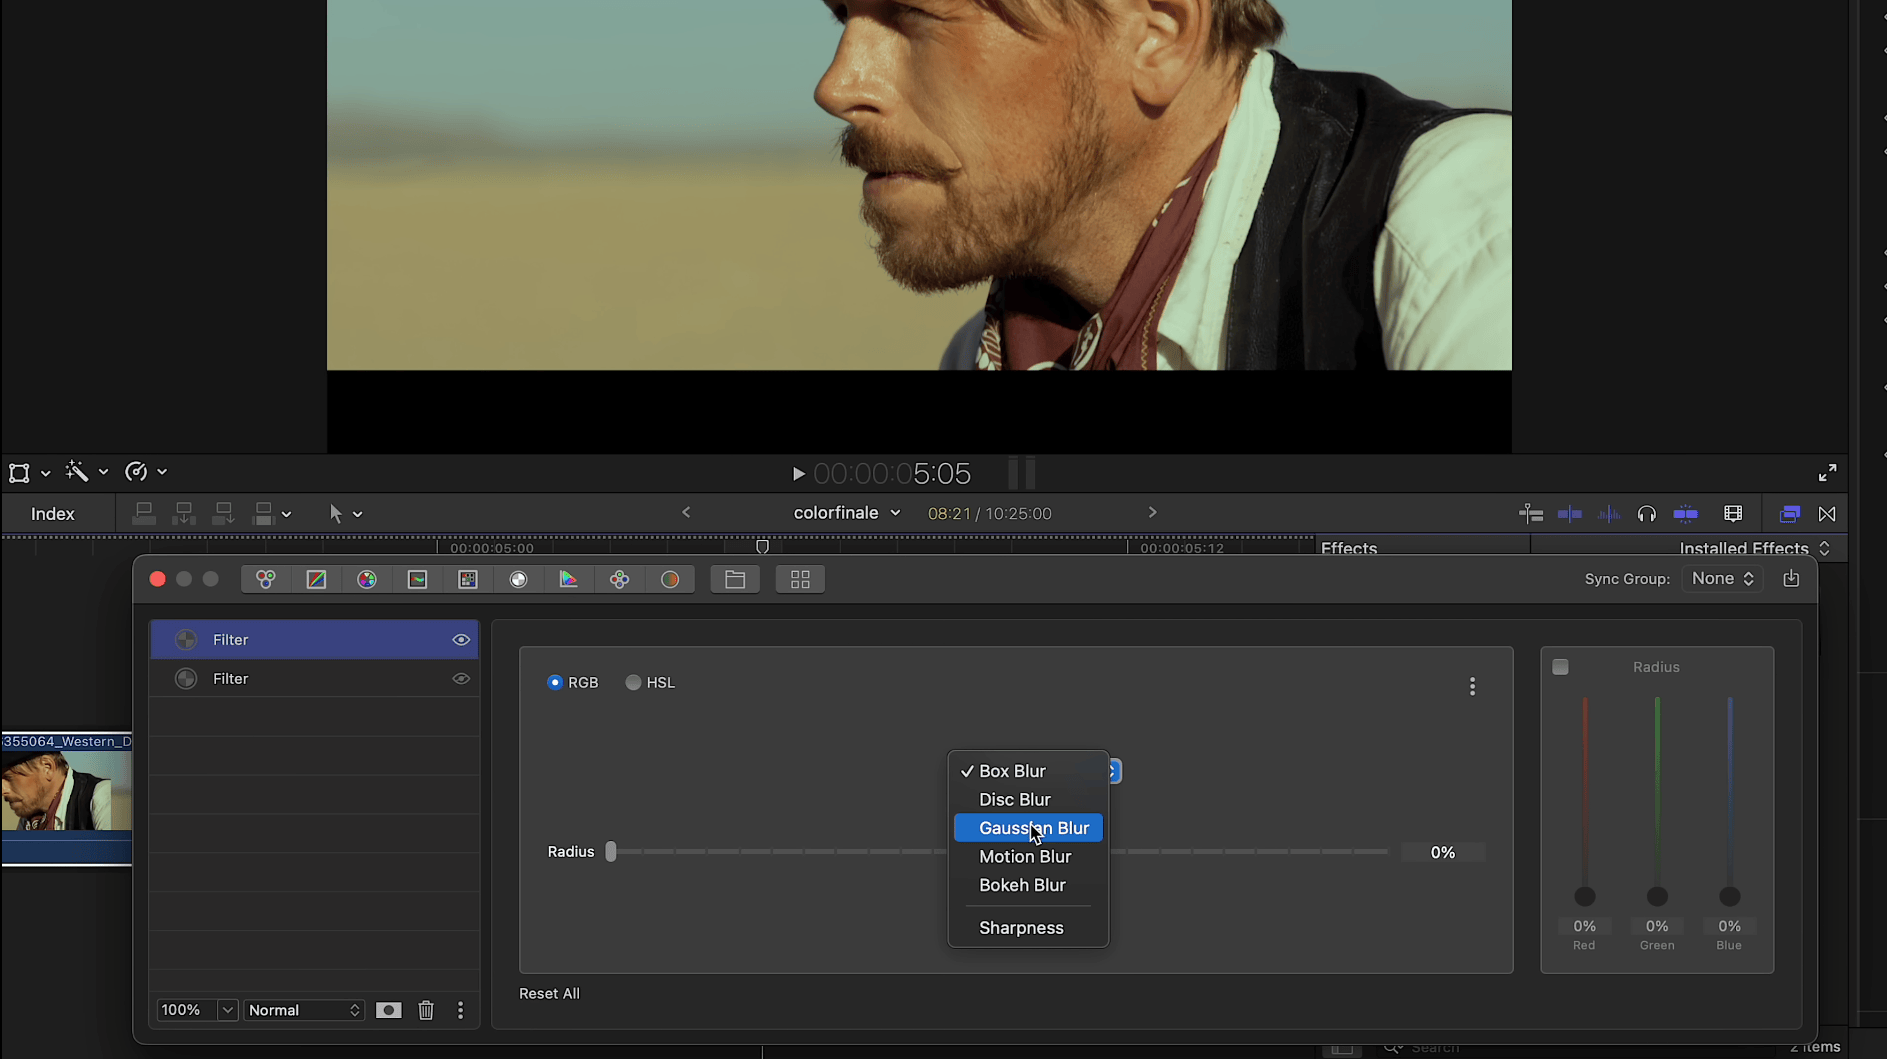
Let's expand our approach. We've bypassed the previous Filter layer and added another one. Again, we’ve set it to Gaussian blur, and selected the Lighten blend mode. But then, apply an image mask.
The image mask does the following: at first the whole image is masked because the input and output levels capture 100% of the image's tonal range, but when you start to limit the levels, the mask shrinks to that selection.
The composite mask view mode shows the clearest representation of where the mask will be strongest — that is all areas in white are affected.
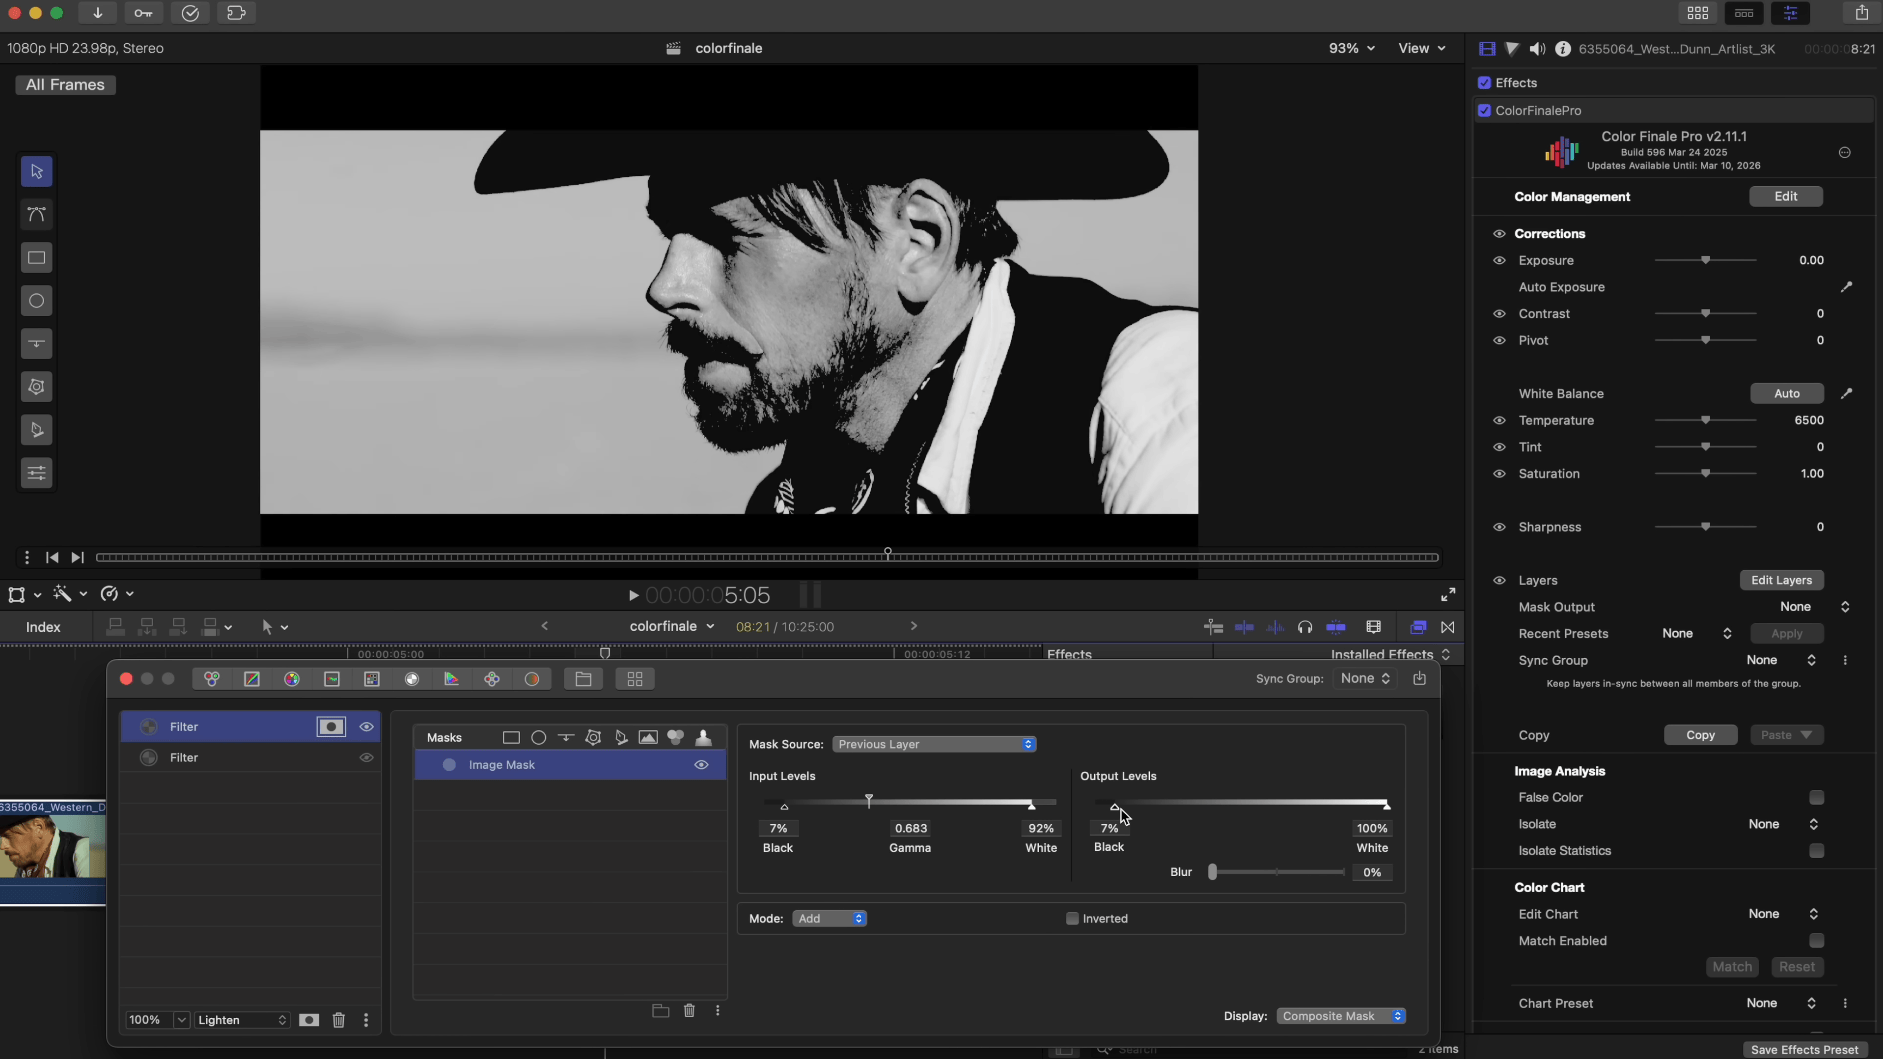
So we have the blur from the effect layer, but because it's masking the image and the mask has sharp edges, we need to also separately blur the edges of the mask.
These different viewing modes help to quickly switch between the final result and a clear view of just the mask.
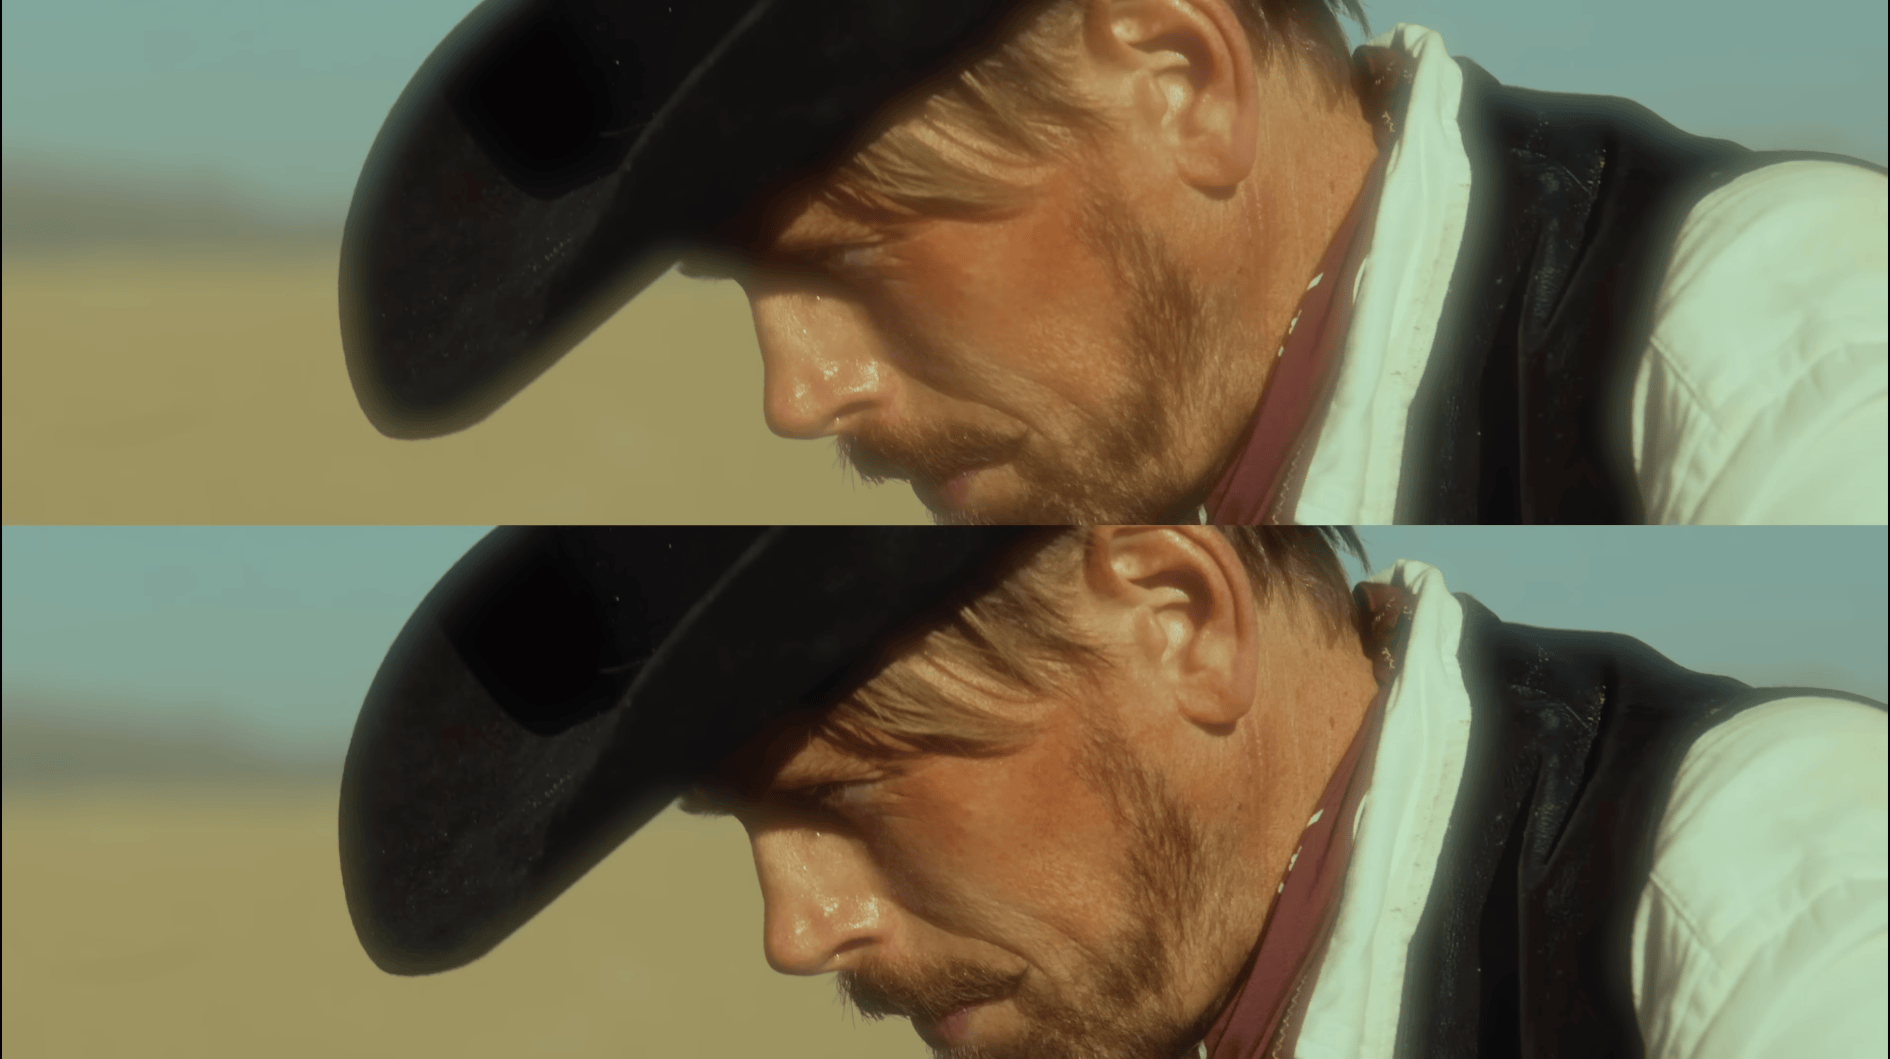
So this is what diffusion filters such as Pro-Mist tend to do, the result is that diffusion is limited to specific tonal ranges, for example just the highlights - so you get beautiful halos around bright objects while the rest of the image remains nice and sharp.
Let's compare this with the simpler method from earlier. The former (top) looks overbearing now!
Third example (selectively diffusing shadow areas)
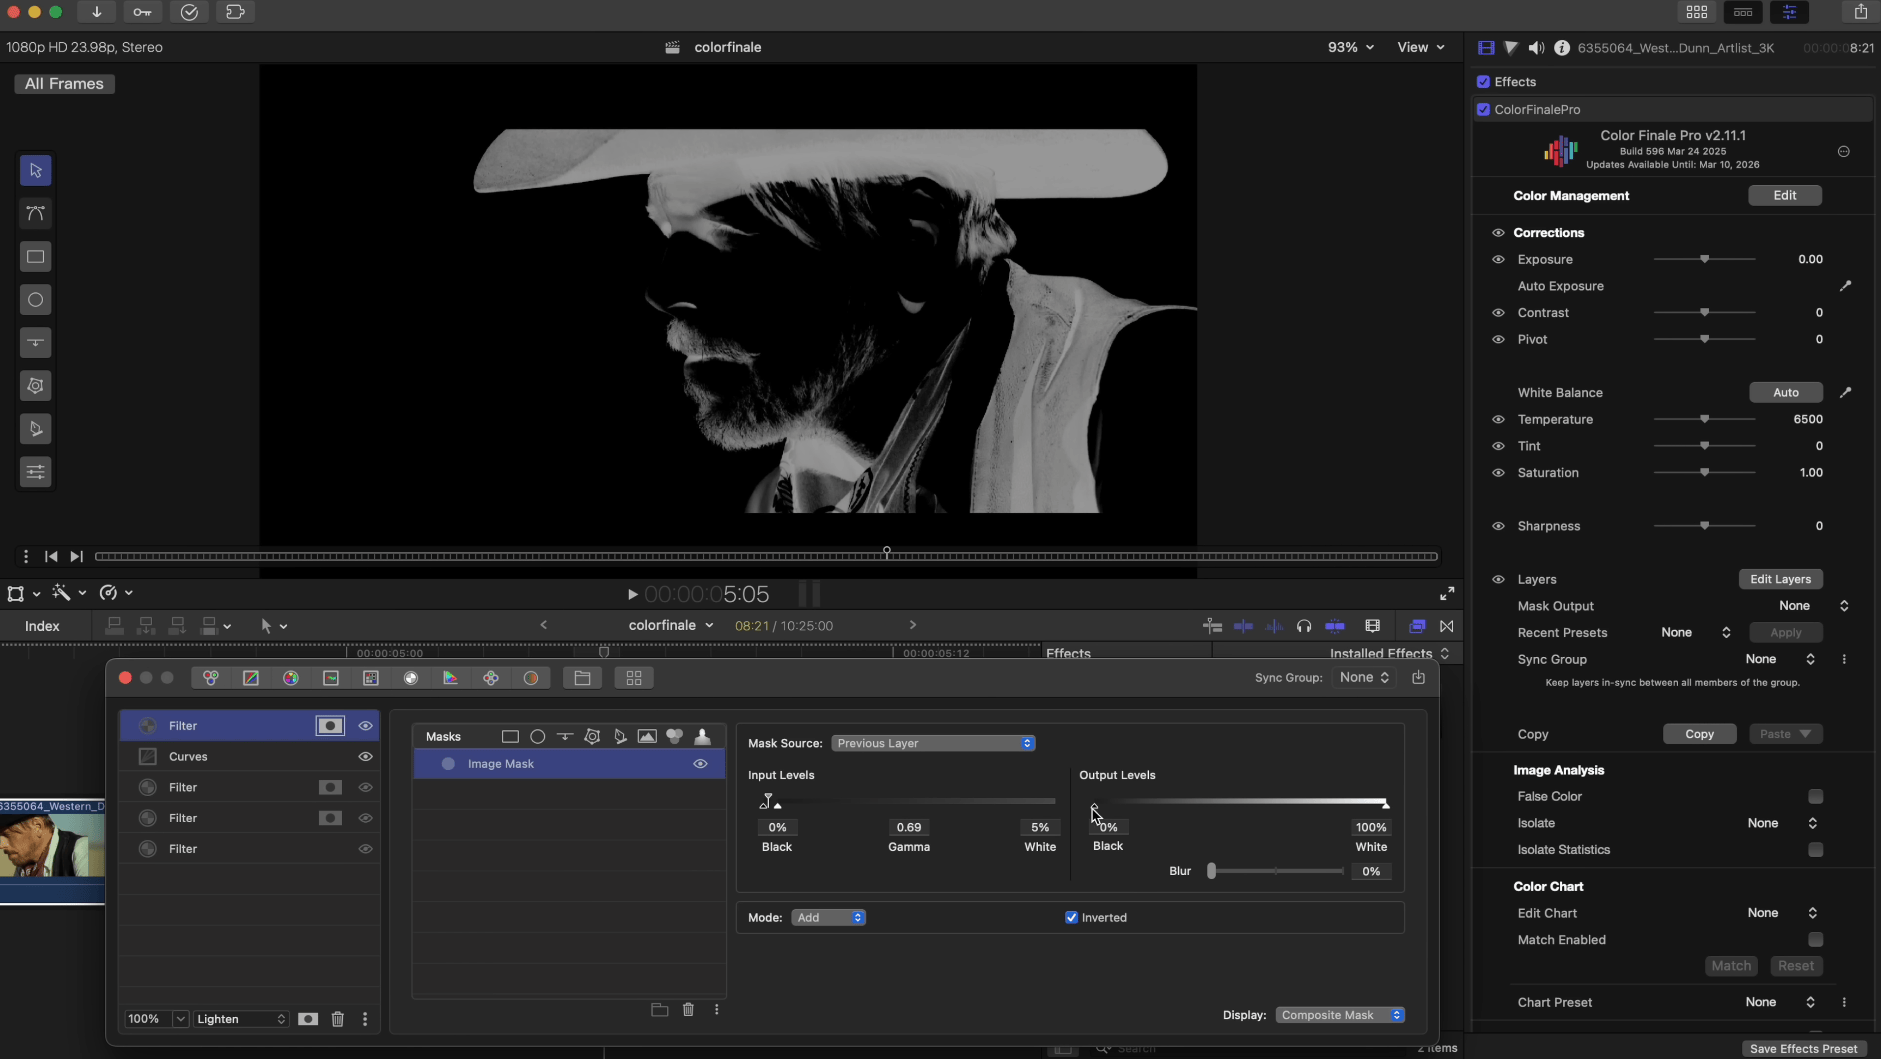
Another way to use the Image Mask that starts to diverge from what’s easily possible in-camera is to diffuse only the shadow areas instead of the highlights. Let’s bypass the previous filter layer. We’ll need one extra step: slightly lifting the shadows using an RGB Curves layer.
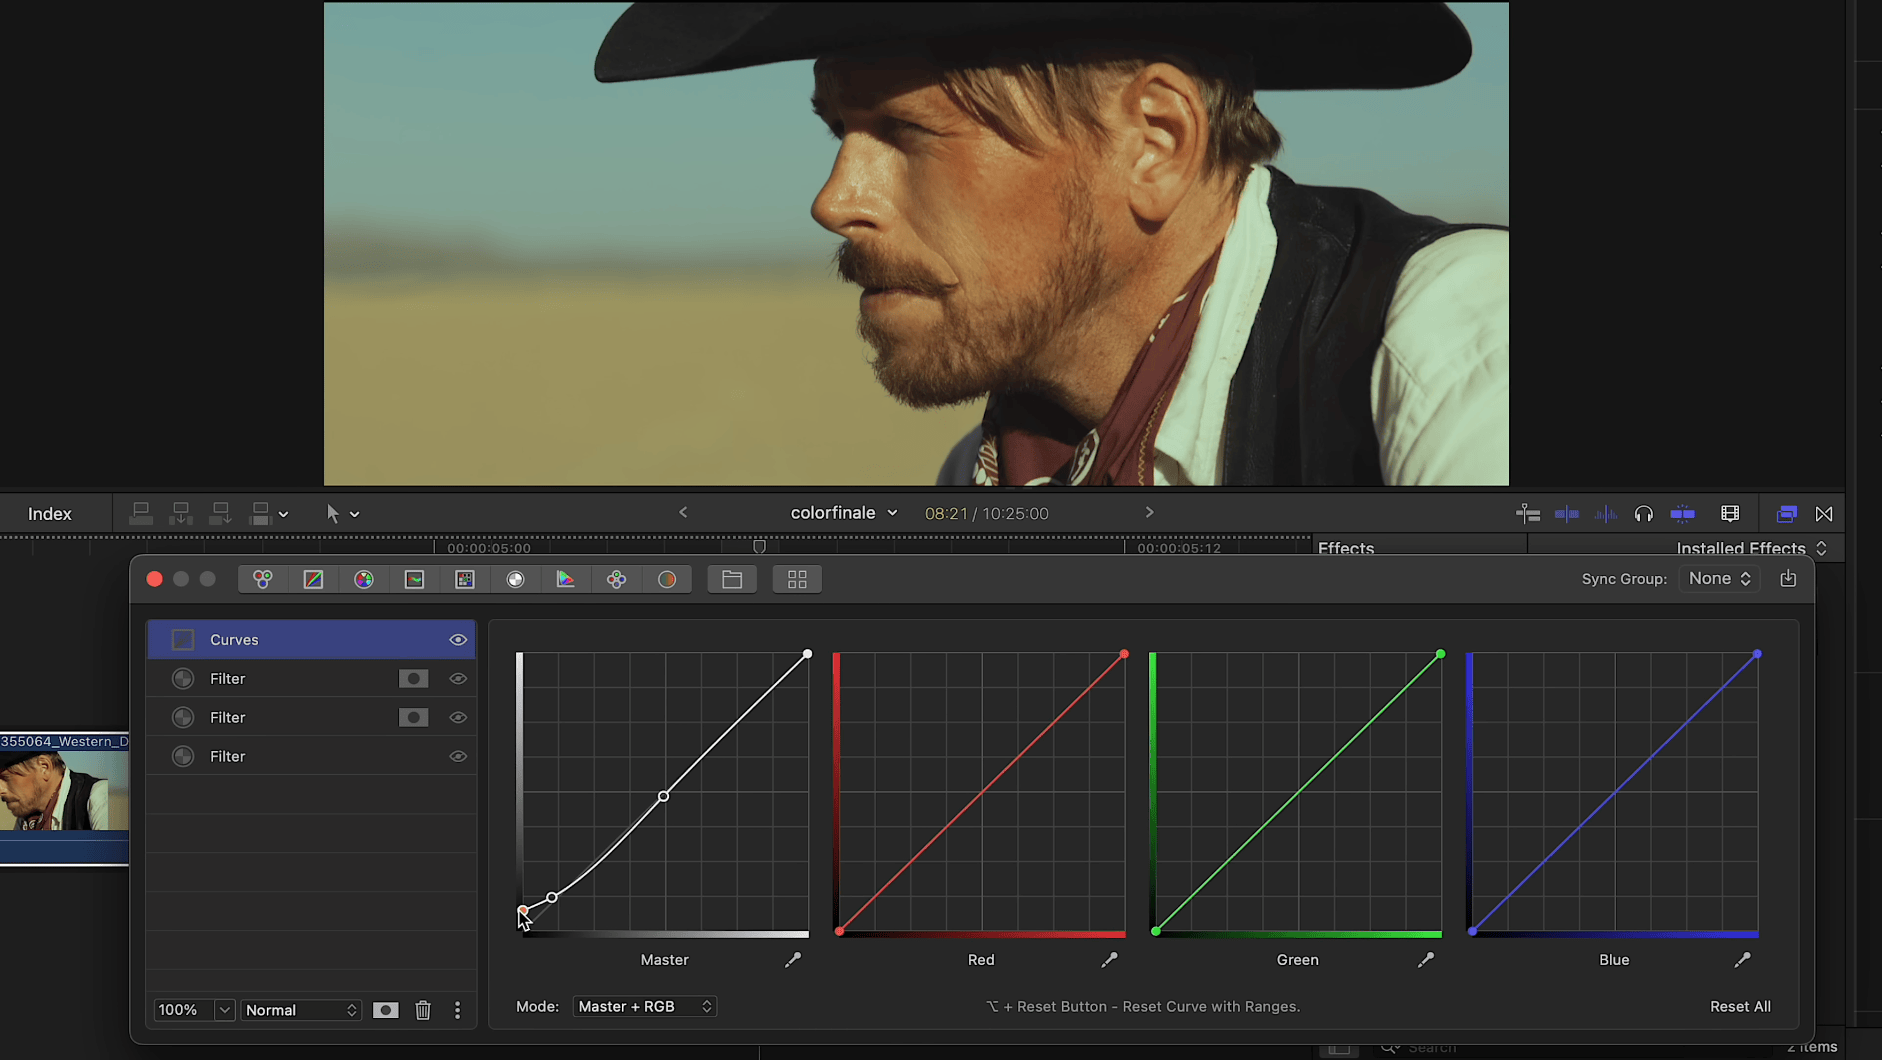
Next, follow the same steps as before: add an image mask and configure it in Composite Mask mode. But in this case, invert the mask to target only the shadows and experiment with the mask blur slider to achieve the desired result.
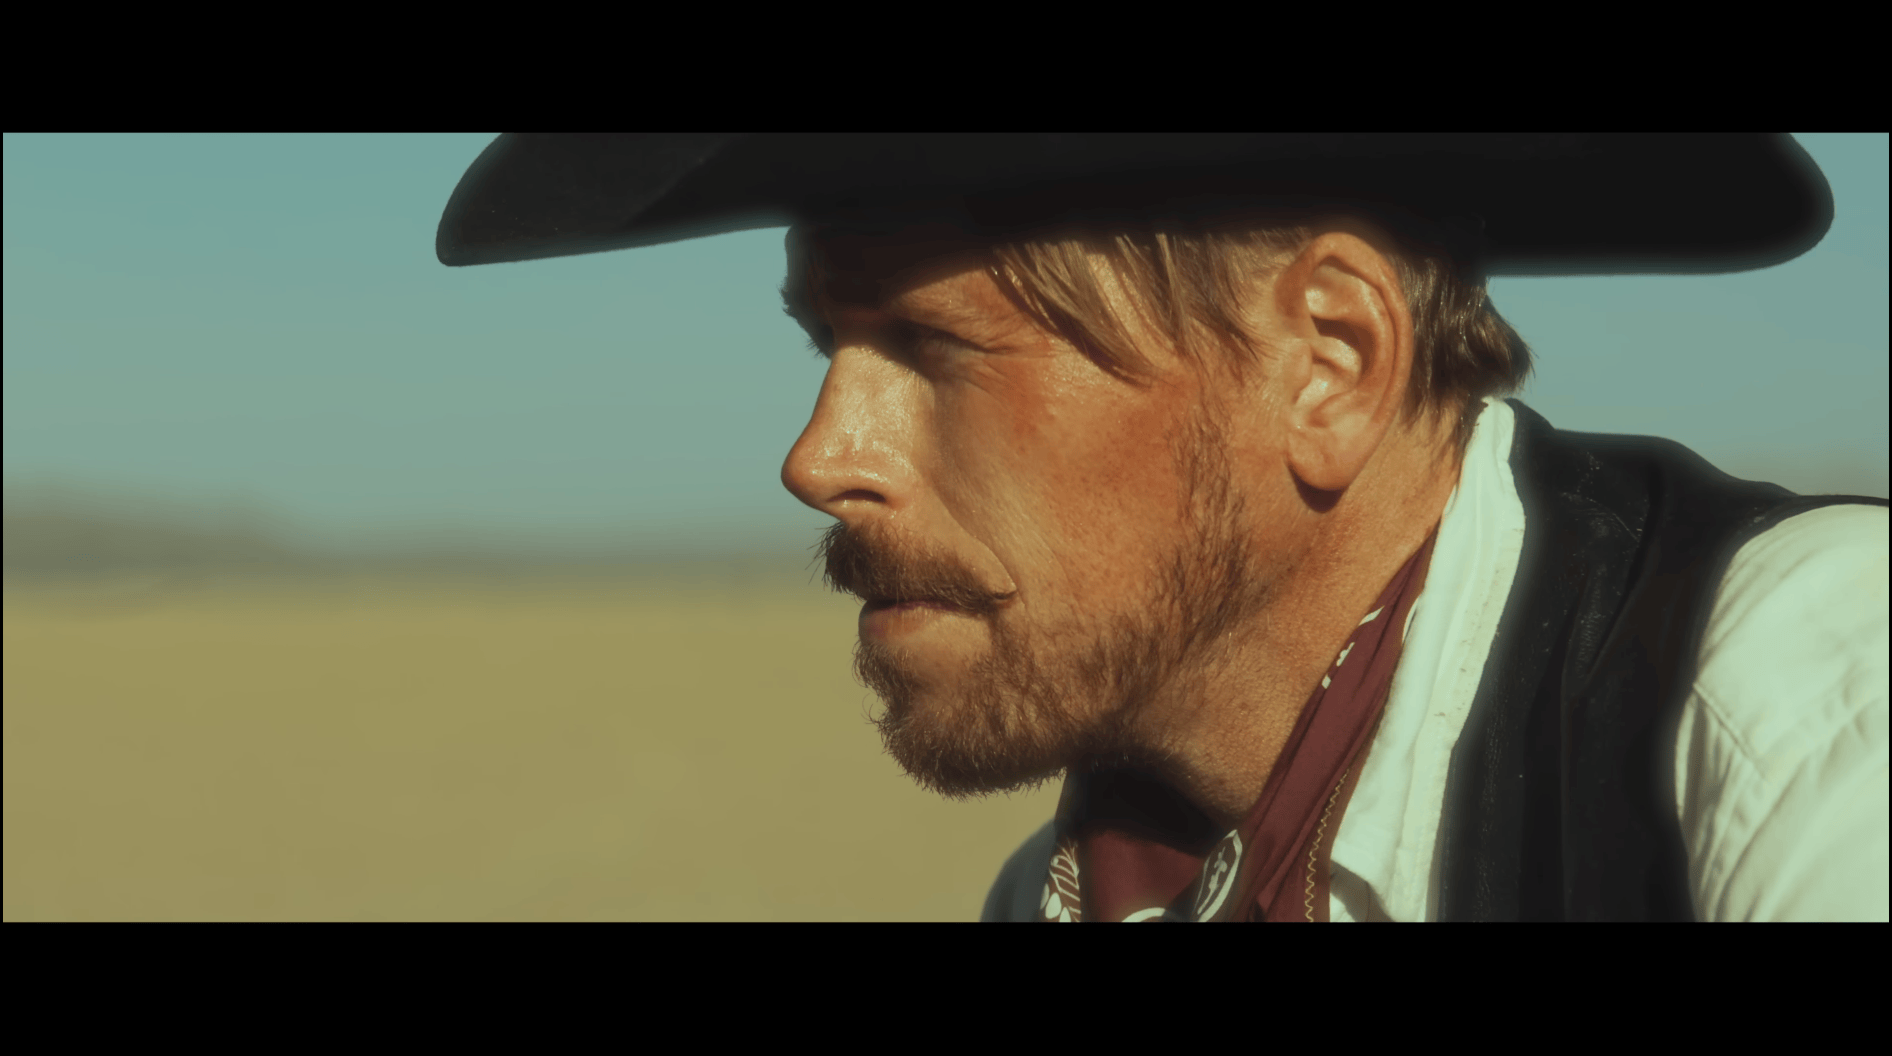
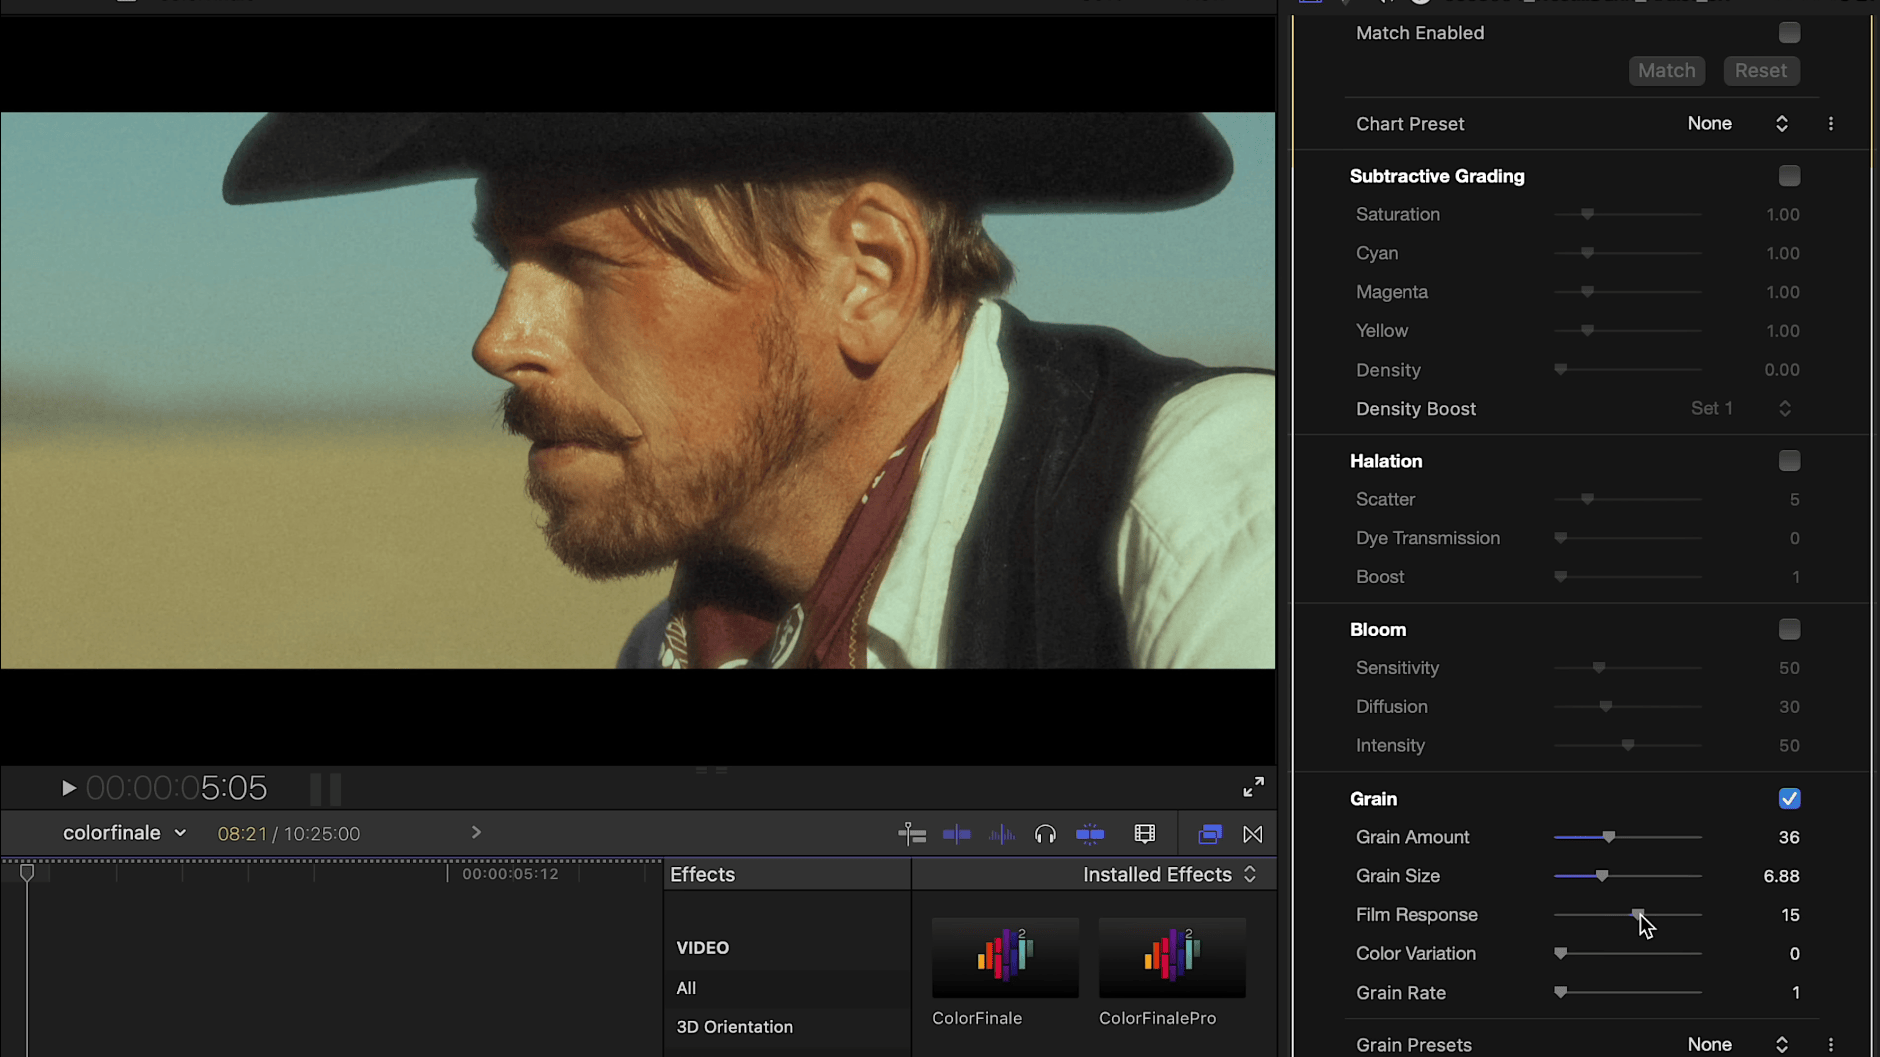
As you can see, we’ve diffused all the darker areas including the hat, vest and shadow areas. Looks pretty cool right?
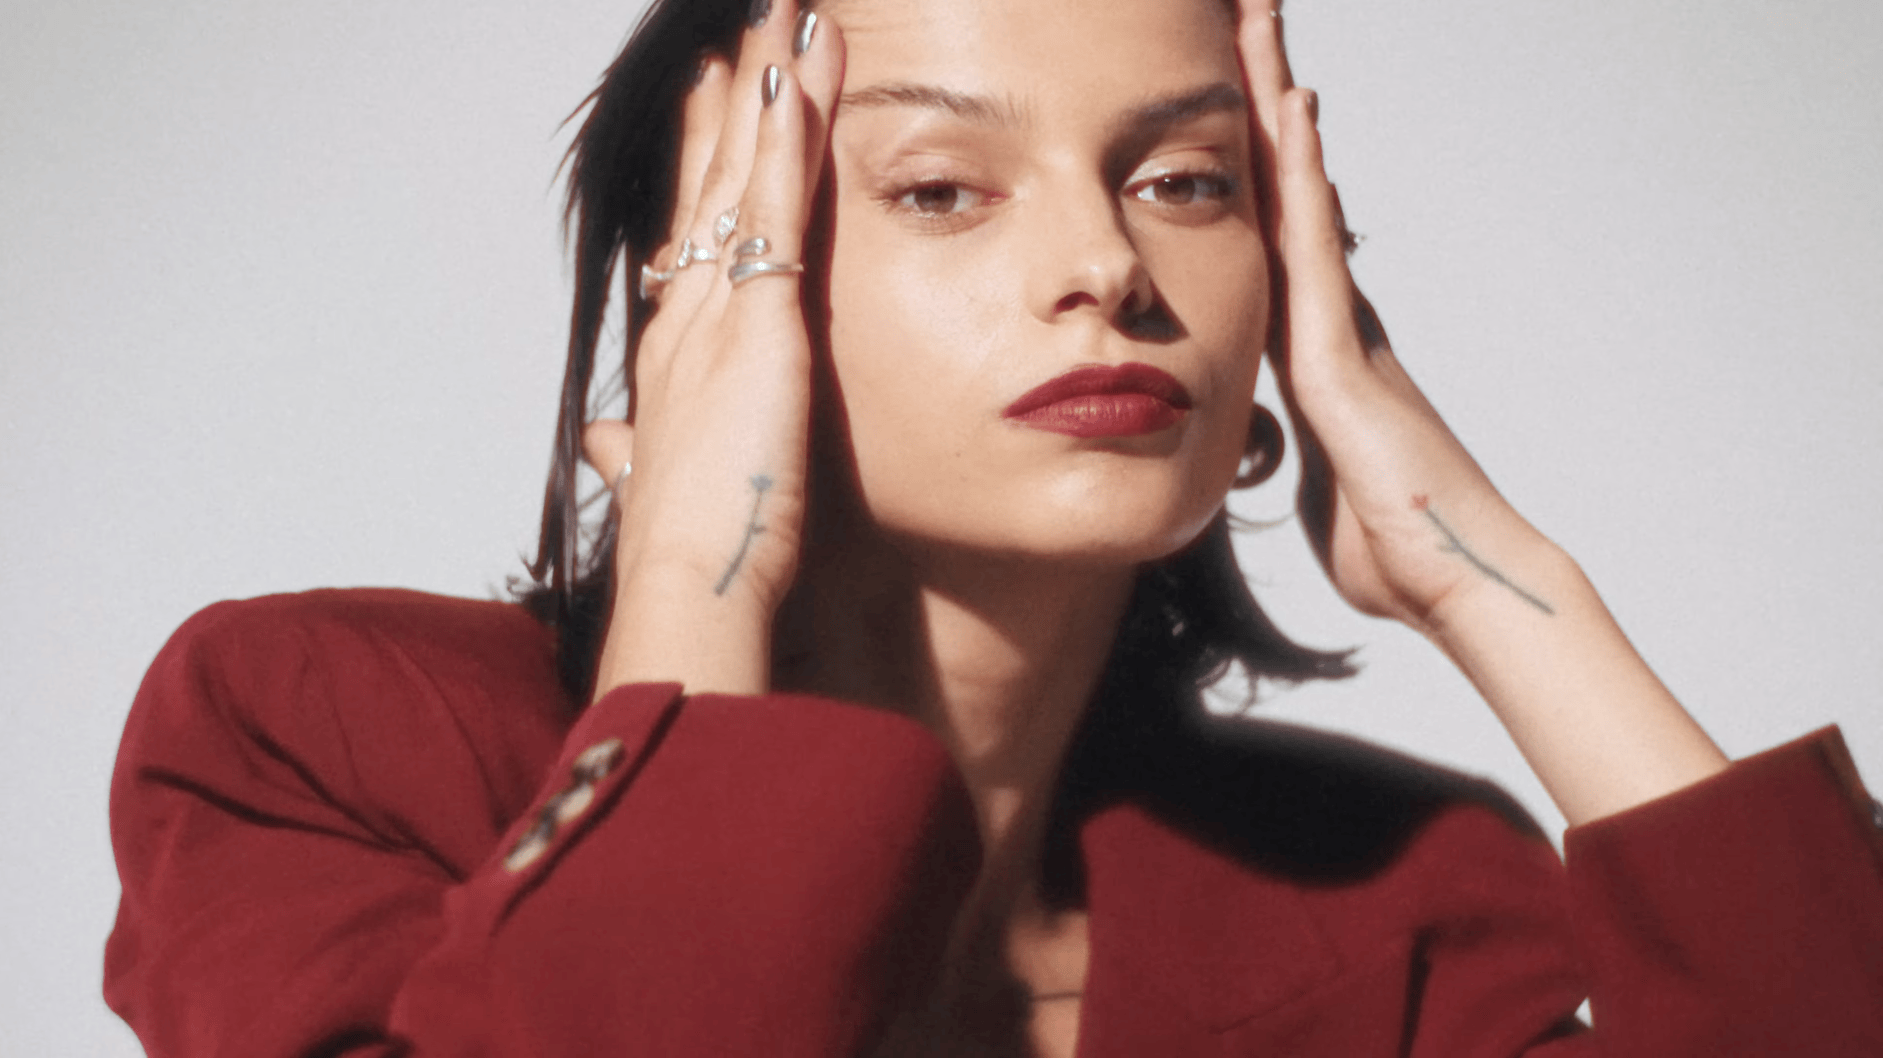
Let's see how this looks in a different context, for example on a clip from a fashion editorial shoot.
Of course the journey towards the final look doesn’t need to stop here. As a final touch, we can apply film emulation—film grain and halation—to create an old-school filmic look.
Fourth example (HSL Mask)
Here's one more tip for applying diffusion, this time using an HSL mask.
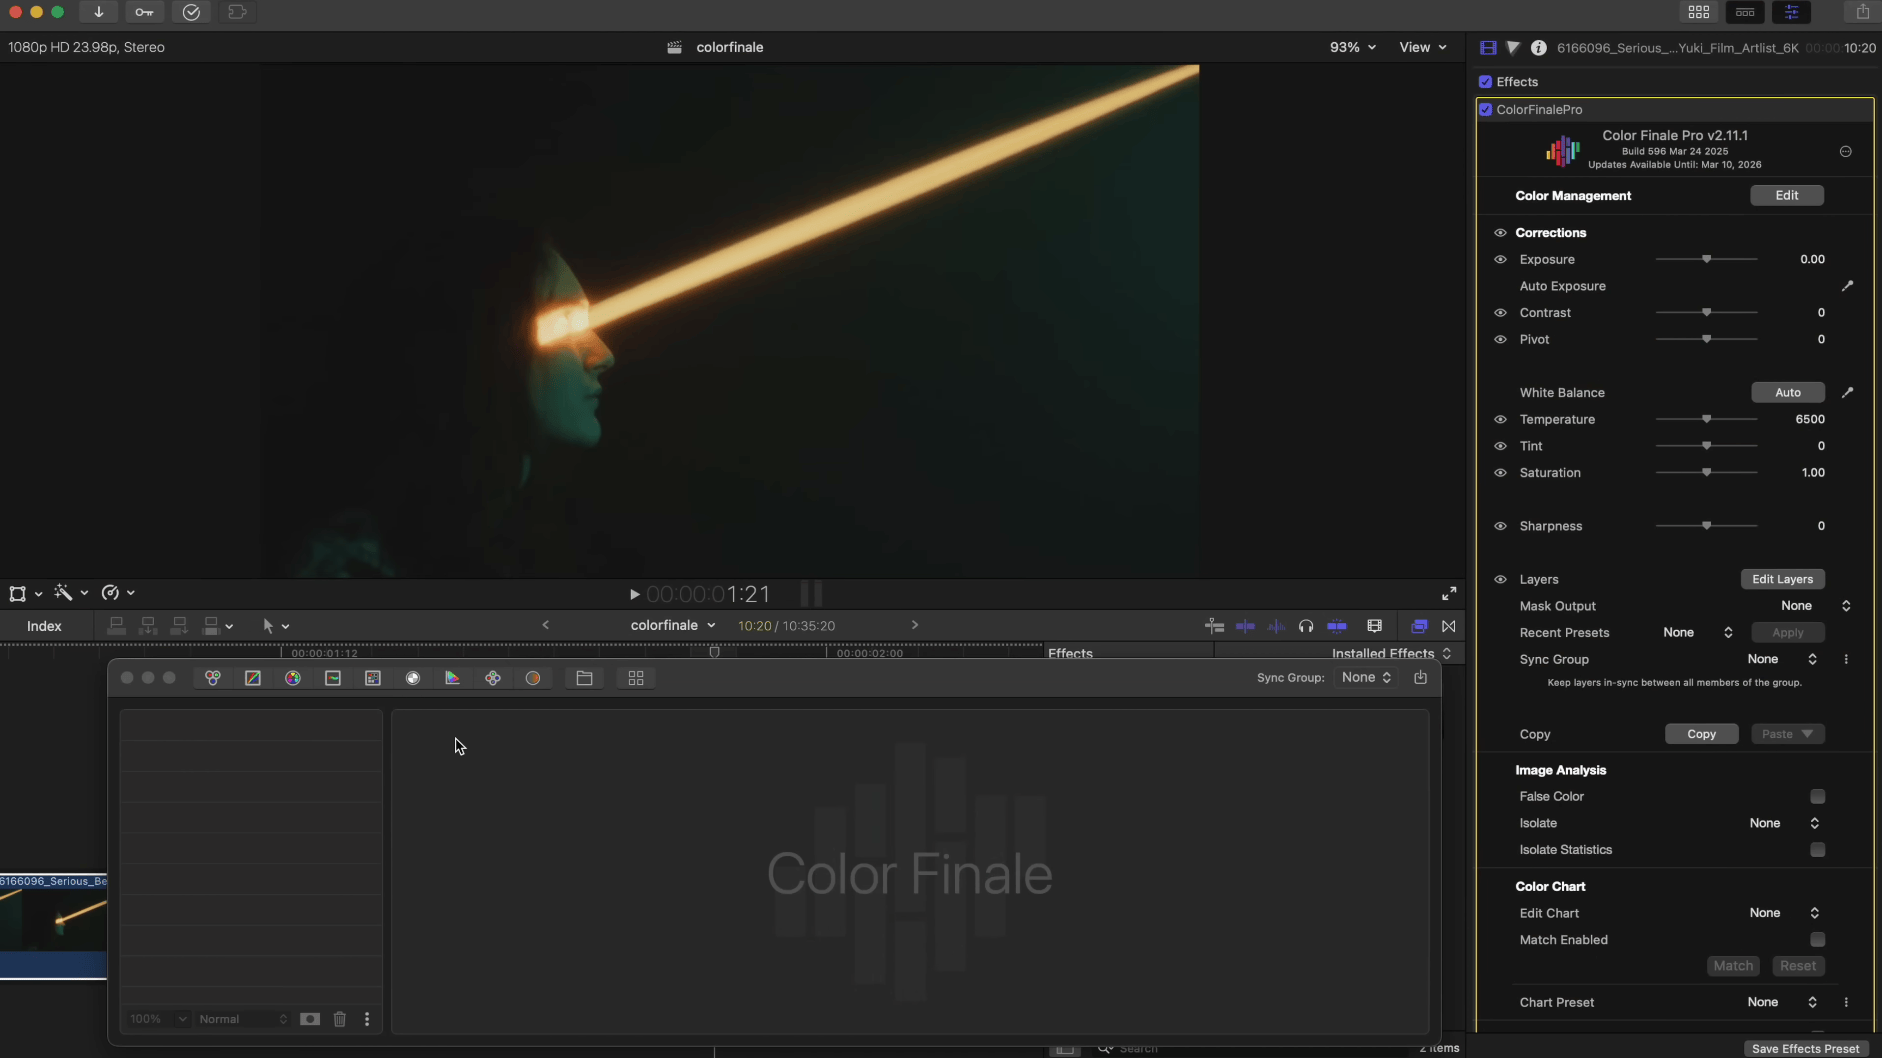
Take a look at the above clip. There’s an artificial light source—a yellow beam of light piercing through the frame. Let’s mask and diffuse just this beam. Add a Gaussian blur and apply an HSL mask instead of an Image Mask. The HSL Mask is the same as Image Mask, but with extra controls for Hue, Saturation, and Luma parameters, meaning instead of targeting just the tonal range of an image, we can also apply the mask over any hue we want. Use the picker to mask only the light beam. As before, adjust the mask’s blur level using the blur slider. Additionally, fine-tune the settings by adjusting the Gaussian blur radius.
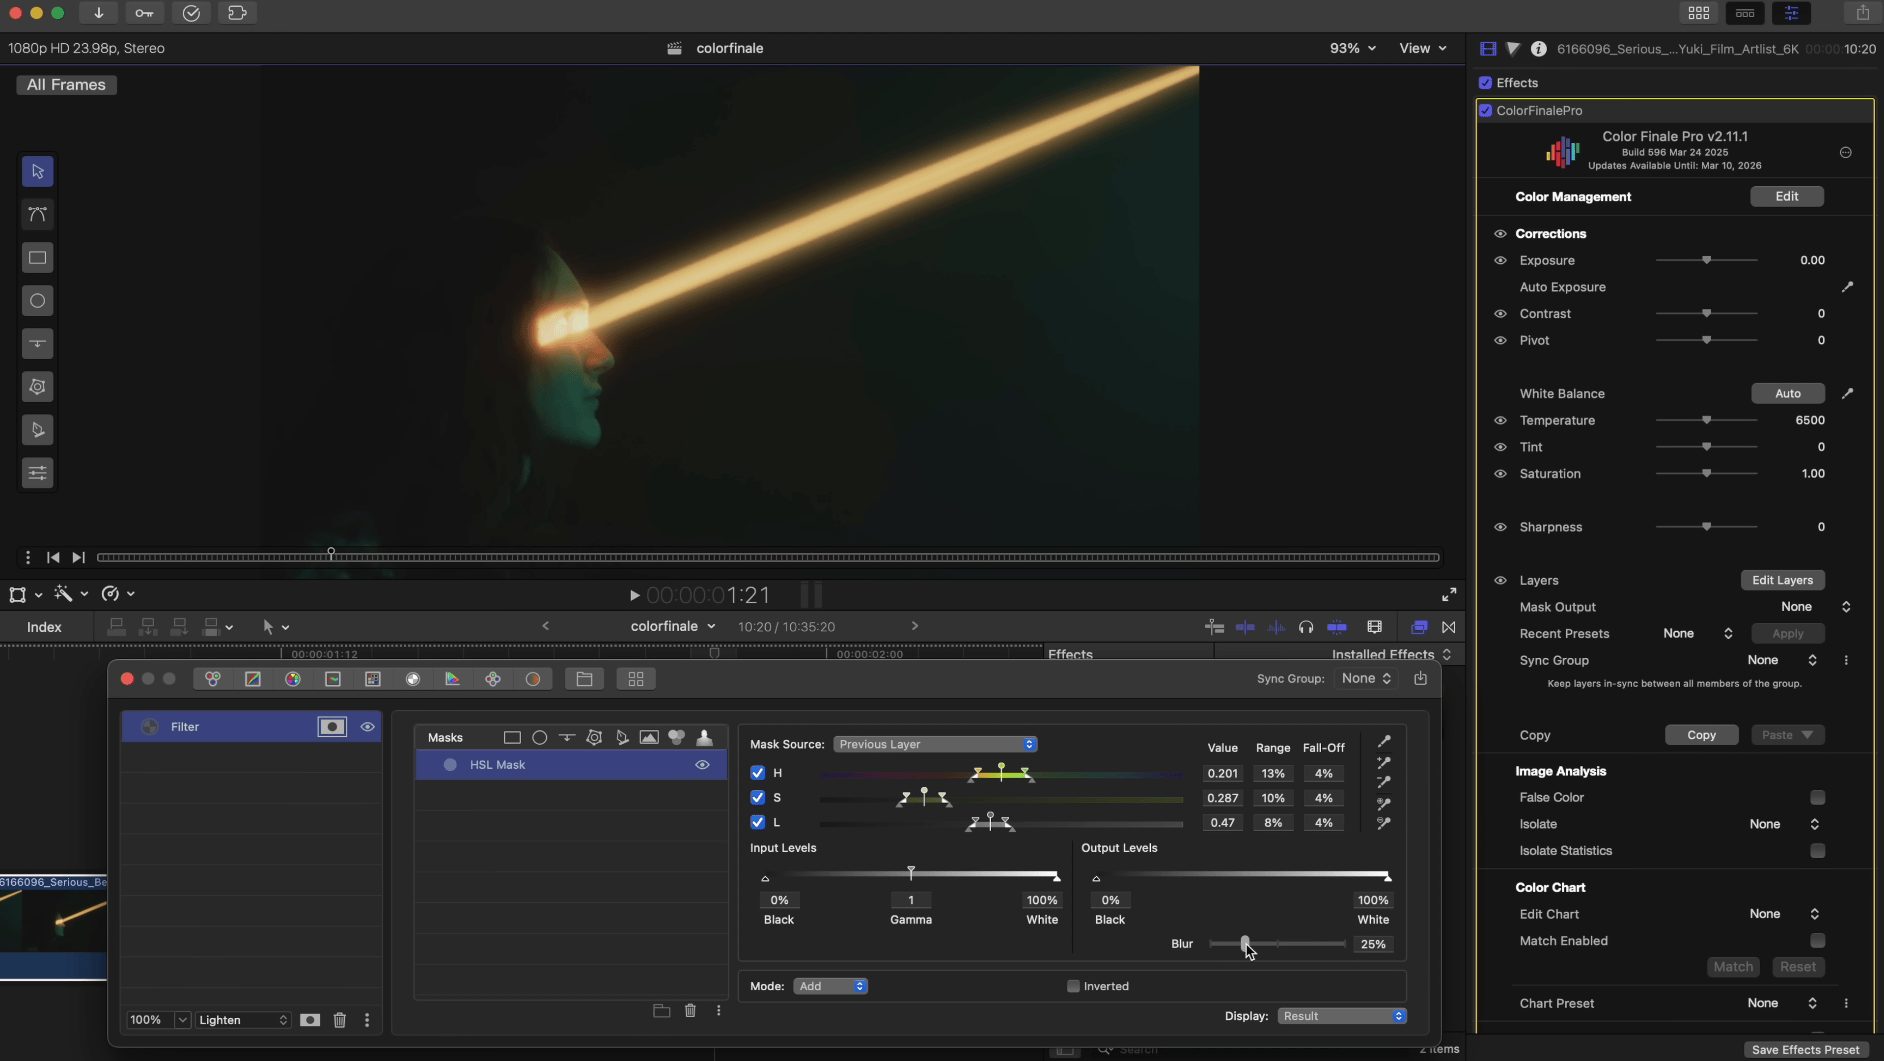
It looks very interesting, doesn’t it? We’ve created diffusion solely over the light beam.
The applications of this technique now depend only on your imagination! Try this and more with a free 7-day trial of Color Finale 2 Pro.