Introduction
With the latest string of updates (2.8 and 2.9), you can now apply Color Finale 2 Pro’s powerful and flexible shape masks, complete with area tracking, to tasks beyond colour grading—such as building complex image compositions directly within the Final Cut timeline.
Let's take a closer look at what’s possible.
Example 1
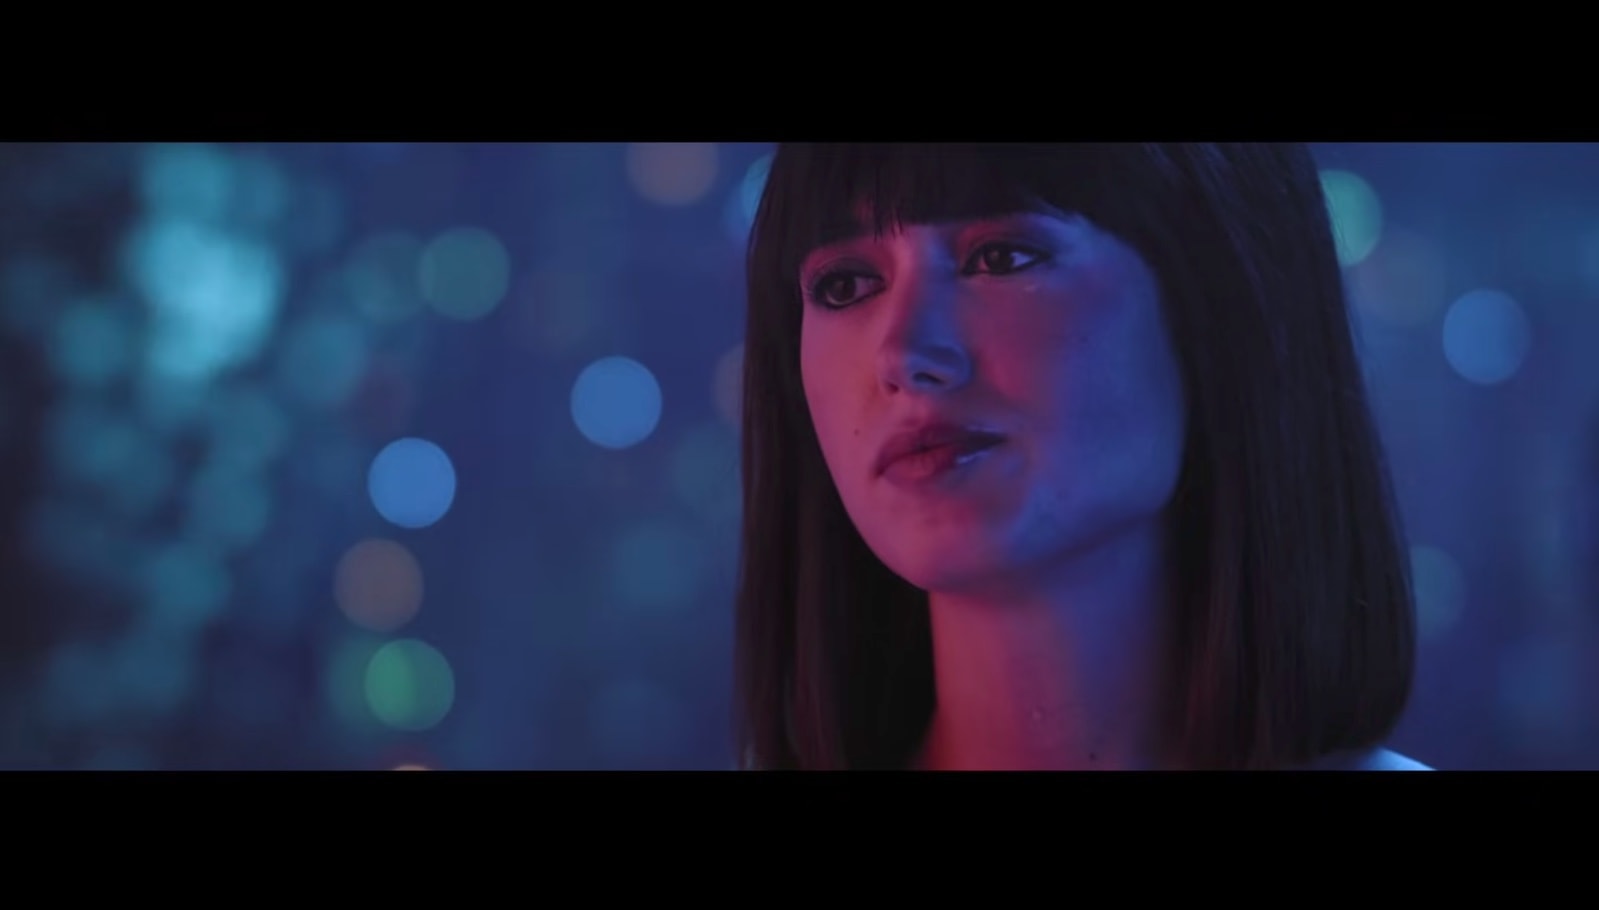
In our first example, we're going to remove the red and blue glow from the skin.
To do this, we're going with the inside/outside mask technique. The first step is to create a group and add a mask to it. Creating a group from the get-go keeps things conveniently organised and means we only have to add a mask once instead of repeatedly applying it to every layer.
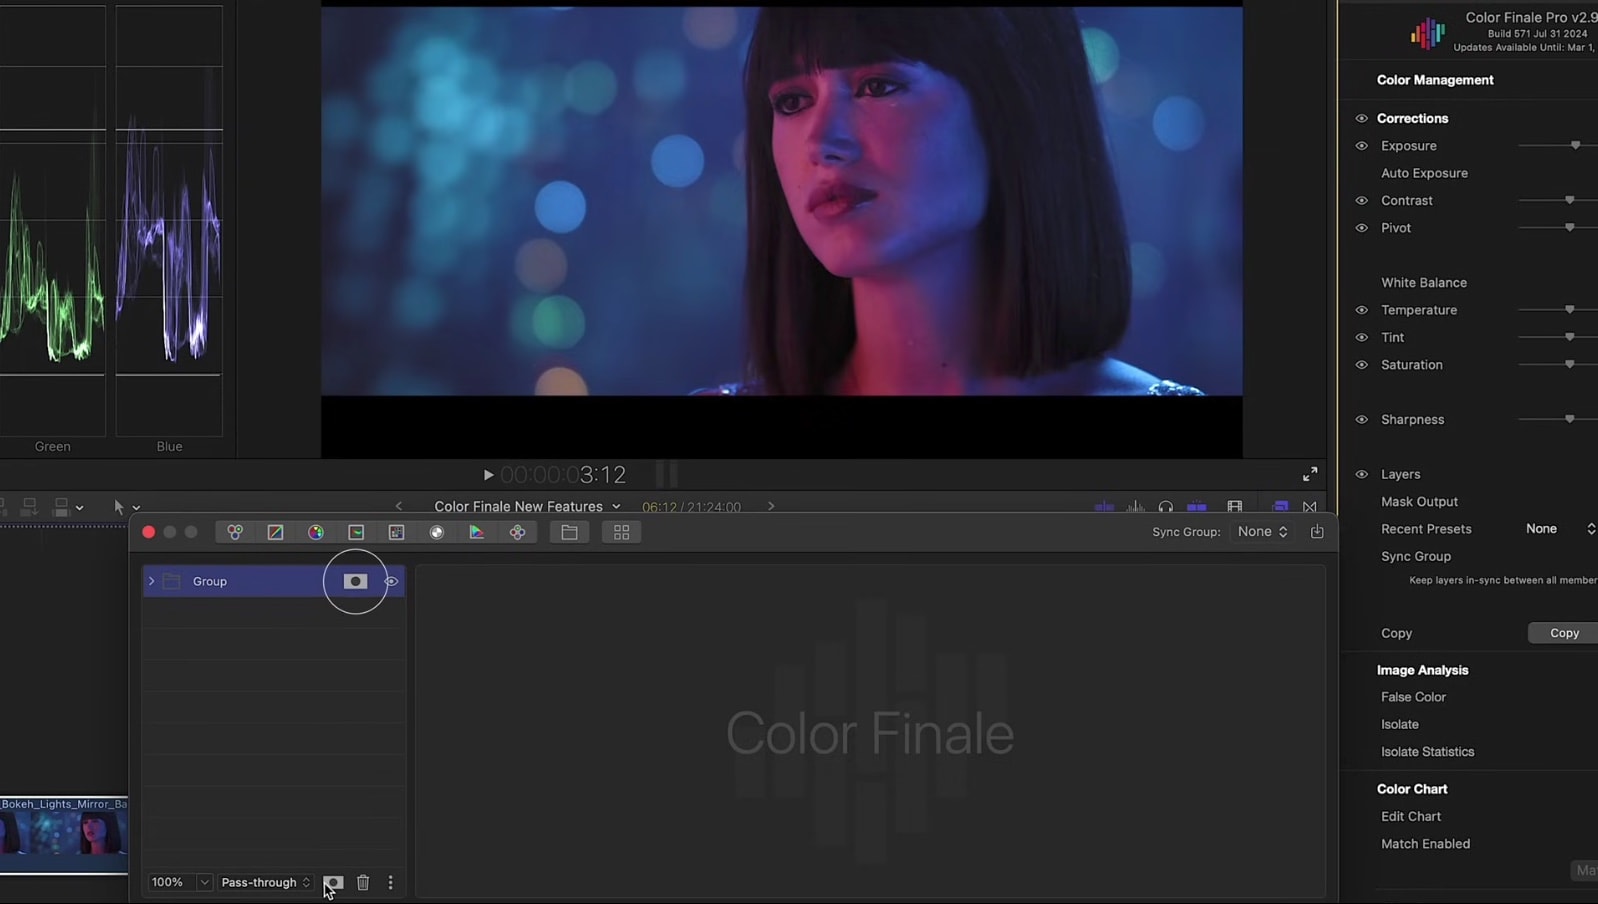
Both the face and the background have blue in them. At this point our new AI Person Mask comes in handy to separate a subject from the background. Apply it and change its display mode to “Mask input + mask” to see the result.
Notice the options that help refine the mask, for instance to capture all the hair and to blur the edges.
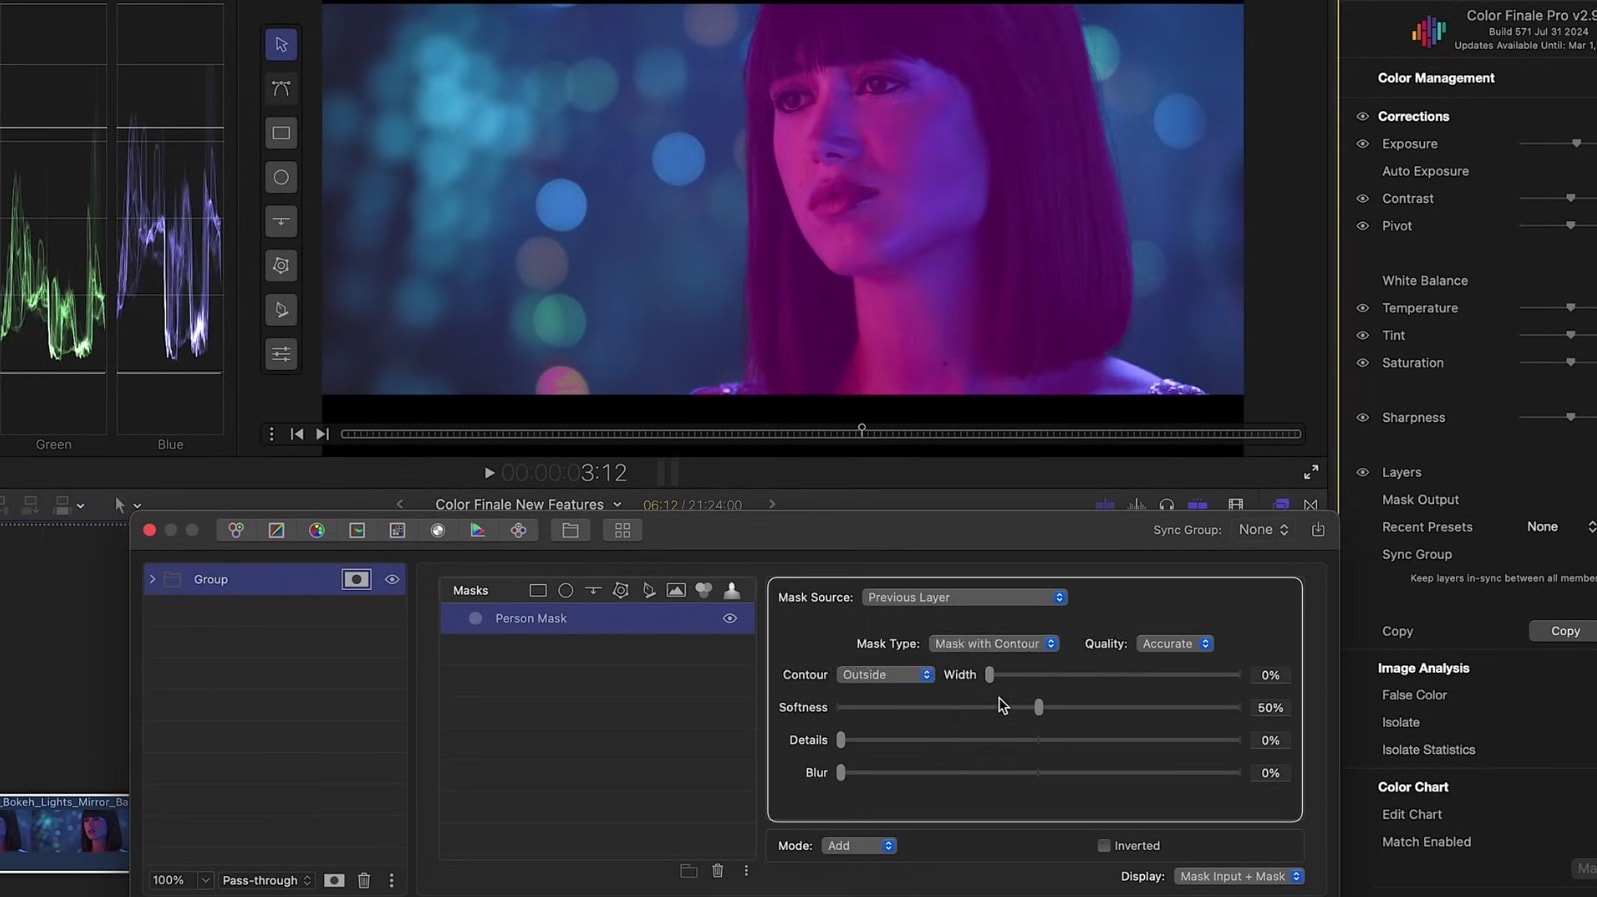
Once we’re satisfied with the interim result, we can start to work inside the mask to correct the skin tone. Color Finale 2 Pro offers a lot of tools to work with skin tones.
We use the Shuffle Tool’s channel mixer with the new normaliser mode enabled to dial in a more natural skin tone, and apply an HSL mask to the group. This HSL mask is set so that only the skin tones are affected by the previous step, but at the moment it spans the entire image and captures more than the skin. By setting it to “intersect”, we make sure that it’s only applied to the areas covered by the Person Mask.
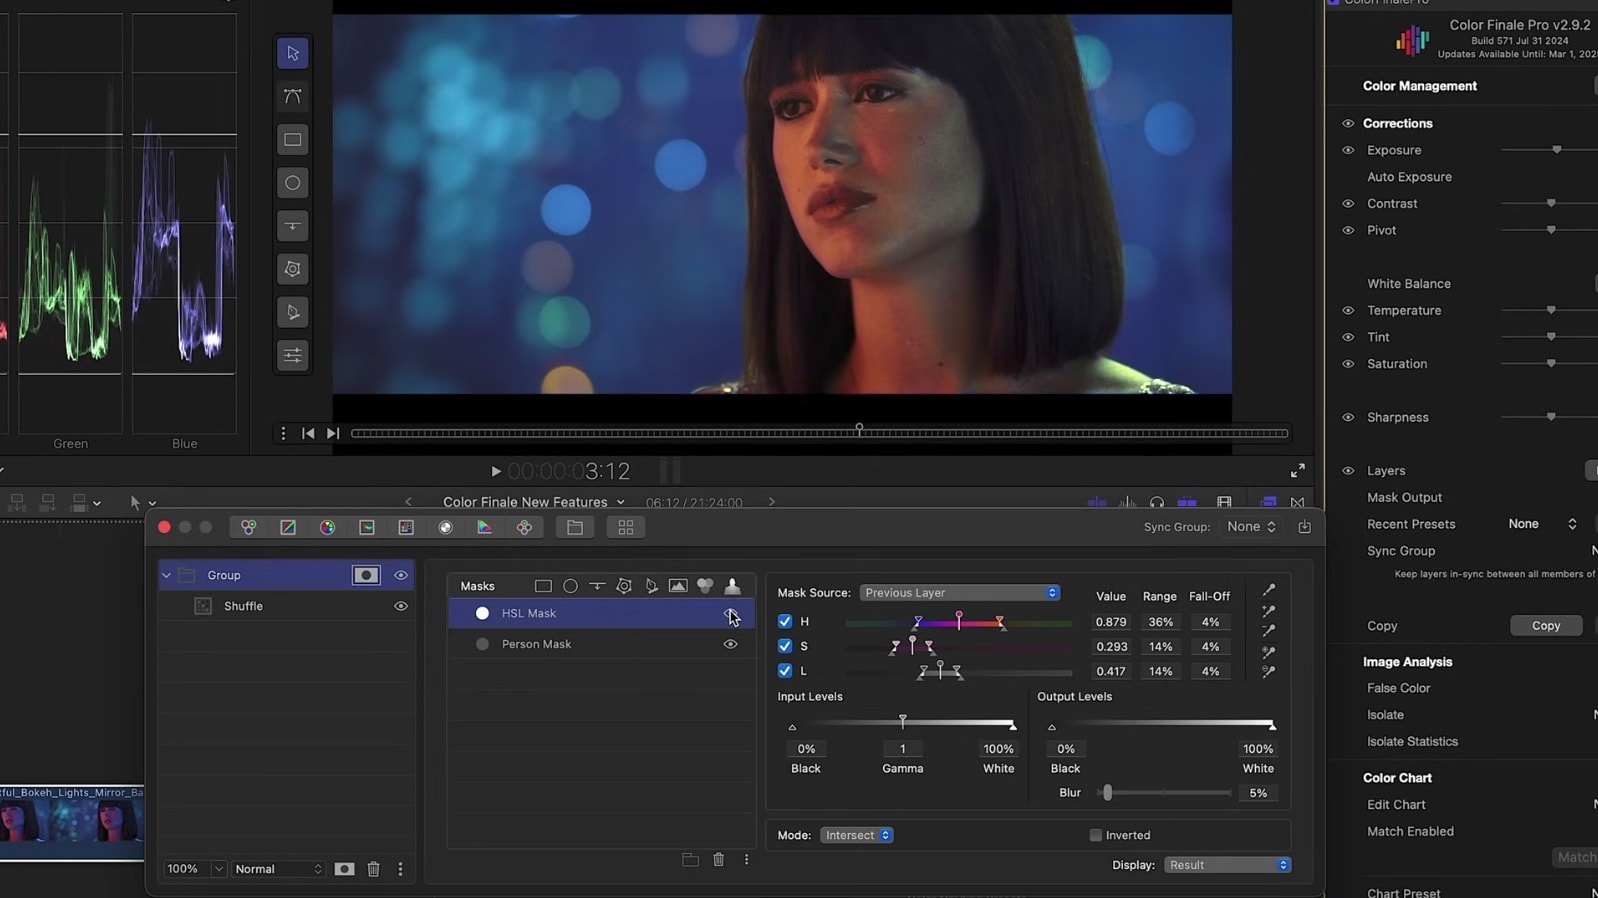
With the two masks added to the group, the Person Mask and the HSL Mask set to intersect with the Person Mask, we can add as many layers as we need (for example a Color Wheels layer) and changes made with them will only affect the skin.
Now placing a layer such as Six Vectors above our group affects the image globally, as you would expect.
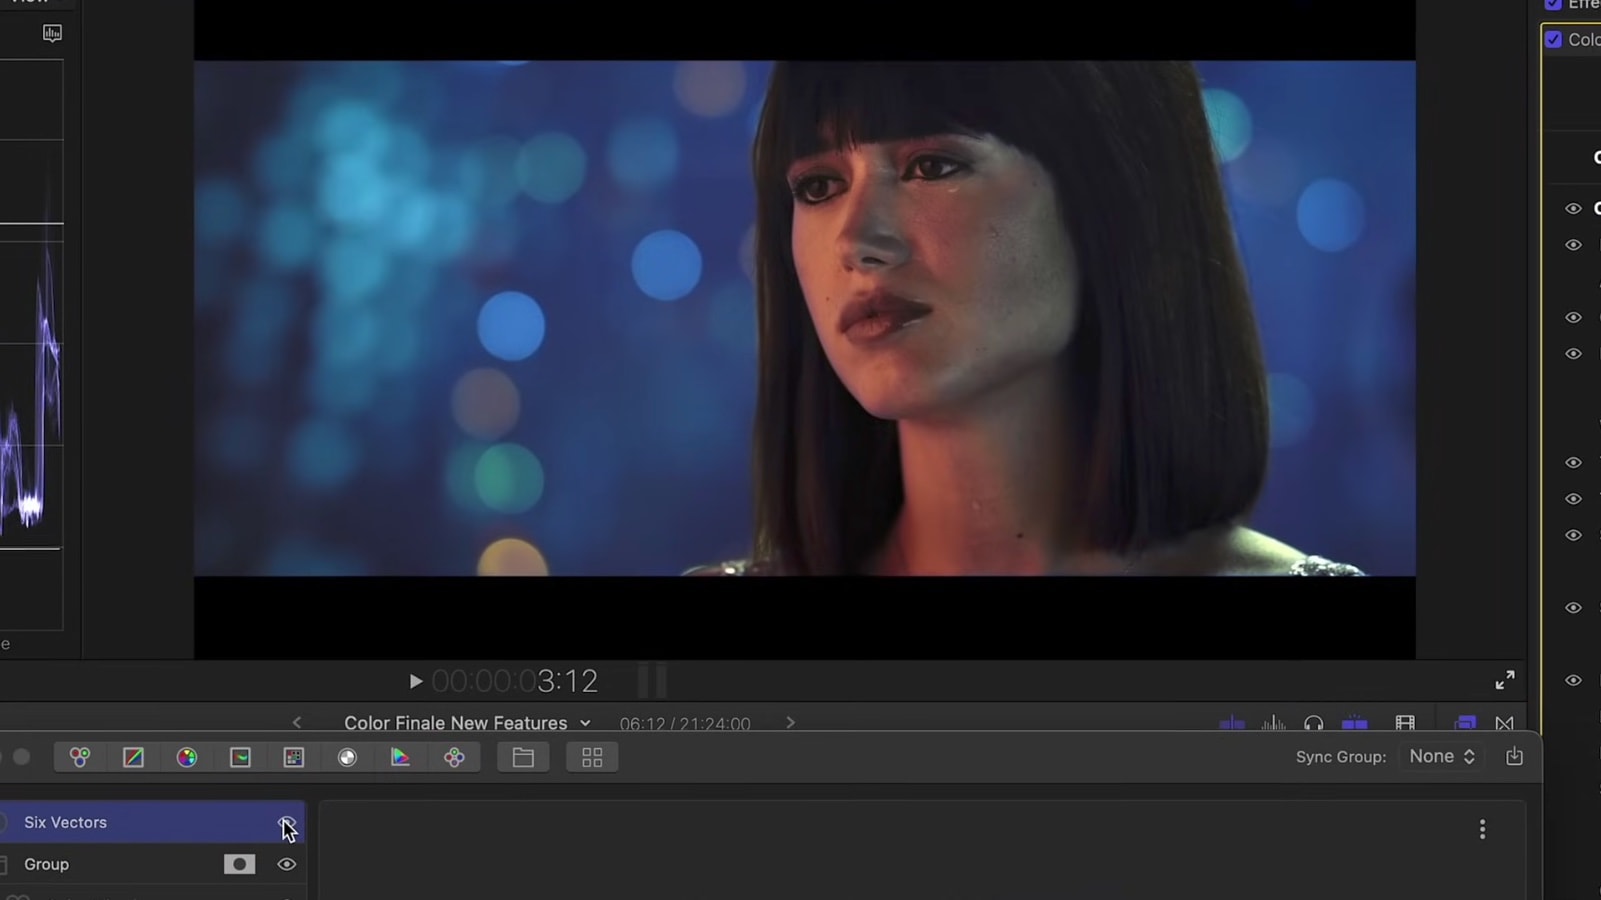
We can make the talent pop out even more by adding another Six Vectors tool inside the group and selecting “Invert Parent Mask” before making the necessary changes. Now everything outside of the mask is targeted. Handy!
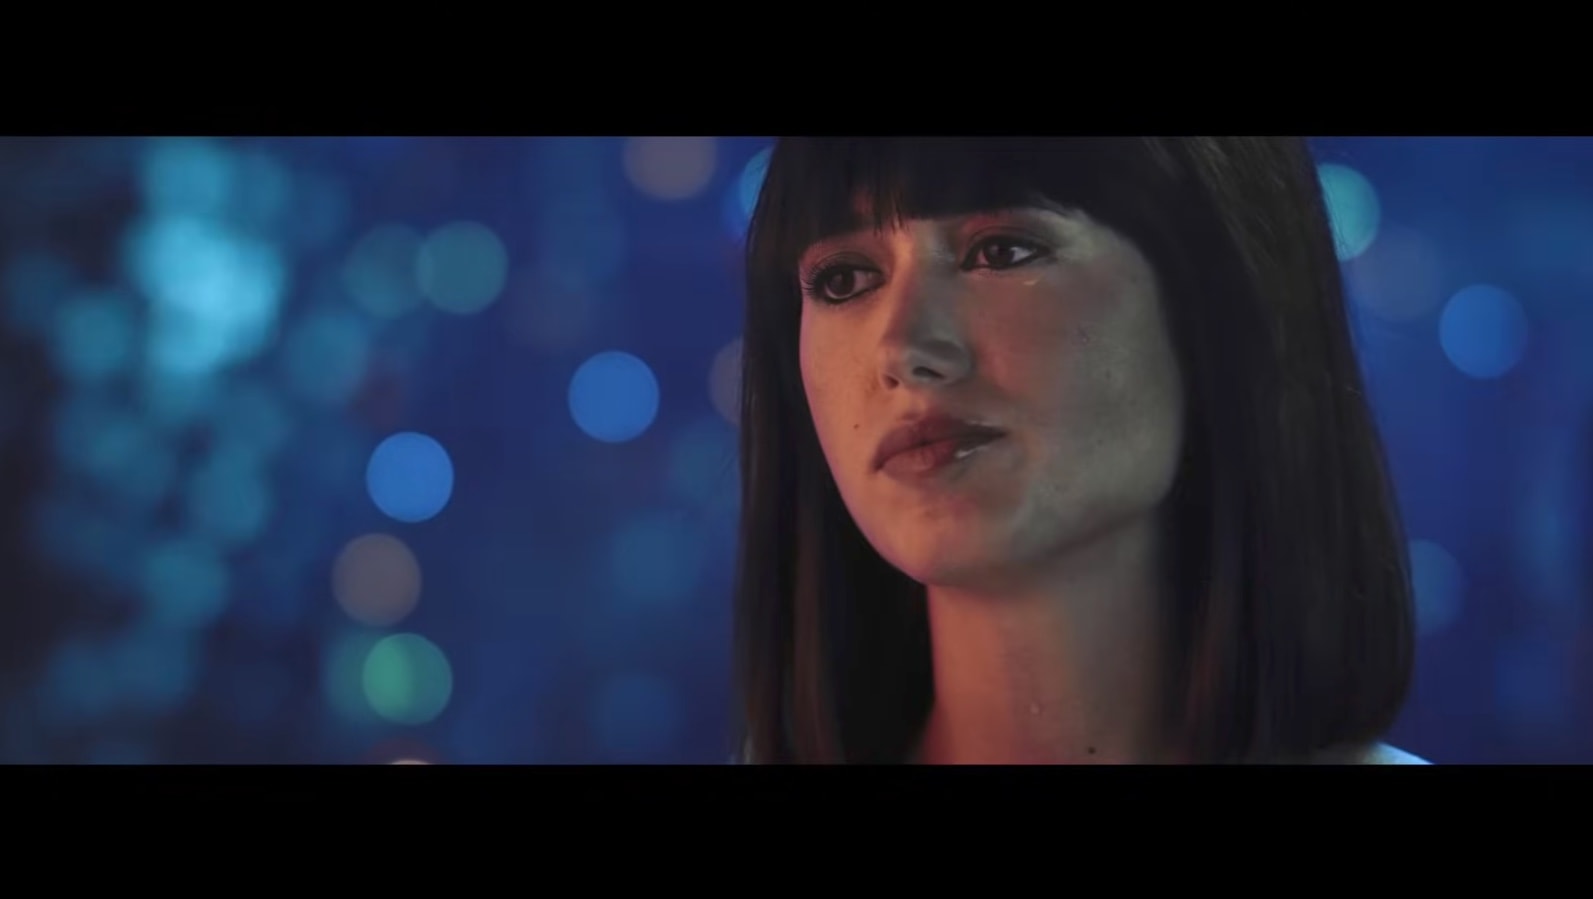
The final result:
Example 2
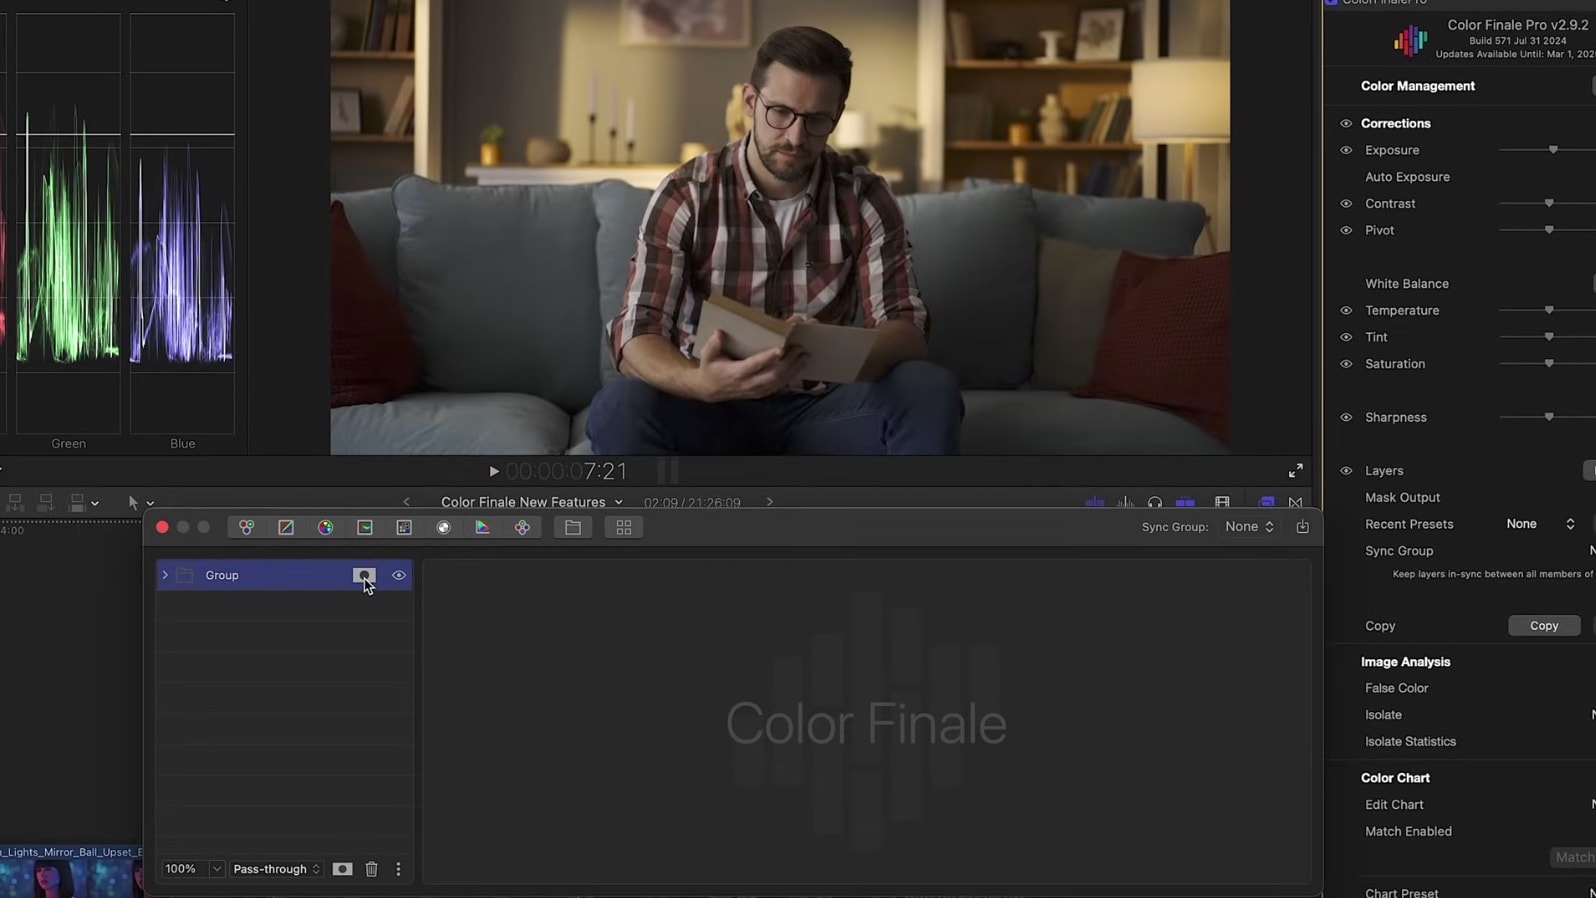
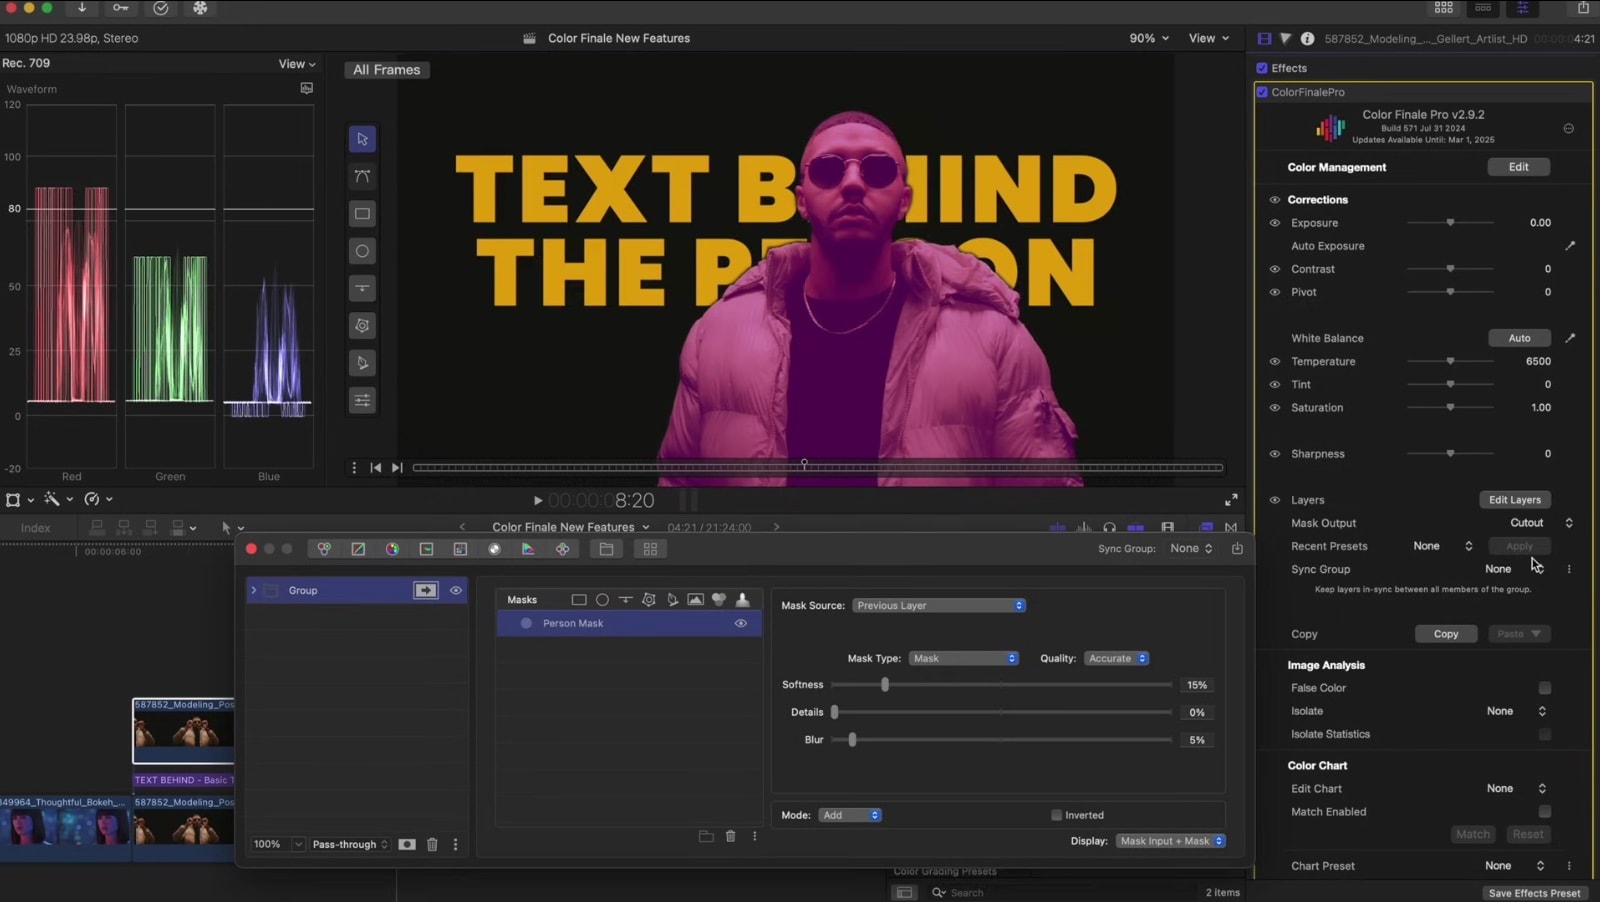
Let's explore another new option for masks, which is the ability to cut them out and publish them to the timeline. Added in version 2.9 of Color Finale 2 Pro. It lets you publish any mask that's included in the masks menu.
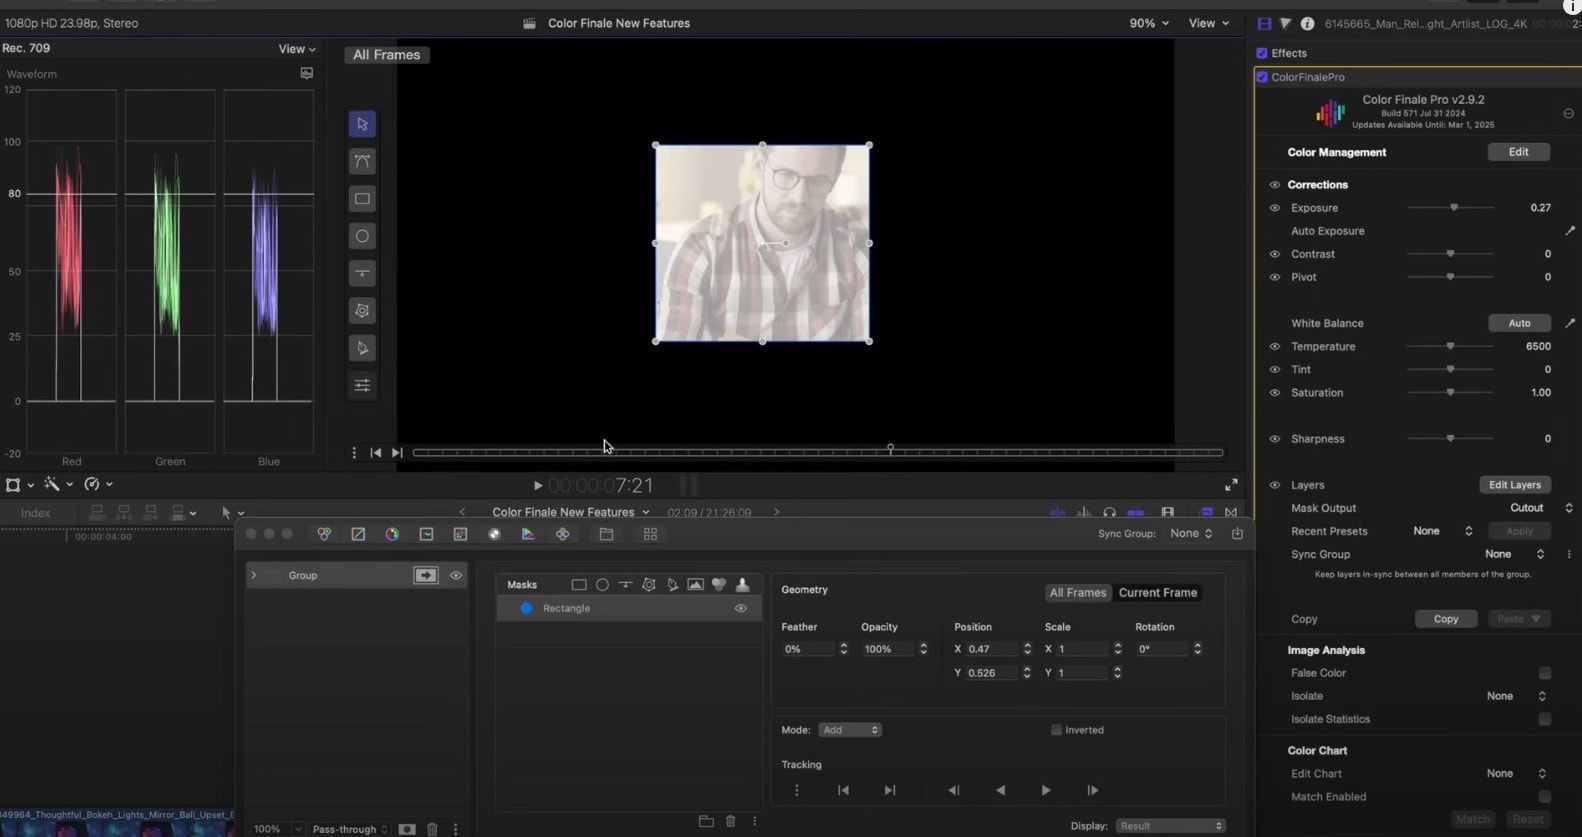
For example, let's add a square mask to the following clip:
“Publish Mask” in the layers panel. Then, go to the inspector, find Mask Output, and select “Cutout.” Now the square mask is separated from the footage.
But one of the most interesting results you can achieve are by cutting out a Person mask since you avoid manually rotoscoping and tracking your subject.
Here is a practical example of mask publishing. Besides just cutting out a character from the scene, a great use of this feature is to place text such as movie titles or a graphic behind a character. First, duplicate the clip on the timeline and place it above by holding “Option” and dragging to create a copy.
Then, apply Color Finale 2 Pro to the top clip and follow the same steps: create a group, add and refine a Person Mask, select “Publish” and then “Cut Out” in the inspector panel. Now place your text in-between the two clips. Easy!
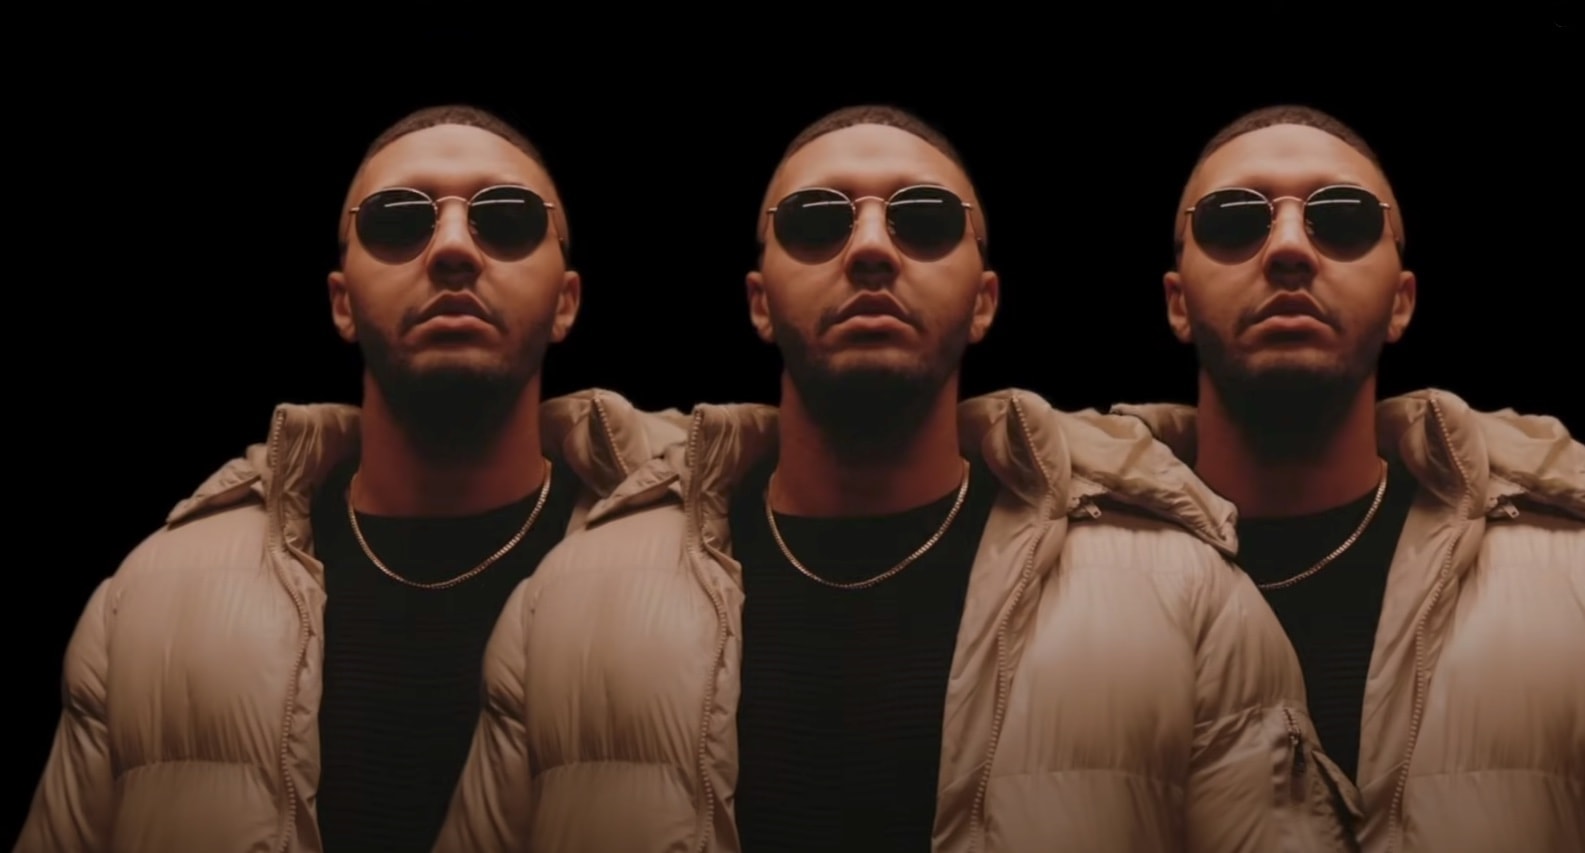
Here is another tip on how you can use this feature. For example, let’s apply the “Bad TV” effect, which comes with Final Cut Pro natively. You can apply it to the character or the background. Apply any other effects to achieve interesting results.

You can also duplicate the layer with a cut out mask multiple times to clone the character. For example, you can offset these layers by keyframing in the inspector panel.
Try yourself
Interested in trying these features out for yourself? Try a free 7-day trial of Color Finale 2 Pro to see how it can improve your Final Cut Pro workflow!